The Kristine ID Wallet
The Kristine ID Wallet pattern is designed by Michelle Burke of Uniquely Michelle. Michelle’s pattern reminds me of a Vera Bradley design. A vast majority of the Middle School and High School students are wearing the Vera Bradley ZipID Case for their school ID. I have been a big fan of the Vera Bradley patterns and knew that I could probably make something very similar to this design. I was browsing through an online pattern site and fell upon Michelle’s pattern. Michelle and I became friends and she allowed me to write this article and make some videos to show you my version of her pattern. Let’s get started!

This post contains affiliate links for your convenience. ? Read my full disclosure policy here.
Kristine ID Wallet Material list
- PDF Pattern
- 1/4 yard fusible batting (such as Pellon TP971F Fusible Thermolam Plus)
- 1/3 yard exterior fabric (check out these new prints – Super Cute!!!)
- 1/4 yard fusible woven mid-weight interfacing (such as Pellon Shapeflex 101)
- 1/4 yard lining fabric
- 3 1/4″ x 2 1/4″ piece of clear vinyl (I would recommend a 12 gauge vinyl)
- 1 – 7″ zipper (I always get my zippers right here)
Kristine ID Wallet SUPPLY LIST
- Sewing Machine (if you don’t have one yet, here are some that I recommend)
- Cotton Thread (I recommend Aurifil 40 wt)
- Rotary Cutter with a sharp blade (no kidding about a sharp blade)
- The 28mm is the perfect size for this project – I have this one
- Acrylic Ruler
- Cutting Mat
- I love the tiny cutting mat for this project!
- Iron & Ironing Board (I love using my Oliso Mini Iron)
- Sewing Pins or Wonder Clips
- Key ring or D-ring
- 2 – 1/2″ swivel snap hooks (optional – one for the wrist strap and one for the lanyard)
- 1 thin magnetic snap, or a size 16 snap, or a 1″ square of Velcro, or a button
- Water-soluble erasable marking pen or chalk pencil
- Fray Check (optional)
- Double-sided tape
I used Michelle’s pattern and created a slightly different version of that wallet. It’s completely handmade. I used designer cotton fabric for making these wallets and used to sell them in my Etsy and Amazon shops.
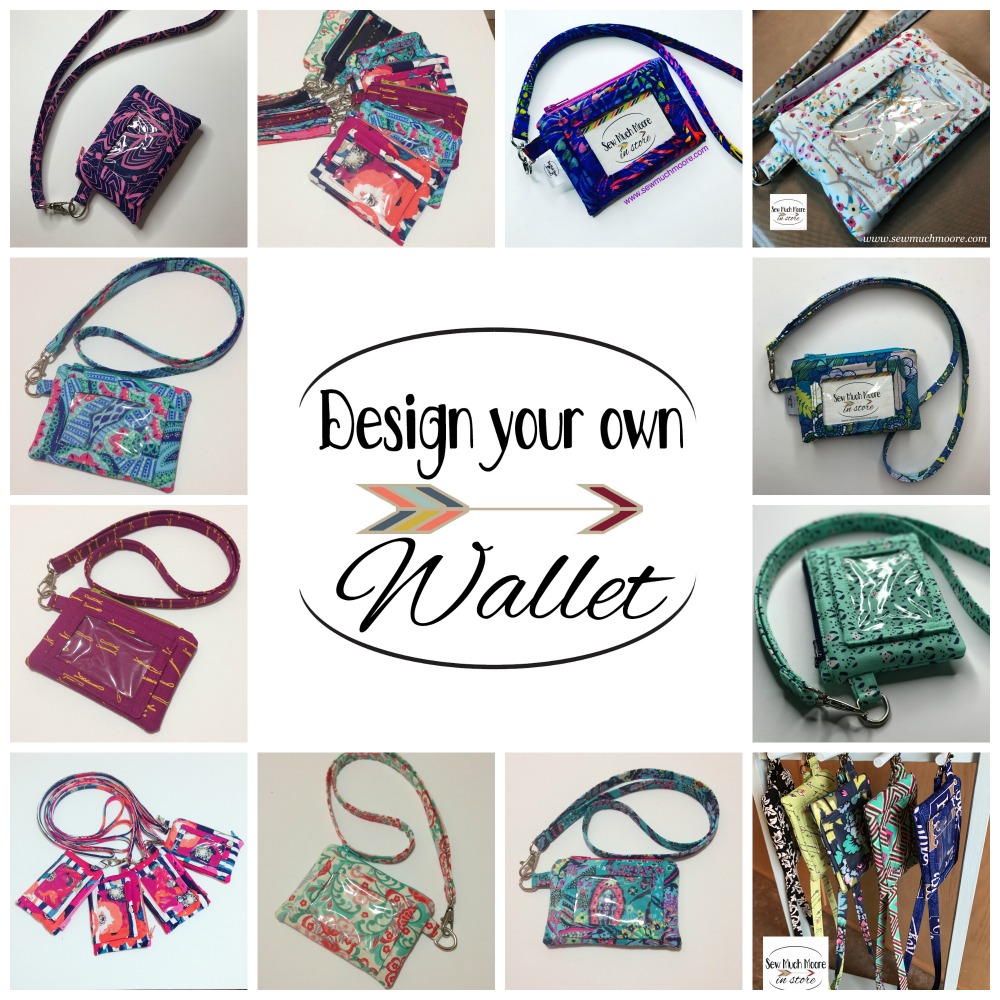
Perfect for anyone!!!
This design had great usability and I love the small size! I just love the design!
It lets you carry your essentials wherever you go – from your credit cards and ID to your cash. The clear window can act as a student ID holder. You can add a wrist strap and go hands-free. The long strap of the wallet goes around your neck to keep the wallet exactly where you need it.
This wallet is perfect for an office going woman or even a teenager. Big on practicality and fashion, it will be just the perfect companion for the modern-day woman.
I a Kristine ID Wallet for my neighbor and she loved using it! Her Student Badge went in the clear ID pocket. The little coin purse stored her coins (and her earbuds). It’s very durable and resilient. She prefers to wear it around her neck and not with a wrist strap. It’s a personal choice – which is great!


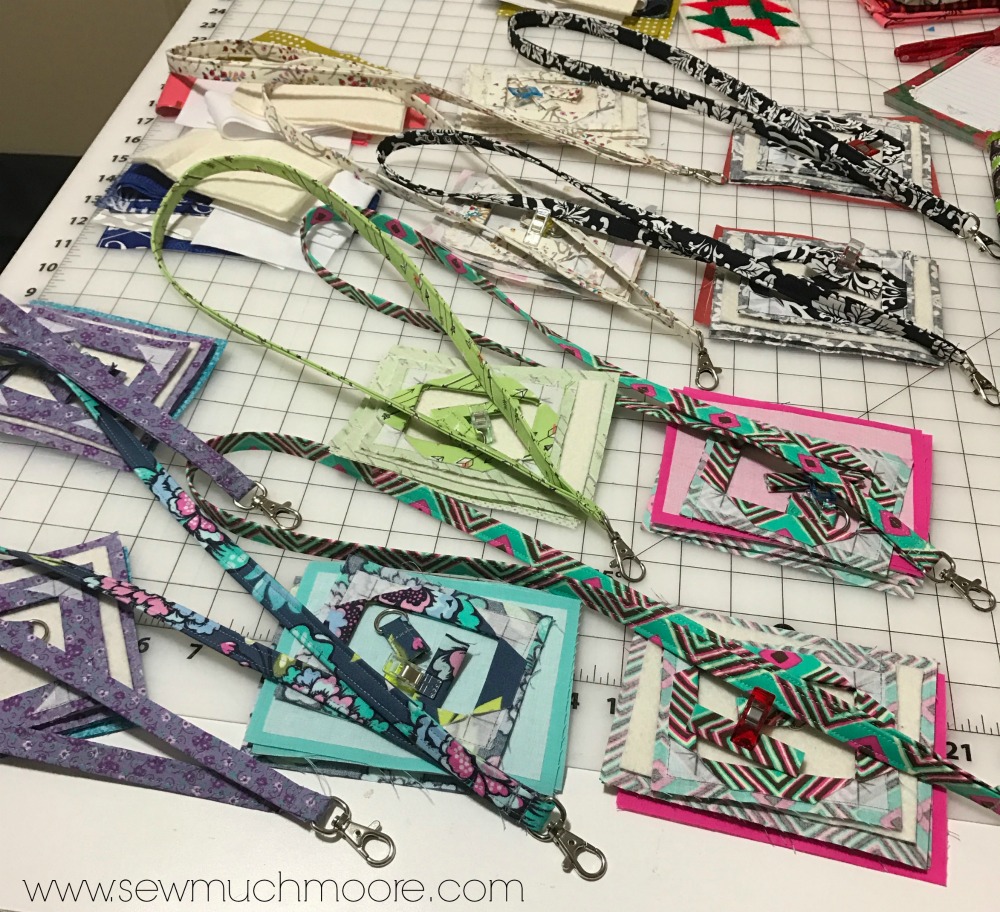
You will need a couple of pieces of hardware (not including the zipper) to make this wallet. I offer most items and have them available in my online shop. Check the supply list above for the links. If you are like me, you can make dozens at a time! If you have an online shop for handmade goodies, you should know that these are very popular and can sell fast. To learn more about what can sell online, check out my article on How to Sell Handmade.
Watch my tutorials right here:
Part One: Making the ID Window
Part Two: Finishing the Wallet
Part Three: Make your own Lanyard
Subscribe to my YouTube Channel!
I would love to see the ID wallets that you make! Join my Facebook Community for Bag Makers and show us what you’ve been working on!
Join my Facebook Community

Thanks for stopping by and Happy Sewing!

Hey girl I need to order another one. The teacher I work with loved mine. Looking for a blue floral/polka dot/striped one. Let me know your thoughts!! Thank you!!!
Hi Tammy! Thanks for your comment! I’ve sent you an email 🙂
Where do you order the plastic cover pieces?
Hi Amanda! I usually buy my vinyl at my local quilt shop. You can always order from Amazon. I have included a link in the article. Also, the pattern designer has written an article specifically about this question. Here is the link for your reference: http://www.uniquelymichelle.com/new-blog/2016/5/3/some-information-about-clear-vinyl
All the best with your sewing!
You were absolutely fabulous on this tutorial. Clear precise nothing left out everything in order you told us exactly what the materials were I just wondered how much you were selling them for. And where do you get your vinyl? Thanks again
I sell my ID wallets in person and online. Here is a link to my Etsy store listing for reference: https://www.etsy.com/listing/472360152/design-your-own-id-wallet-lanyard-badge
Best of luck with your sewing! Thanks!
Absolutely fabulous tutorial! Nice job! You were very clear precise in order and so tidy as you went through this I really appreciate that. How much do you sell your ID wallets for and where do you get your vinyl? I’ll be purchasing the pattern now and I want to look up those half inch swivel rings thanks again Pat McKinney
Thanks for your kind words! I included links for the needed supplies. I hope those work for you. I get my vinyl at my local quilt shop, but you can always order from Amazon as well. Good luck in your sewing!
what kind of sewing machine do you use? Love your tutorial…very helpful!
Thank you for your kind words! The machine I am using in this tutorial is a Kenmore. I recieved this from my late Aunt. It is very special to me! ❤️
I think this is one of the most important info for me. And i am glad reading your article. But wanna remark on few general things, The site style is wonderful, the articles is really nice : D. Good job, cheers
Where do you get your personal tags from? Also do you get prices on zippers? I want to make some of these to raise money for unity outreach homeless shelter in Versailles, KY
I get my Zippers from a really great Etsy shop: https://www.etsy.com/shop/zipit
I get my tags from http://www.ikaprint.com.
Good luck with your charity!
Great Blog. Really enjoyed reading.
hey good site i will definaely come back and see again.
For the same amount of work, I think I would make them passport sized. Good idea for my mates at retreat next year.
I’ve been exploring for a little for any high-quality articles or blog posts on this sort of area . Exploring in Yahoo I ultimately stumbled upon this website. Studying this information So i’m satisfied to convey that I’ve a very excellent uncanny feeling I found out exactly what I needed. I most unquestionably will make certain to don’t omit this website and provides it a glance a continuing.
Great post. Thank you!
This is very useful blog , thankyou for sharing this great information
This is great!!! Thank You ❤❤
Hugs..
Julie from Malaysia
Thank you very much for your video. It really helped me to sort out which materials would work where before starting my first one. Really appreciated.
Where do i get the pattern for the id pattern at or buy it at to make one. I make coin purses all the time and get asked to make id ones I have no idea how yo make that part of it.
Hello, I have linked to the pattern in the above blog post. Let me know if you have questions. Thanks!
Thanks for the video and for the info on this little wallet. I will be making some of these for an upcoming craft show. All the little teenagers use these in our town. I can see these being really popular!
I would like to order one with a pen holder a bling I’m a medical assitant so this will be great and I also lose my pen so holder will be helpful I know my coworker will want to buy too so it will be great for business
I made one and didn’t have the glue or tape for Id part. Bought fabric double sided tape for next. Followed directions and it got needle gummed up and jammed. Package states not to sew it. What do you use for that part of holding the cut flaps in place?
Tricia, I have updated the video to show how I made the ID Window. Enjoy!
Hello Tricia, Thanks for your question! I use the double-sided adhesive tape without any problem. You can get this from Amazon or your local quilt shop. Here is the Amazon link (http://amzn.to/2w5BtRp). Thanks again and let me know if you have more questions!
Thanks for the tutorial. Haven’t done a lot in vinyl yet …
I have made lots of these. Both with the card slots and without. I also made a bunch with tissue holder on back and those have sold out except 2.
Hi, I loved your tutorial, can’t wait to see more. I love the Id wallet and I want to make a few. I am not that familiar with how you buy your fabric, I went to the page to see the new patterns and I am confused, are you using just the small what look kind of like quilting pieces? I am a sewer who only bought fabric from a bolt, but I want to be enlightened. Thanks in advance for your help!
I buy my cotton fabric from the bolt. Thanks for your kind words ?
Hi Ann: Just read your comment and I would suggest buying “FAT QUARTERS” for these small projects. I am addicted to fat quarters and you can do so much with them. I have 2 huge bins full of nothing but fat quarters. Hope this will give you something to consider. Happy sewing!
I love your videos! So helpful! Thanks a bunch!
Hi. Thank you for this video tutorial. ?
May I ask when you were assembling the exterior and interior of the fabric, what were you showing on the zipper part?
Thanks.
Hello! Can you help me understand your question? Which part of the video are you talking about? Can you give me the time stamp, so I can check that part and reply? Thanks!
hi, i have been trying to purchase this pattern since earlier today. but i keep running into problems at the check out page on pay-pal. never experienced this before so im not sure what to do. any suggestions.
Thank you!
Hi Lisa, the pattern is sold through Craftsy and I don’t have control over things on that side. I can recommend that you clear all your cookies and try my link again to make your purchase. Good luck! Your gonna love making these!
Hello, how can I purchase this pattern?
The link is in the supply list above. Happy Sewing!
Great videos! I’m ready to tackle this! One question: the linked Etsy listing shows an envelope flap on the back covering a couple of credit card slots. Did you just omit this part in your video, or is it an amendment to your pattern?
Great question! I omitted the envelope flap, since I didn’t need it.
Great instruction video’s I just can’t find out what size I need to cut my fabric pieces is there somewhere on here that gives measurements
The measurements are found in the pattern, which must be purchased.