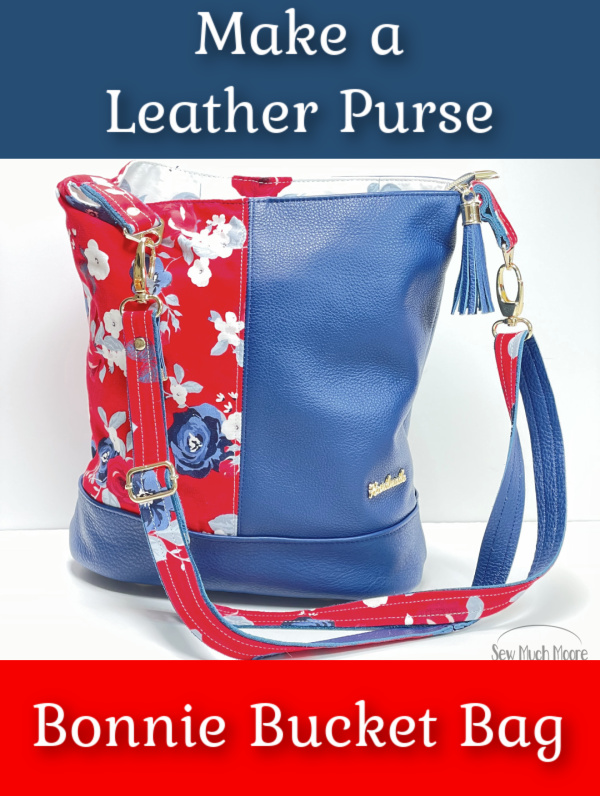
Bonnie Bucket Bag
I have been wanting to make the Bonnie Bucket Bag, by Swoon patterns, for the longest time. It wasn’t until I recently purchased some leather and had some coordinating fabric on hand that convinced me to set the time aside. For this bag, I have pulled out all the stops! I added an adjustable strap (because I like to sometimes wear purses as crossbody). I also added a recessed zipper for the top. I made several other variations to the original pattern. Let’s take a look at my Bonnie Bucket Bag!
Bonnie Bucket Bag Material List
- The Bonnie Bucket Bag PDF Pattern by Swoon Patterns
- 1/2 yard 44” wide quilting weight Main Exterior fabric
- I used Land of Liberty Main Red Floral
- 1/2 yard 44” wide quilting weight Basic Exterior (or solid) fabric
- I used leather from The Springfield Leather Shop
- 2/3 yards 44” wide quilting weight Lining fabric
- I used Land of Liberty Cream Main Floral
- 2.5 yards woven fusible interfacing (Pellon Shape-flex SF-101)
- 1/4 yard heavy sew-in stabilizer (Pellon Peltex 70)
- 15” (or longer) all-purpose zipper (main compartment)
- I didn’t put a zipper on the outside of my bag. Instead – I added a recessed zipper.
- I used #5 zipper-by-the-yard from my shop (the teeth and tape matched my project)
- 7” all-purpose zipper (welt pocket, zipper is optional)
- I used the same #5 zipper-by-the-yard as the recessed zipper
- Two 1.5” o-rings or 1” rectangle loops
- I changed it up a bit here and went with an adjustable (removable) strap.
- You can learn all about making an adjustable/removable strap RIGHT HERE.
- Coordinating thread
- I used Bonded Nylon Thread with my Juki DU1181N Industrial Sewing Machine
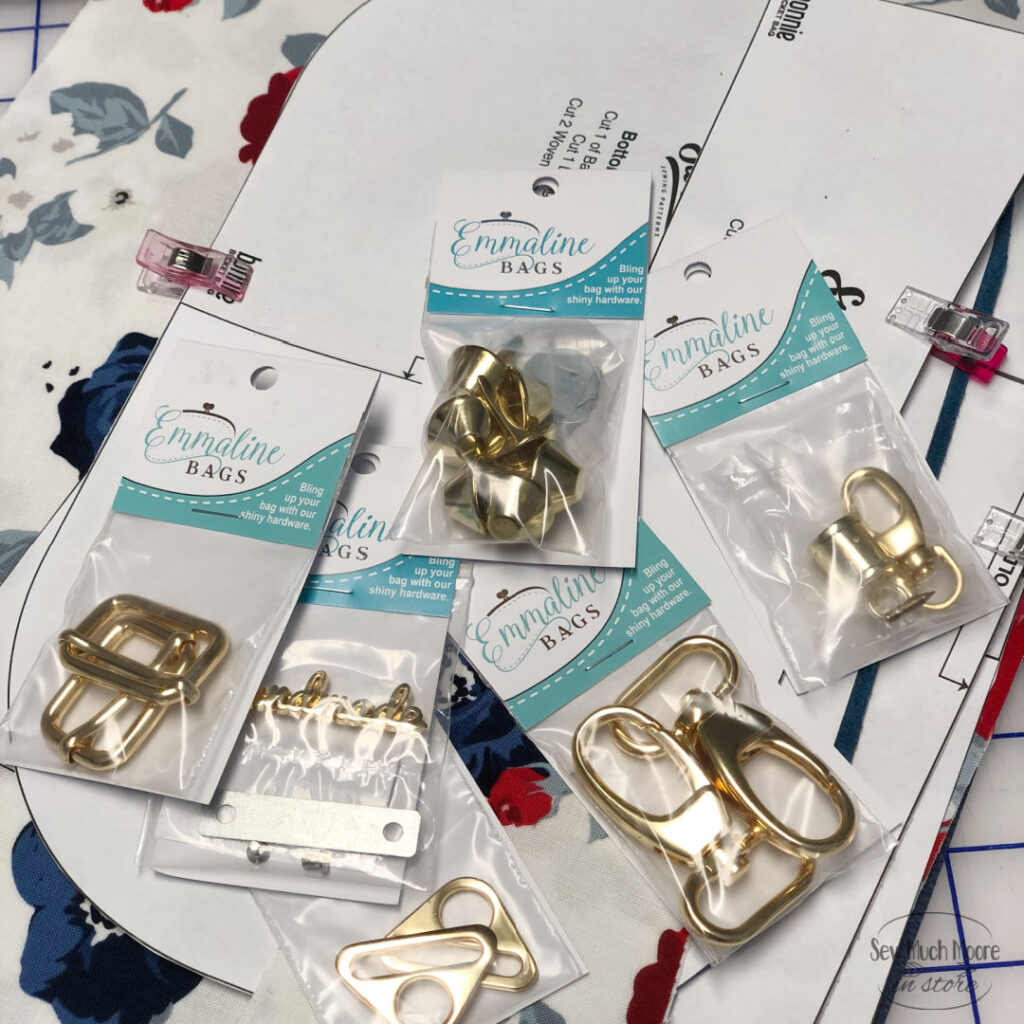
Extra’s I added to the bag
- Purse Feet
- I used the gold purse feet
- Metal Bag Label
- These add a really nice touch – I used the gold one
- Hanging Tassel Cap
- I used some leftover scraps to make this!
- Zipper End
- This was a great way to finish the recessed zipper
Adding the Purse Feet
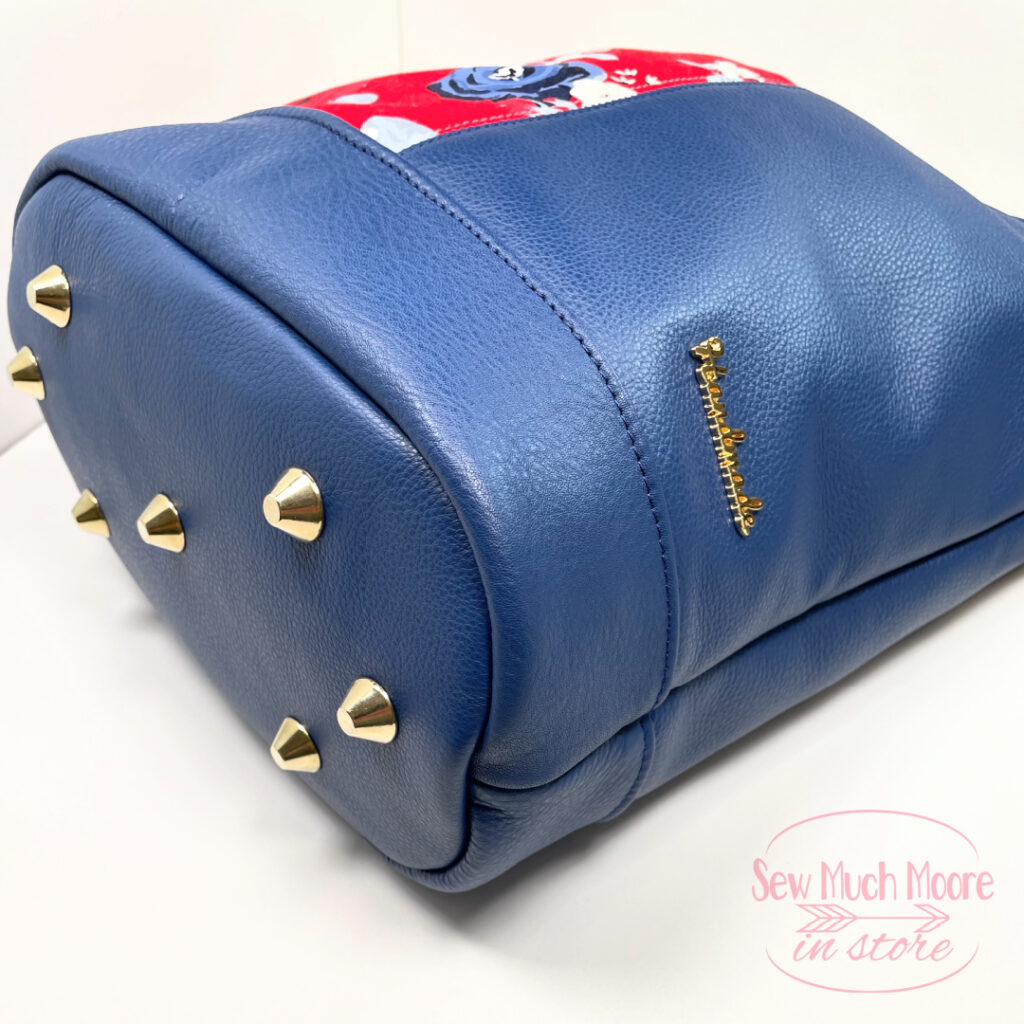
Adding purse feet to my Bonnie Bucket Bag was probably the easiest enhancement I made. I was sure to use the same finish as the rest of my purse hardware. This gold finish is amazing! One of the things I love about purse feet is that these help you keep your bag off the ground. Just think of all the places we set down our bags. Ugh! I especially wanted to protect my leather bottom, so adding purse feet was a no-brainer! You can find my purse feet installation tutorial on right HERE.
Adding a Metal Bag Label
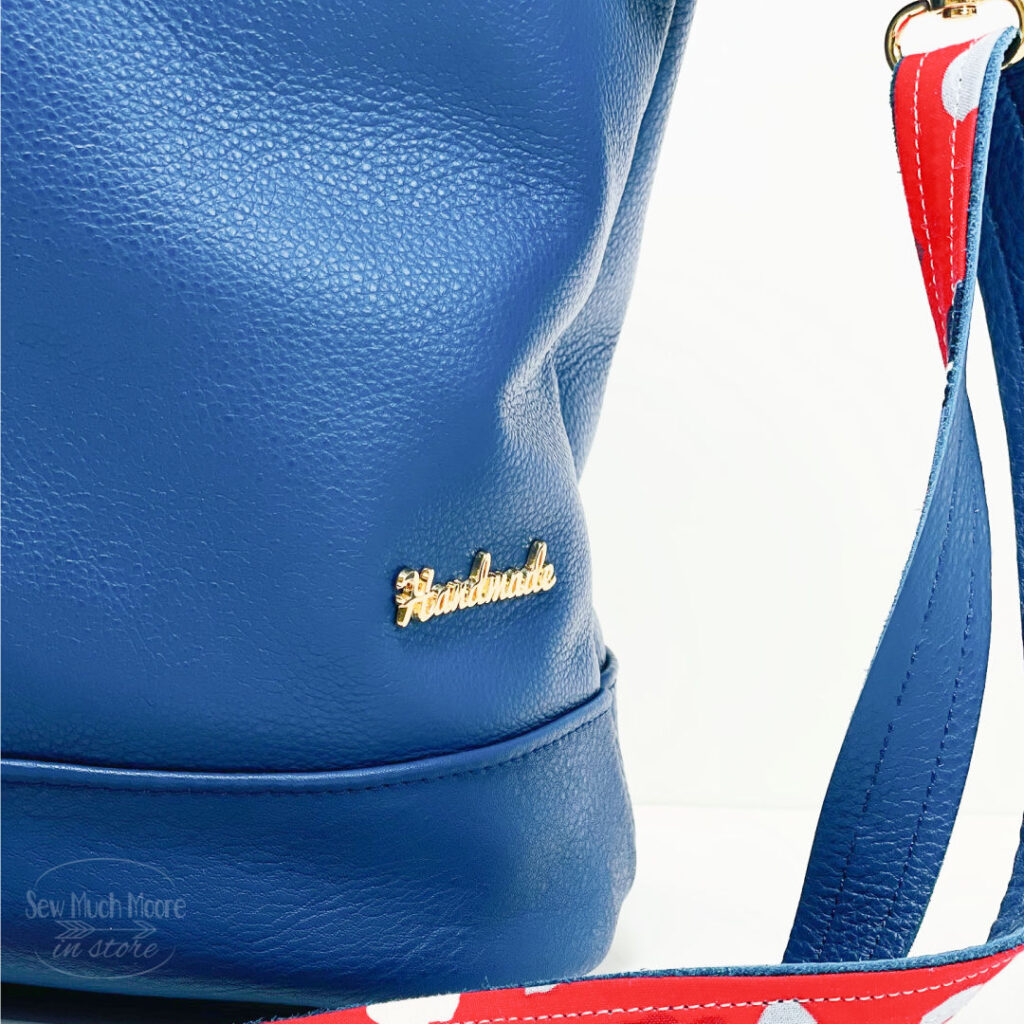
I can’t tell you how many compliments I receive on these metal bag labels! They come in a variety of finishes and are super easy to install! I used the golden finish to match the rest of my bag hardware. If you want to see how easy it is to install a metal bag label – head over to THIS TUTORIAL.
Adding a Hanging Tassel Cap
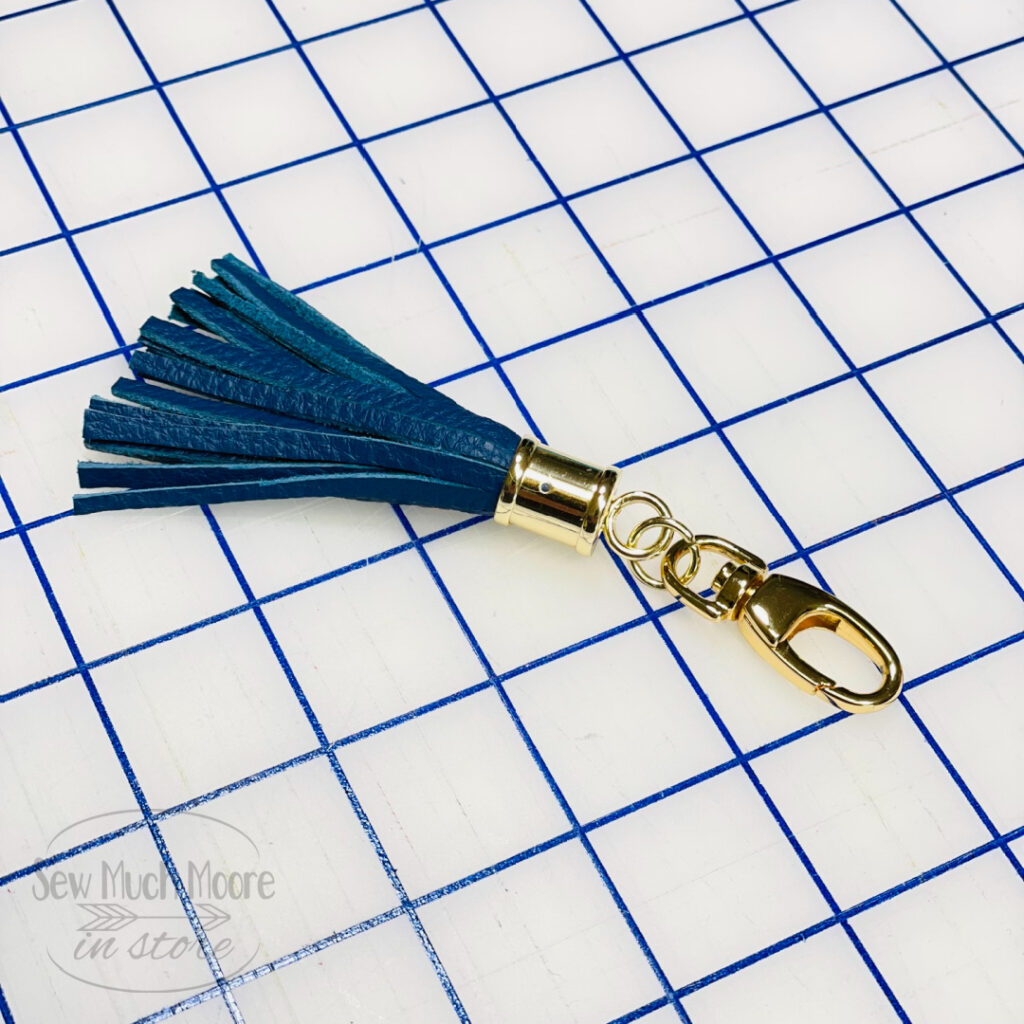
Using some of the leftover leather, I used the hanging tassel cap hardware and made my own (coordinating) tassel. This tassel is perfect and attached to the side of my bag. It definitely gives this bag a designer appearance and people are shocked to learn that I made this bag myself! If you want to add a hanging tassel cap to your bag, you can choose the finish that works best for your project!
Finishing the zipper tape
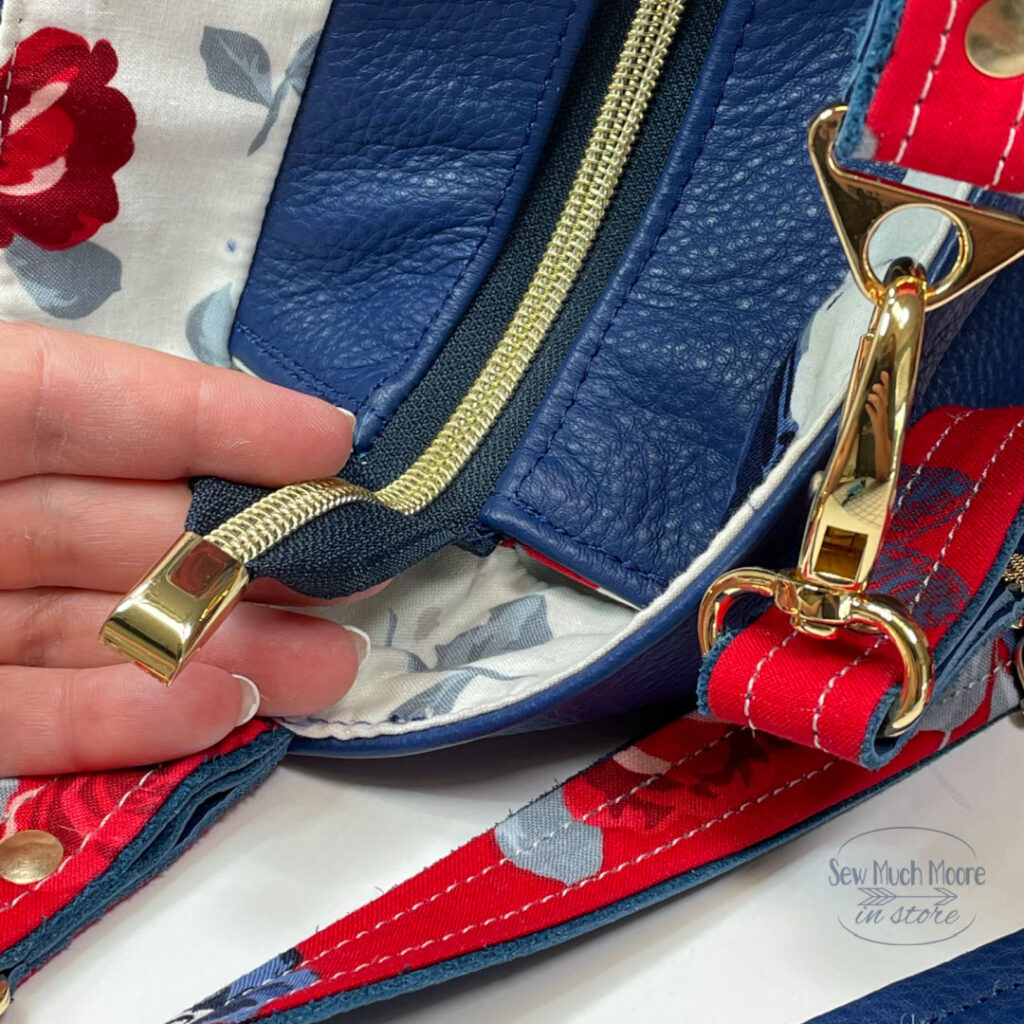
You would normally only find zipper ends on high-end purses and bags from designer brands. If you really want to impress and finish your bag in style, consider adding these zipper ends! They were super-easy to install and come in a variety of finishes! I love how it really finishes this zipper! If you want to see how easy it is to install a zipper end – check out THIS TUTORIAL.
The Finished Bag!
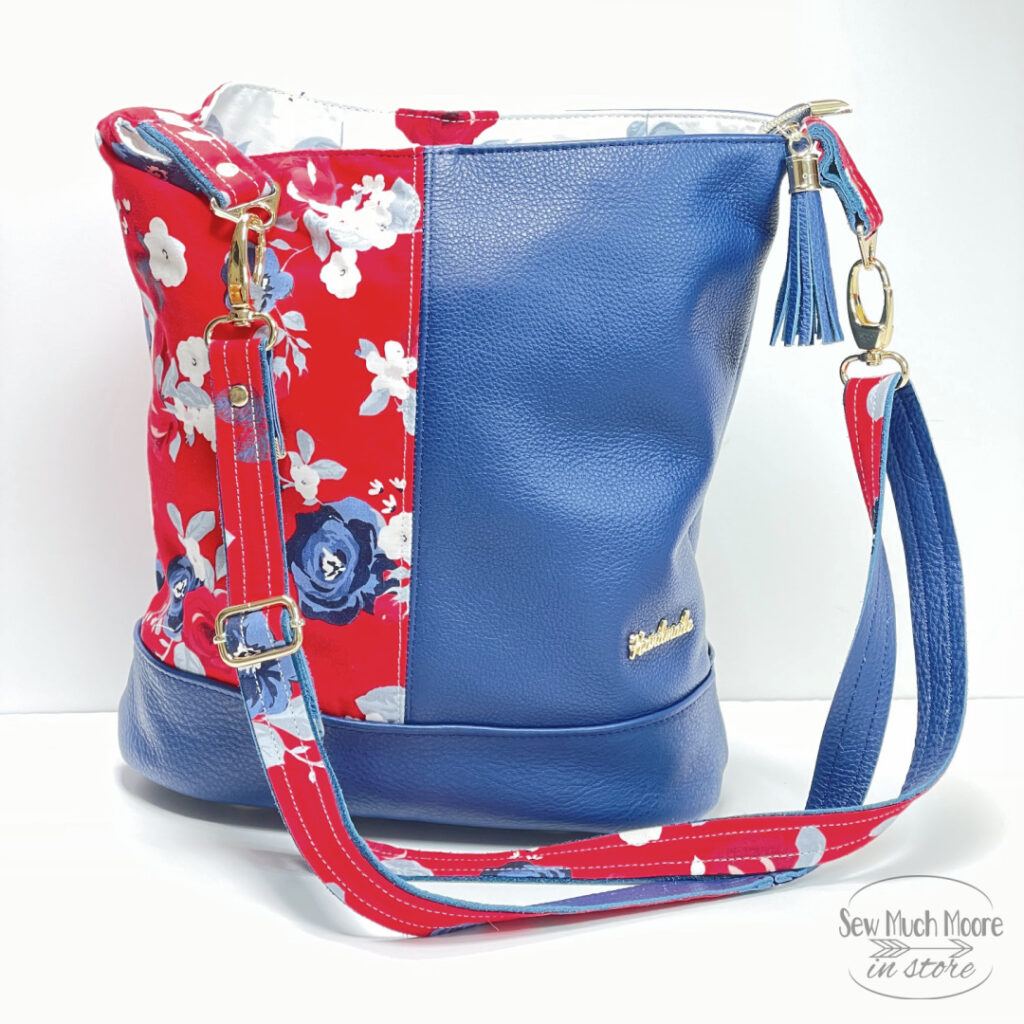
I must say that I loved making this bag. It took me a couple hours to cut and prep my materials and then I spent a few hours the next day on assembly. I used my Juki TL2010Q on a majority of the construction. I switched over to my Juki DU1181N when the leather was getting too thick. Sewing with leather was easier than I thought it was going to be! I don’t know why I hesitated so long to try! Granted, leather isn’t the least expensive material option – but WOW! Making and then using my new leather bag has been a real treat! I bought two more leather colors to try in the near future!
I encourage you to give this Bonnie Bucket Bag Pattern a try! The pattern is well written and adding these variations is quite simple if you plan ahead.
Be sure to grab your Bag Hardware in my shop!
Don’t forget to share what you make in my FaceBook Community! We would love to see your progress and results!

Happy Sewing!

It really is a beautiful bag!