How to Install Metal Bag Labels
Installing metal bag labels into your handmade totes, purses, wallets or bags is one of the easiest additions you can bring to your custom items. This additional bit of hardware can really set your handmade items apart and help people take notice of all your hard work! These metal bag labels come in a variety of finishes to compliment your fabric and even the rest of your hardware. Let me show you all the options for this wonderful hardware and don’t forget to watch the video tutorial so you can see how easy it is to install your own metal tags!
This post contains affiliate links for your convenience. ? Read my full disclosure policy here.
Metal bag label Supply List
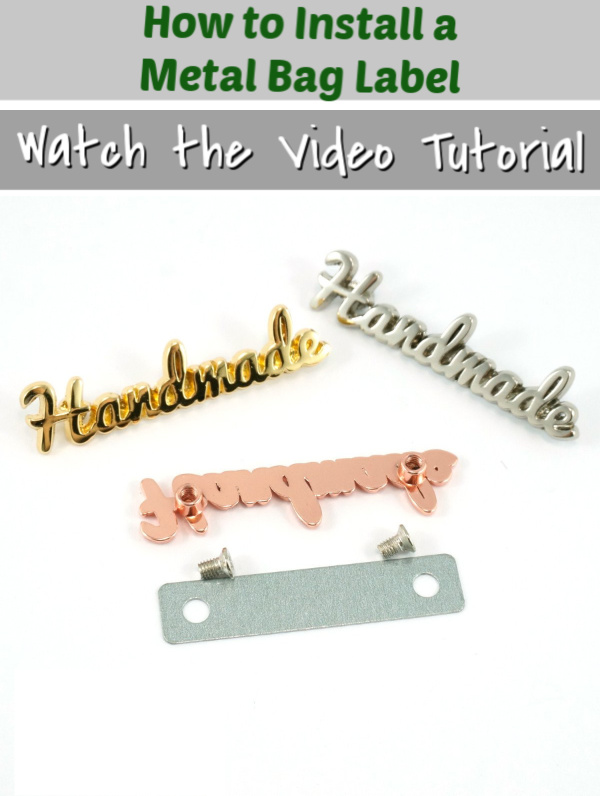
- Metal Bag Label
- (Check out all the different finishes right HERE)
- Leather Punch
- Marking tool
- (I just used a permanent marker)
- Fray Check
- (you should only need this if using cotton, canvas or knit fabric)
- Tiny Screwdriver
- The magnetic screwdrivers work best (Like this one)
Installing your Metal Bag Label
Deciding which hardware finish to use on your handmade bag is really fun! I like to try to match all my hardware. If I am using a metal zipper, then I try to match the teeth on the zipper. If I am using Swivel Snap Hooks or Adjustable Sliders, then I will try to match those as well. I think a nice bag or purse will have all matching hardware finish. If you don’t have any other hardware on your bag or wallet, you can always determine which hardware finish would most complement your handmade item.
For this tutorial, I am using a piece of Cork Fabric that is interfaced with foam and SF101 (Shape-flex). Your Metal Bag Label comes in a variety of finishes. This hardware comes with 2 screws and a stabilizing bracket. Have a marking utensil handy as well as a small Phillips head screwdriver.
I recommend using a Leather Punch.
Take your Metal Bag Label and press down to make an indent in your project. Use your marking utensil to denote where the holes need to be punched. Use your Leather Punch to make your holes in the front of your project and also on the back. Remove any access materials that might be in the way of the screw.
Align the Metal Bag Label with the holes that you just made and attach the stabilizing bracket. PRO TIP! If your project is either Cotton or Canvas, I recommend using Frey Check! Install the screws with a tiny Phillips head screwdriver.
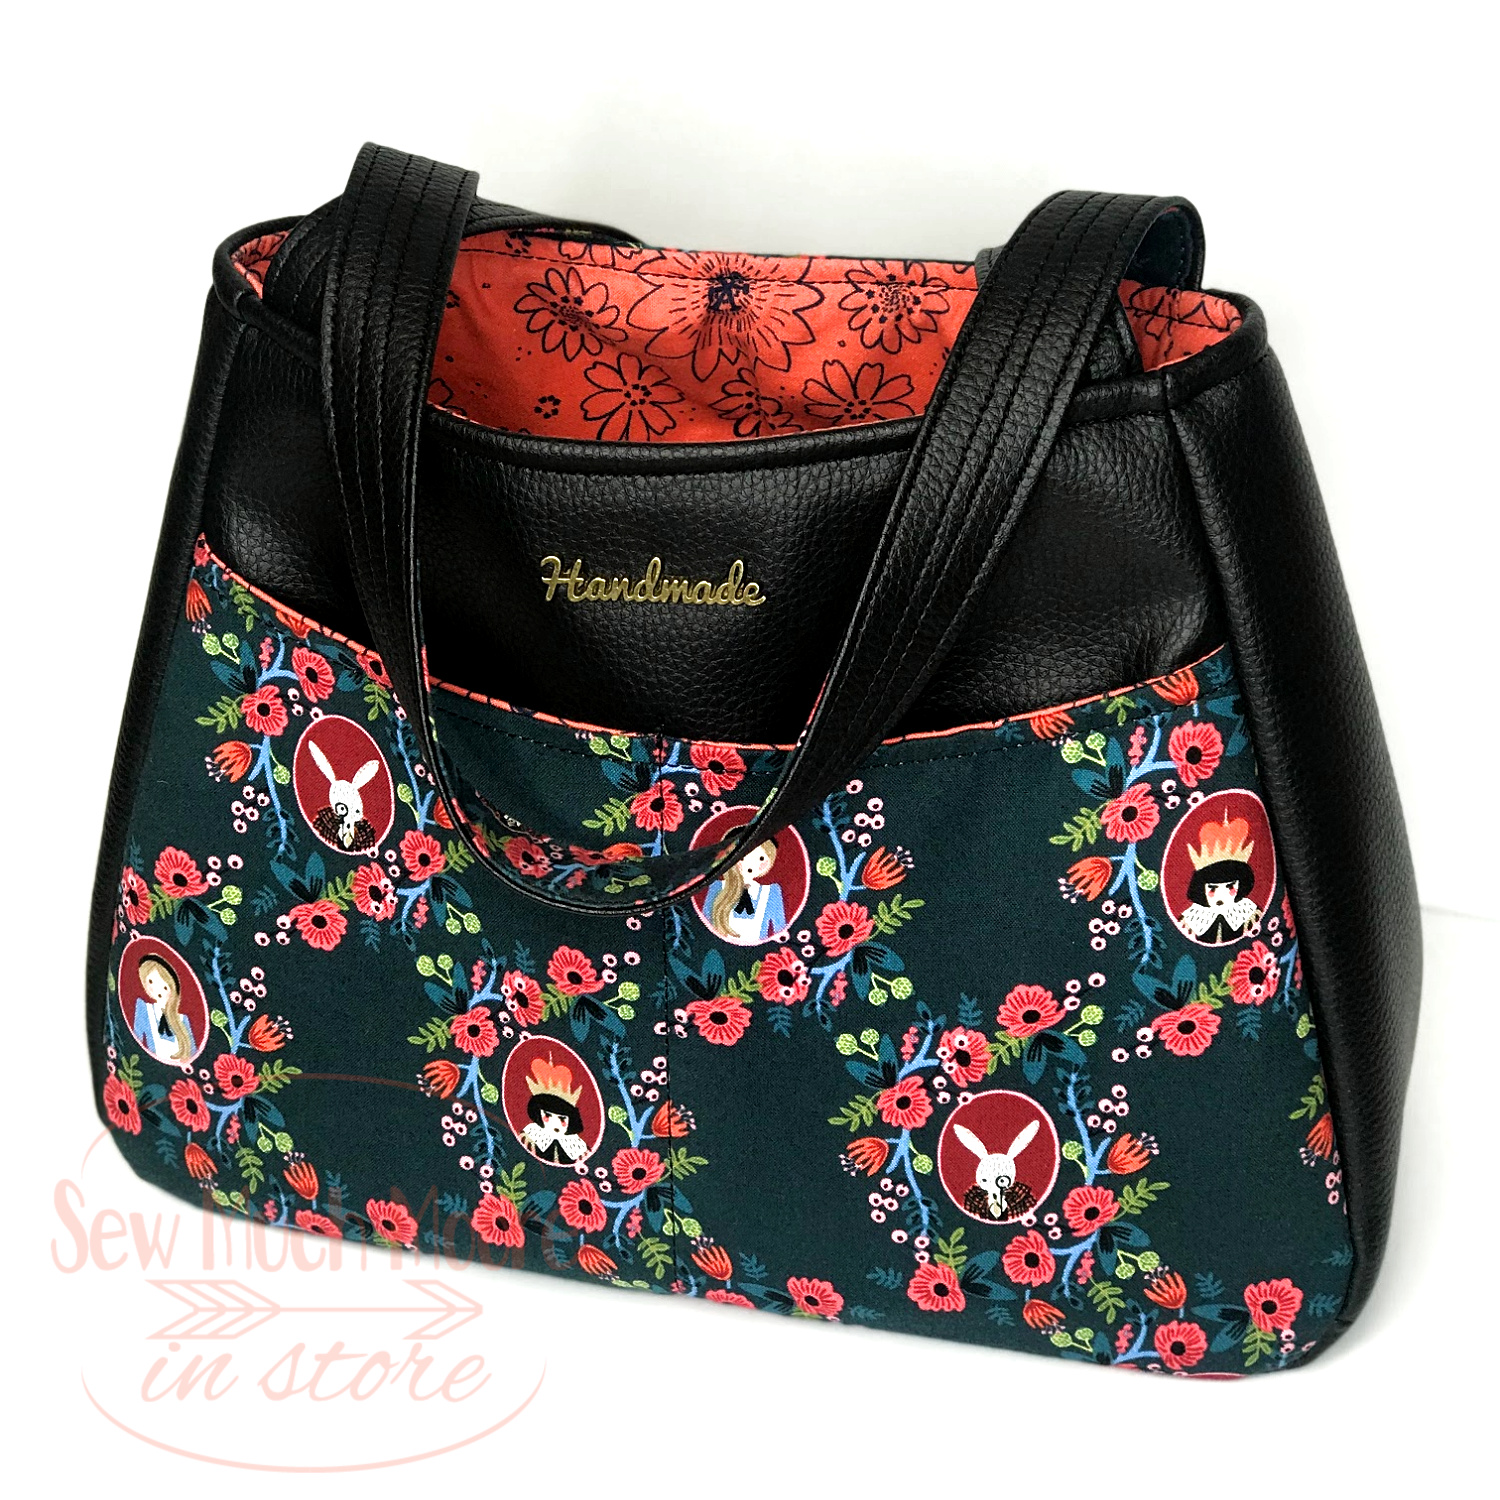
Pictured below is the front of my Ethel Bag. This is a free sewing pattern by Swoon and super easy to make.
Once you have chosen your hardware finish, you just need to install your hardware! It is important to do this before you assemble your bag. I usually install the Metal Bag Label when I am done adding the interfacing to a panel.
Watch the video Tutorial
For this video tutorial, I have used a scrap piece of Cork Fabric. You can use just about any type of fabric. I have used cotton, knit, vinyl, cork, and leather (just to name a few). Check out this step-by-step video to see how easy it is to install your own hardware to your handmade bag, tote or purse.
Be sure to head over to my online shop to get a Metal Bag Label in the finish you like best!
Happy Sewing!
