Ironing Board Makeover
This article contains affiliate links
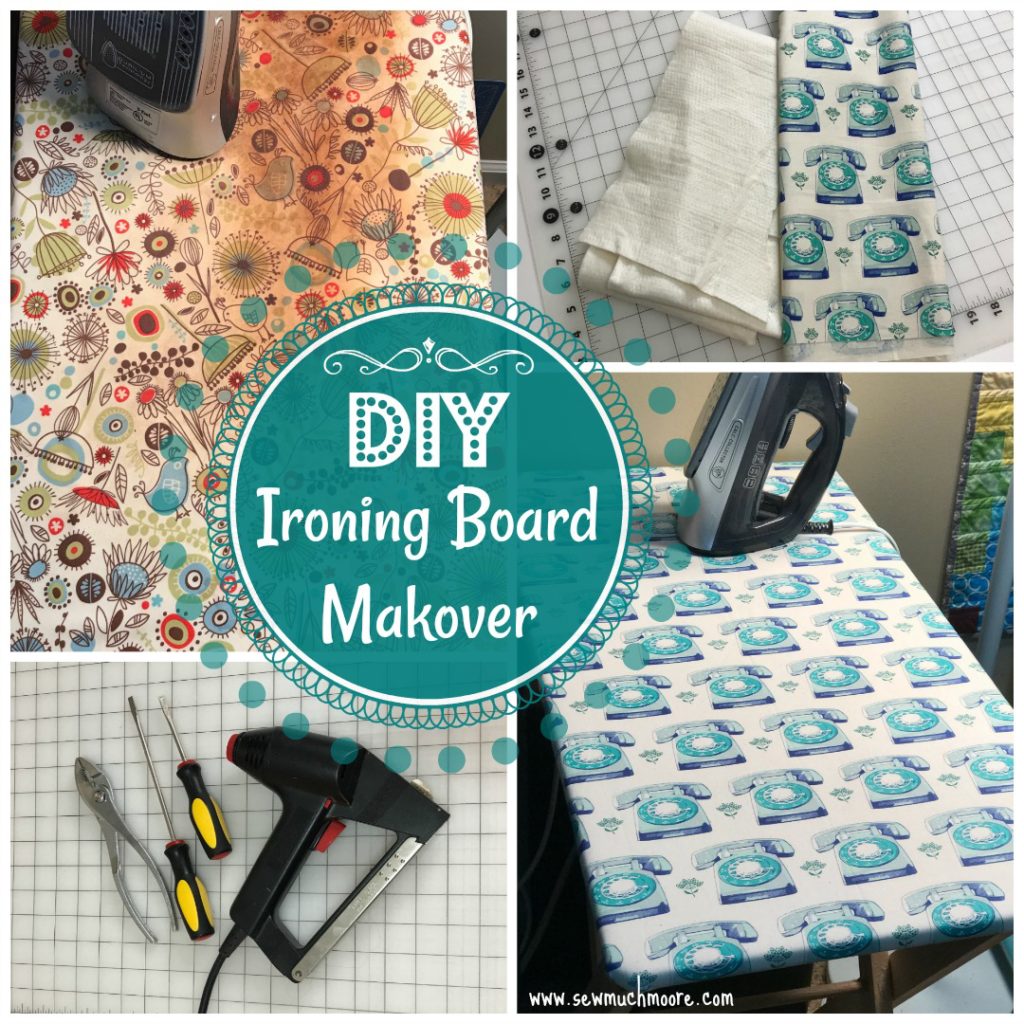
Have you ever looked at your ironing board surface and thought – “Man, I really need to change the cover!!!” Well, that is what I have been putting off for the past year. It took a little embarrassment at a recent sewing weekend to finally motivate me to go ahead and switch out the cover. The process was so easy, that I am really mad at myself for not doing this sooner! It took me less than 20 MINUTES!!! Yes – that was it! I had to try an Ironing Board Makeover!

Check out the video tutorial I made for you!
I know – you want one of those ironing boards! One of my Guild sister’s husband handcrafts them. While they are not interested in making boards to ship, I am looking for an online alternative to the one I have of my own. If you know of a similar product, that you have and love – please comment with that info (and link) below! I will send out an email to my subscribers once I found one that would be a similar product to my own. Be sure to sign up for my emails so you will be the first to know!
signup for my weekly emails
I first shared this process on Facebook and had many questions about the fabric and batting I used for the replacement cover. You can use any fabric that you like. I would only recommend a high quality 100% cotton fabric (the kind you get a quilt shop). Sometime the fabrics that are offered at the big box stores are lower thread count and may even contain other fibers than cotton. Remember that this surface will be getting HOT, so you want to make sure the fabric you use is of good quality. The batting I used is a high quality, 100% cotton batting. I know you saw that I was replacing a double layer with a single layer of batting, but the replacement batting I used is SUPER DUPER thick. For your convenience, I am including these affiliate links of the materials I used to finish this makeover.
Click here for the Fabric
Click here for the batting
Also, if you want to get yourself an electric staple gun – they are available on Amazon. They have the heavy duty manual kind as well. Super easy!! Just add it to your cart with your other items.
This project was very rewarding! Since I use my side table ironing board everyday – I am getting to enjoy my new cover right away!
I hope you found this tutorial helpful! Let me know if you have any questions or other suggestions for recovering ironing boards. I would love to hear from you!
Happy Sewing!
DOn’t miss out – signup for my weekly emails
CHECK OUT MY MOST POPULAR POSTS!

Many of my posts contain affiliate links. If you click on an affiliate link and buy something, I may receive a very small commission. It does NOT result in additional charges to you or cost you anything extra. Mentions of associated products/services/ businesses within the content of my blog may or may not be noted as an affiliate in every reference. The affiliate money I earn per month helps pay the fees to keep this site up and running.
Thanks so much for your support!
Great job on your ironing board cover!! Thanks for sharing the video!
I want one of the ironing board folding tables thanks patty