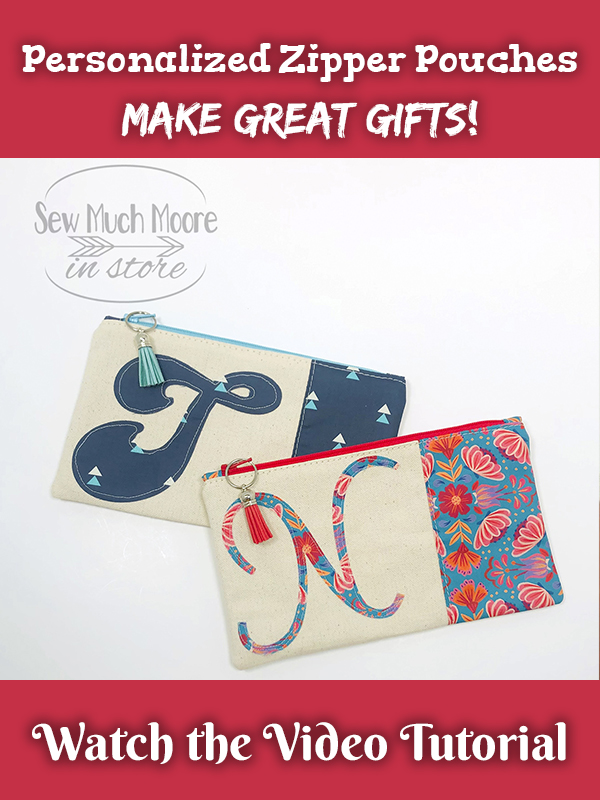
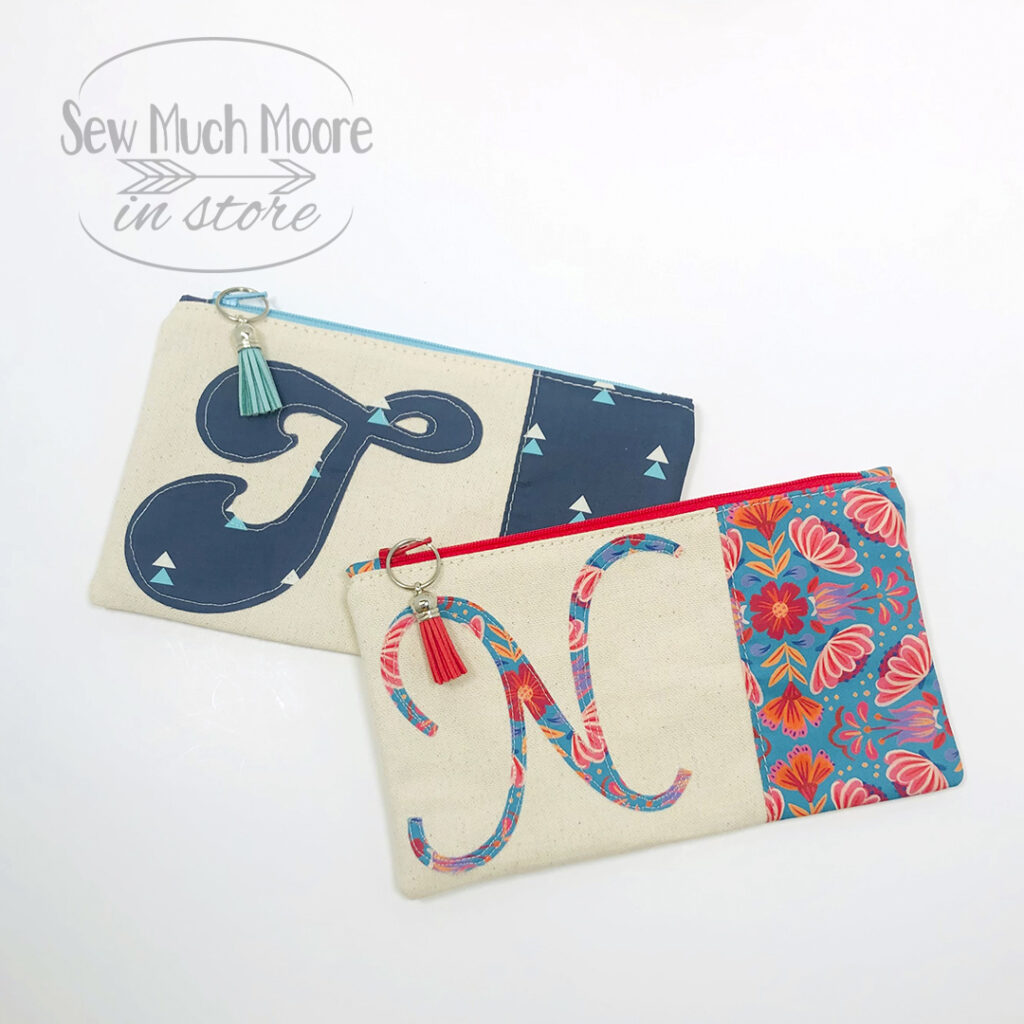
Personalized Zipper Pouch
Everyone loves personalized gifts! Having your name or your initials on an item is a great way to personalize any handmade gift! This Personalized Zipper Pouch is the perfect size for pencils, markers or pens. You can also fill it with makeup or anything to help keep you organized in style. Let’s take a look how to make this fun and simple project!
Materials List
- Qty (2) Exterior fabric pieces: 9′′ x 5.5′′
- I used 100% Cotton Duck Canvas Fabric
- Qty (3) Accent/Interior fabric pieces: 9′′ x 5.5′′
- I used fabric from my online shop
- We will use one of these pieces for the exterior Letter and Accent
- Zipper Tab fabric: 2′′ x 4′′ (I used the same fabric as the interior/accent)
- Qty (1) 9′′ Nylon zipper – I get all my zippers right HERE
- Optional label – Check out Dutch Label Shop
Supply List
- Domestic Sewing Machine (check out my sewing machine recommendations)
- I also used my Industrial Sewing Machine (optional)
- Cricut Maker (optional)
- If you don’t have a Cricut Maker, you can print out your Personalization Letter from THIS WEBSITE, trace, and fuse your letter this way.
- Cricut FabricGrip Machine Mat for the Cricut Maker
- Cricut Weeding Tool
- Cotton Thread (I recommend this thread)
- Rotary Cutter with sharp blade (get replacement blades HERE)
- Cutting Mat
- Misty Fuse
- Iron (I love my Oliso Iron)
- Wool Pressing Mat
- Wonder Clips
- Scissors – I love my Karen Kay Buckley Scissors
- Parchment Paper
Cutting The Personalized Letter
Place the accent fabric on your Circuit FabricGrip Machine Mat, right side up. Use a seam roller or a brayer to secure the fabric onto the mat. Program your Cricut Machine to cut your Personalized initial. I made sure the size did not exceed 4” in height. Once you cut the shape, remove your mat from the machine. Use your Cricut weeding tools to remove your cut shape.
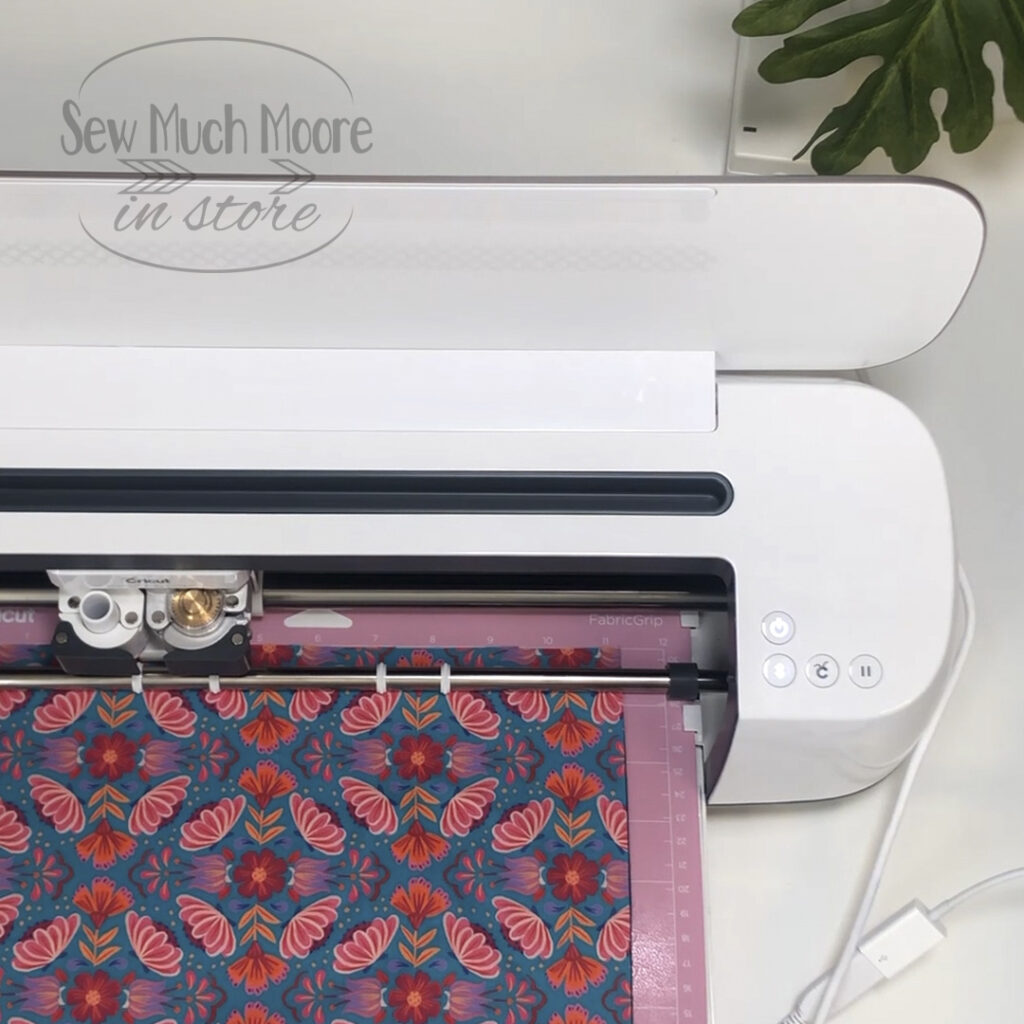
Clip off a piece of your Misty Fuse and Parchment paper to prep the wrong side of your cut shape. Using your iron, fuse the Misty Fuse and remove any access residue. Place your cut shape onto one of your exterior fabric pieces.
ps – If you don’t have or use a Cricut Machine, you can simply print out a letter, trace and fuse as well. Don’t let the machinery stop you from making this fun project!
Making the Zipper Tab
Cut your zipper to 8”. Fold and press fabric rectangle in half lengthwise , wrong sides together. Open it back up and fold each side to the center; press. Trim the ends of the zipper. Slip the zipper end in between the folded fabric to create a sandwich.
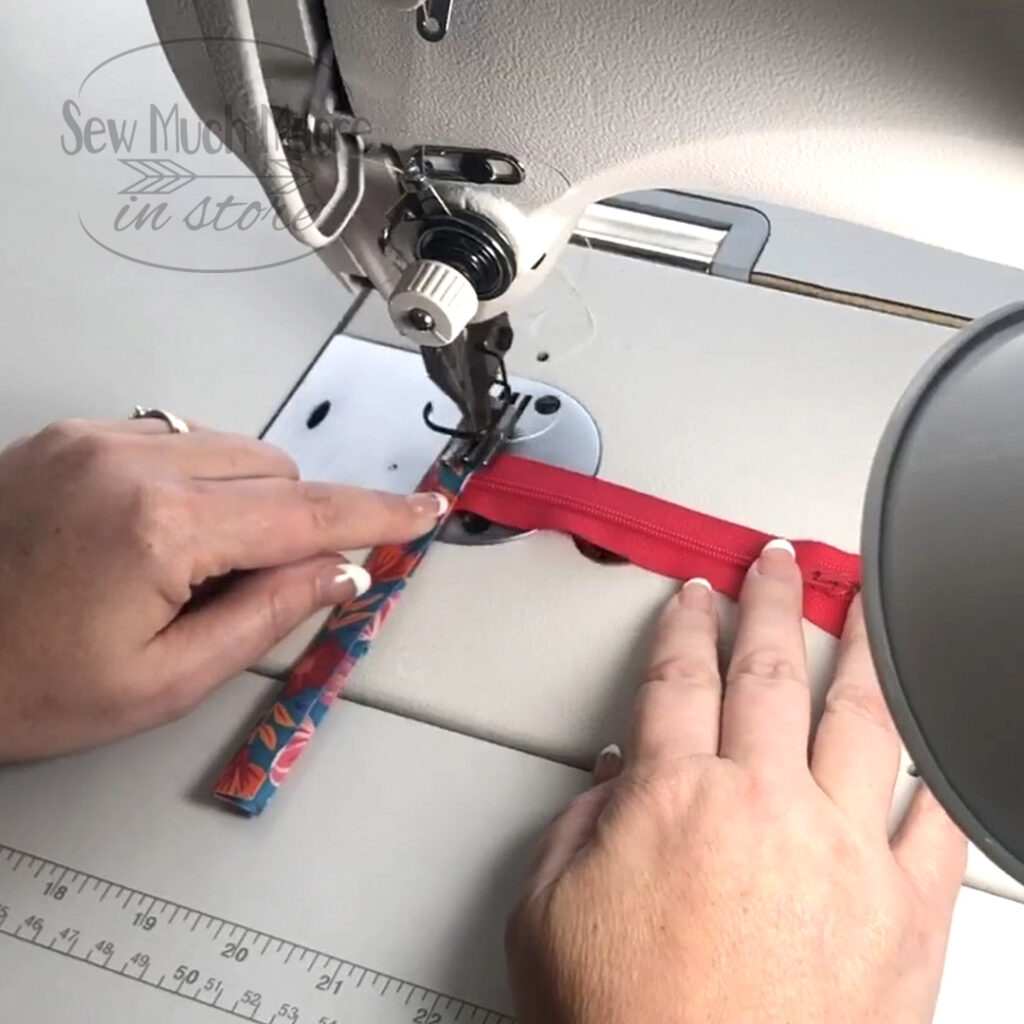
Straight stitch along the edge. Trim off ends of fabric from zipper tab. Open zipper and repeat steps 3 & 4. Be sure to line up the zipper straight across the top opening before attaching the zipper tab.
Assemble the Personalized Zipper Pouch
Place the front of the exterior fabric piece, right side up. Place the zipper along the top raw edge, the wrong side down. Clip in place and cover this with the interior fabric piece. Clip all together and sew along the top edge with your zipper foot. Be sure to secure this side with topstitching. Next, follow the same steps on the back side of the pencil pouch.

Finally, OPEN YOUR ZIPPER! (This is important). Secure the exterior and interior pieces together (right sides together) and secure with clips. Sew along the entire perimeter of the project, but leave a 3-4′′ opening on the middle of the interior fabric side. Now you can flip your project right side out and sew the opening closed.
Just take a look at this video and see how fun and easy it is to make these Personalized Zipper Pouch!
I got carried away and decided to make several of these for my family. They really make great gifts. I filled them with age related items. Colored Pencils for my young niece and some makeup compacts for my older nieces. So much fun to make them special for each person!
Let me know in the comments who you would make a Personalized Zipper Pouch for. I would love to hear from you.
Just Keep Sewing!

Nicole –
Great video & the personalized zipper bags are not only a great gift on their own, but the perfect gift wrap for inside treasures. Nicely designed.
I’m so glad you like it! Thanks for your comment!
Hi Nicole
I always enjoy the information you provide and will be making Christmas pouches for the girls in my family.
Barbara…Australia
Thanks Barbara! I’m so glad you found this helpful! Happy Sewing!
I’ve been making zip pouches for many years, and still enjoy personalizing them. May I ask what font the “N” is?
Love your website!
Great Question – the font is called “Pen and Ink” from Cricuit Access
Hi Nicole, thanks for the easy pattern, I am making one for my sister in Assisted Living, who likes to go to their bingos. This a nice bag size for her to put the phone, lip gloss, kleenex, and her dimes in to play bingo.
Jackie Jarboe.
Which font did you use for the N?
Great Question – the font is called “Pen and Ink” from Cricuit Access