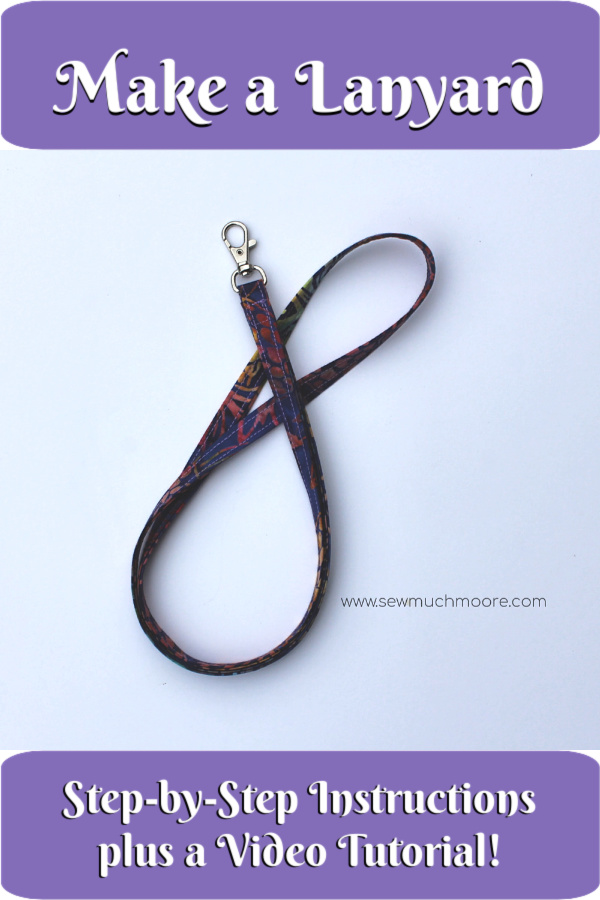
Learn to Make a Lanyard
Lanyards are such a useful item to have and to make! You can attach them to small wallets and hang around your neck (like the Kristine ID Wallet), or you can make a smaller version to use as a wristlet! I have even seen many people use lanyards as a key chain! Lanyards can make a fun and simple gift! Teachers LOVE them! One year, I gave all my kid’s teachers a lanyard and they were pleased as punch!
In this post, you will learn to make a lanyard, without having to use a Bias Tape Maker. Let’s get started and don’t forget to watch the video too!
This post contains affiliate links for your convenience. ? Read my full disclosure policy here.
Learn to make a Lanyard – Supplies List
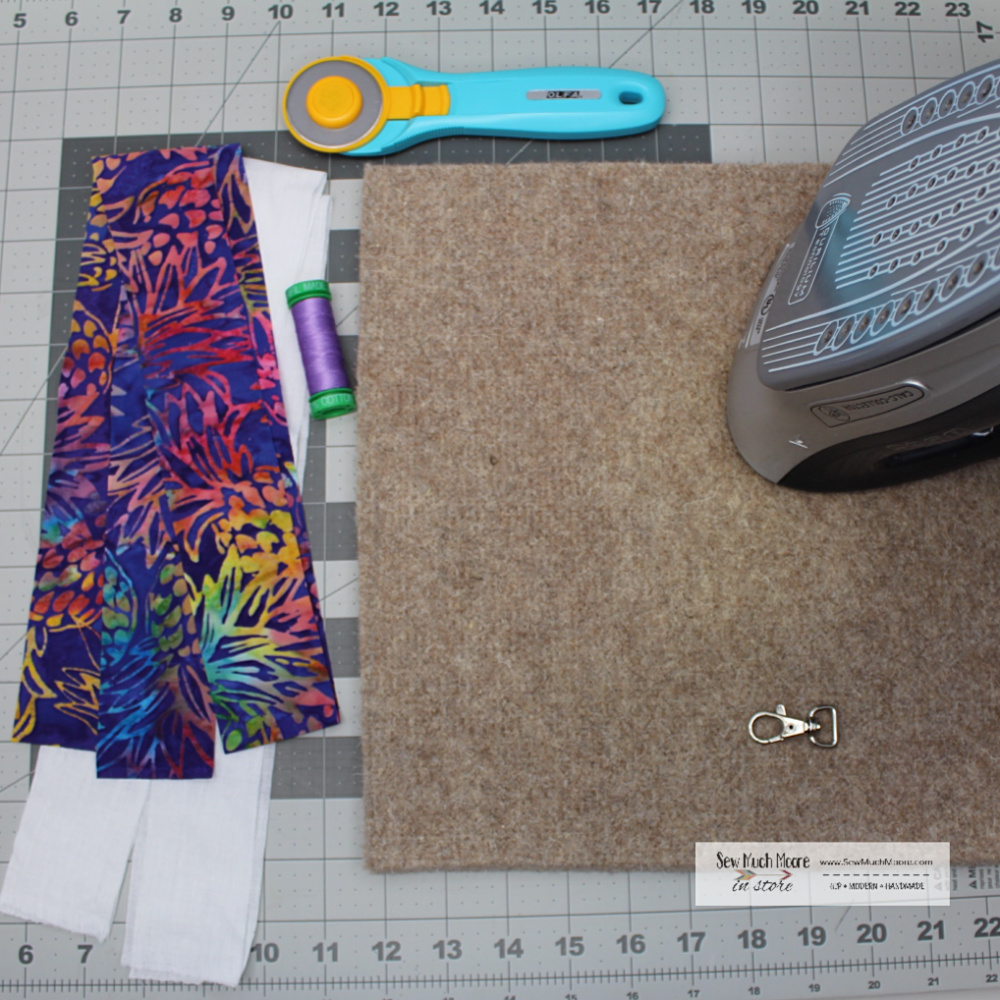
- Lanyard Fabric (I recommend 100% quilting cotton)
- SF101 – Pellon Shapeflex
- Thread (I recommend using a 40 wt thread)
- 1/2″ Swivel Lobster Clasp
Learn to make a Lanyard – Tools Needed
- Sewing Machine
- Cutting Mat & Rotary Cutter
- Scissors
- iron and ironing board
Learn to make a Lanyard – instructions
- Cut Lanyard Fabric and Shapeflex to length (2″ x 38″)
- Fuse the glue side (the bumpy side) of the Shapeflex to the wrong side of the Lanyard Fabric
- Be sure to leave a few inches at each end without any Shapeflex. This will make it easier to sew together at the end.
- Fold and press the entire length of the fused Lanyard fabric in half (lengthwise) with wrong sides together.
- Open this fold and fold the long raw edged sides toward the middle crease and press.
- Straight stitch along both edges (starting with the open side first).
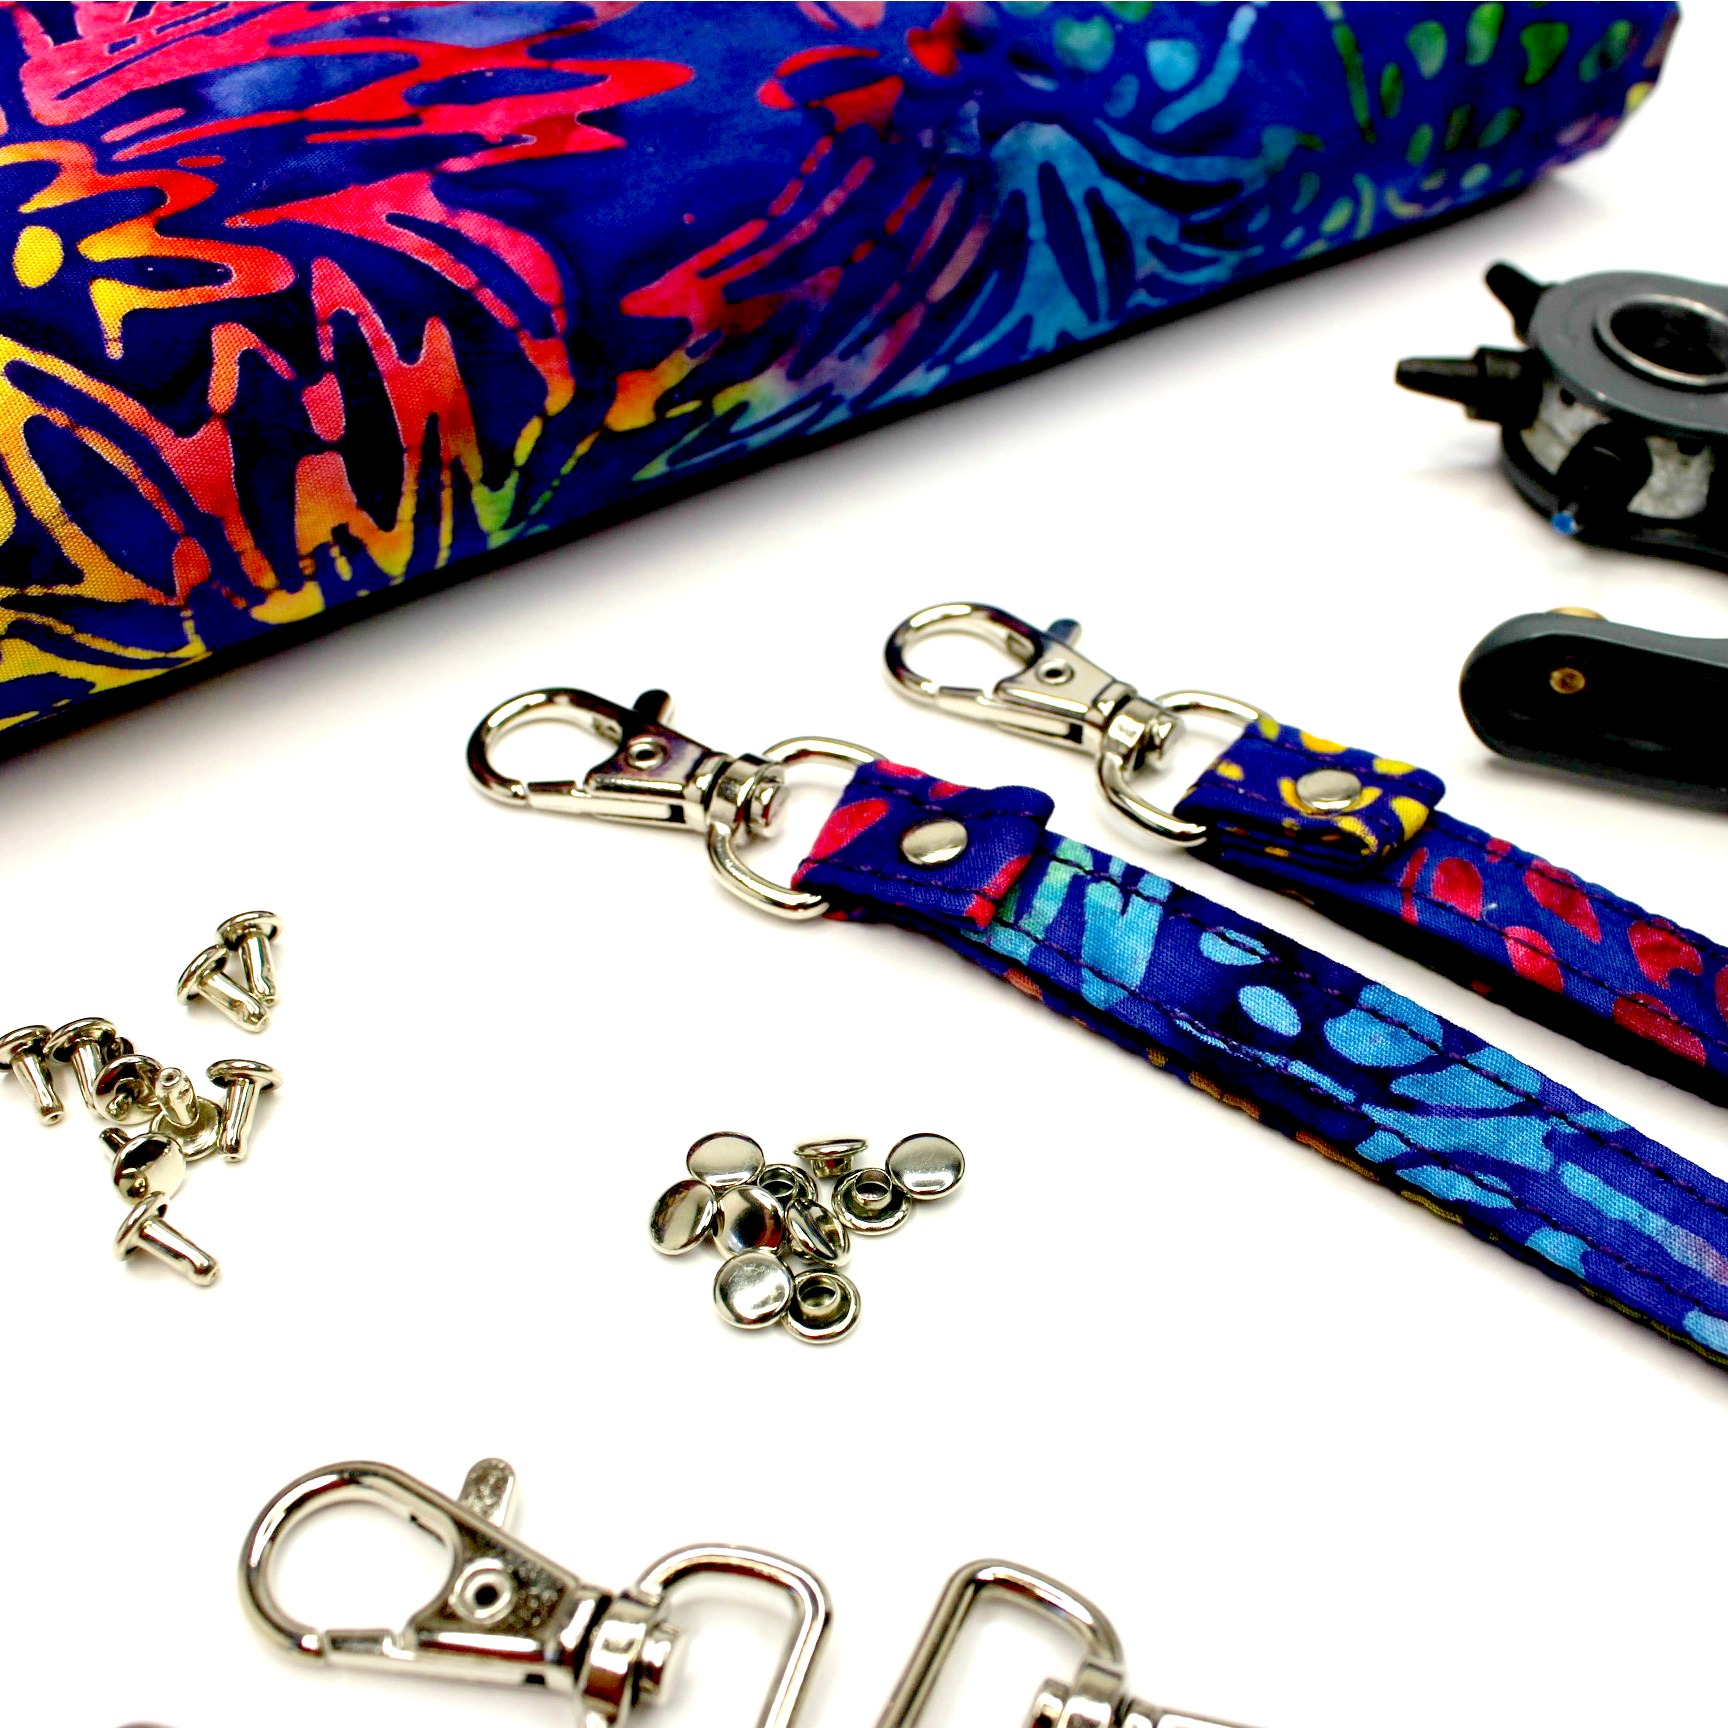
- Insert lanyard tape through the Swivel Lobster Clasp Dring and sew both ends in place (enfolding all raw edges)
Sewing Tip!
- Use a longer stitch length when sewing your lanyard tape together. I use a 3.0 stitch length and it gives it a nice Top Stitch effect!
- Use a thicker thread – I use Aurifil 40wt.
I created a YouTube tutorial to help you learn to make your own lanyard. Enjoy!
I hope you learned a lot from this tutorial. Don’t forget to subscribe to my YouTube Channel!
You can also finish your lanyard with Rivets instead of sewing. Check out these tips on using a Rivet Press right HERE.
I would love to know how you are going to use this technique in your next project. Are you going to make these for yourself or maybe as gifts? Let me know in the comments below!
Happy Sewing!

Your instructions for making a lanyard are much easier than others ways I have seen. Thanks so much for the video. I loved it!
Thank you! I’m so glad you can find it useful! Happy Sewing!
Great Video and instructions. Thanks! I need to get some of those little clasps!
Thanks! Those little clasps are great for not just lanyards…. You can use the same instructions and make wristlets too!
What fabric are you using in the video? I love it!
This fabric is an out of production print. I’m not sure what it is called, but I sure do love it!
Why don’t you use a bias tape maker? I bet it would be quicker if you tried that!
I’ve tried using a bias tape maker with fused cotton, but the additional thickness makes it more trouble than it’s worth (in my opinion). I spend way too much time trying to get the fabric to feed through the tiny opening when I could just start folding and pressing! 🙂
What a great idea! I’m going to make these for my Grandchildren!
I bet they will love them!
I loved your video! Now I have a plan for Christmas gifts!
Hi Nicole! I’m hoping to order my rivet press and supply’s from your links to Gold Star Tool and Amazon this next week, so will the discount still be good? Also, what size rivet would you recommend for this lanyard, please? Thanks so much!
Hello Jennifer!
I just heard back from David with Goldstar Tool. The coupon code has been extended until the end of August. I think there is a $25 minimum order.
I would recommend a size 7 rivet. You will eventually want more sizes, but that is a good size to start with.
You may also want to checkout the grommets as well. These are features in my last post:
https://www.sewmuchmoore.com/how-to-make-a-3-ring-binder-zipper-pouch/
Happy Sewing!
Your the best!!!
I mean you are the best!
Maybe David from Gold Star Tool hasn’t updated his computer yet because site wouldn’t accept the discount code, saying it has expired.