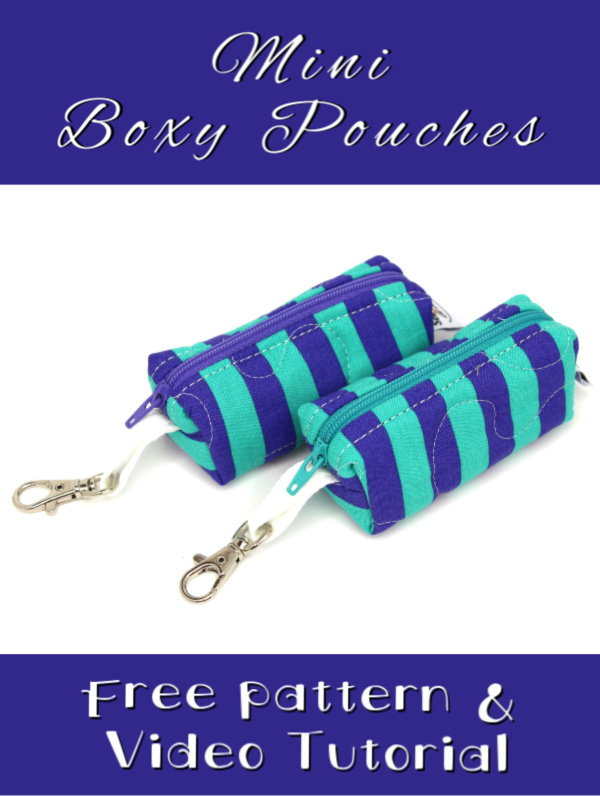
How to make a Mini Boxy Pouch
I just love these little, quick projects! Using common items, found in your sewing studio, you can make a quick and easy Mini Boxy Pouch! These are perfect to attach to a keychain, backpack or to your existing purse hardware! Let me show you how I make these and don’t forget to watch my video tutorial too!

This post contains affiliate links for your convenience. ? Read my full disclosure policy here.
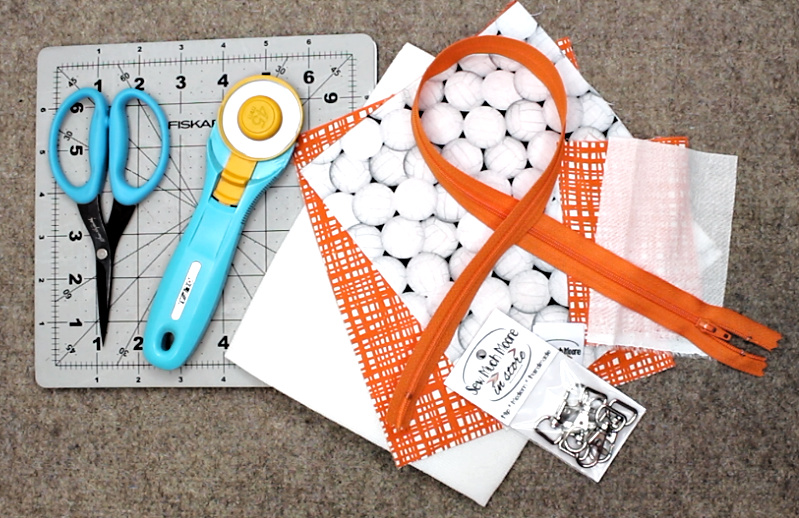
Mini Boxy Pouch Materials List
- Mini Boxy Pouch Pattern
- Qty (1) scrap of fabric for the exterior
- Qty (1) scrap of fabric for the interior & the clasp holder
- Qty (1) piece of double-sided fusible foam (here is a good online option)
- Qty (1) piece of woven interfacing
- Qty (1) Zipper (see cutting instructions for zipper length)
- Qty (1) 1/2 inch swivel lobster clasp
- Qty (1) Pull Tab (I used a custom tag)
Mini Boxy Pouch Tools & Supply List
- Sewing Machine with a zipper foot and regular presser foot
- Thread
- For Domestic Sewing Machines, I would recommend Aurifil thread
- Rotary Cutter with a sharp blade (I use this brand – 45mm)
- Acrylic Ruler (I like this brand)
- Rotary Cutting Mat (I recommend this rotating mat – it’s amazing!)
- Clover Wonder Clips
- Fray Check
- Marking Pen (I like to use my Frixion Pen)
- Sharp Scissors (I love this pair)
- Iron (I love this brand of irons)
- Wool Pressing Mat (check out the Pressing Links from Oliso)
Mini Boxy Pouch Assembly
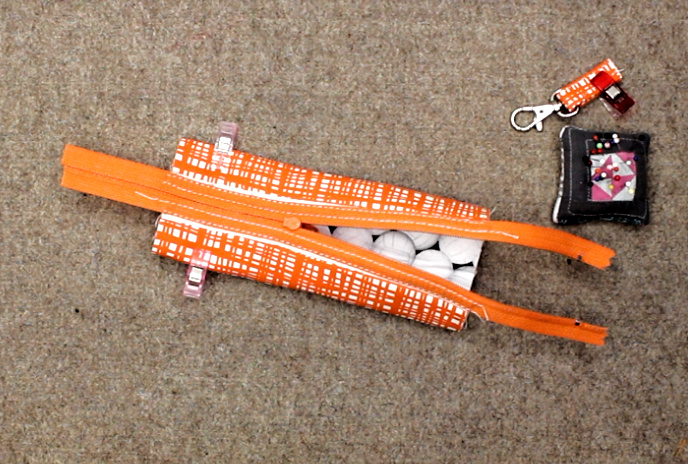
Cut and fuse all fabrics, according to your cutting directions. Align and clip your zipper, right side facing the right side of your first fabric panel. Make sure your zipper head is facing the fabric. Using your zipper foot attachment, sew the zipper tape to the panel. Fold-down the zipper tape to the back of the fabric panel and secure it with a line of stitches. Align the other side of your panel to the top of zipper tape and clip in place. Sew your second fabric panel to the zipper tape. Fold-down the zipper tape to the back of the fabric panel and secure it with a line of stitches. While your project is still inside out, unzip your zipper about halfway. Fold the sewn fabric panels ends so that the center of the bottom is in the middle and the zipper is aligned on top of that. Align and secure the raw edges together and insert the pull tab on the closed zipper end. Repeat that step for the other side (except insert the lobster clasp and tab on this end) and sew the raw edges closed.
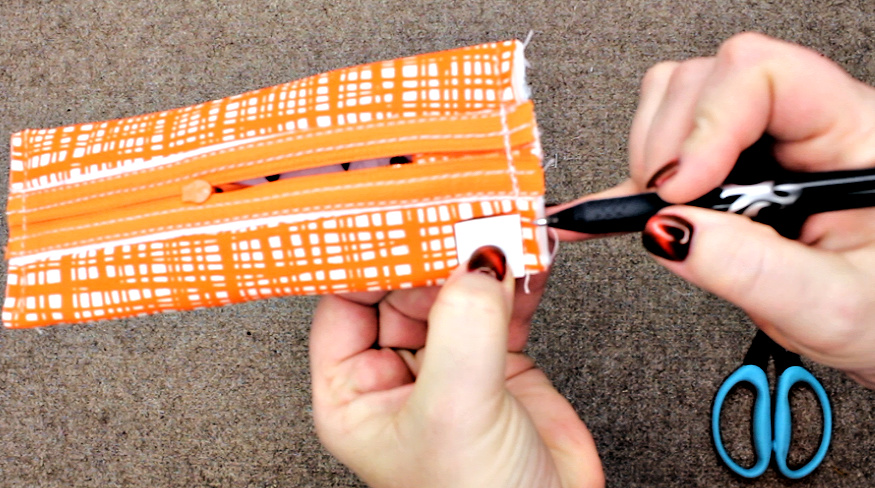
Taking your boxing template, draw cut lines on all four corners of the project. Using your sharp fabric scissors (these are the BEST scissors), cut out the corners. Trim off the excess zipper tape. Align the handle in the middle of the boxed corner. Use clips to secure. Repeat for the other end of the handle. Sew these edges closed. Make sure you backstitch at the beginning and end of each side. It is also a good idea to backstitch the handle area as well since this is a high use area. Repeat on the other side of the bag. Turn your finished exterior bag right side out.
Watch my Video Tutorial
I don’t know about you, but I LOVE a video tutorial as well!
Check out my YouTube video which explains how to make my Mini Boxy Pouch!
As I mentioned, these mini boxy pouches make excellent gifts. You can store earbuds, folded money, chapstick/lipstick and all sorts of small items in there! What will you use yours for? Tell me in the comments below!
Happy Sewing!

Thank you so much for this pattern and video tutorial! Yay! I know what all the kids will be getting in their stockings this Christmas!
Great idea for a quick gift. I just signed up for your newsletter and got my cutting instructions! Thanks!
Thanks. What a cute project.
These will be cute stocking stuffers for my daughters! Do you have a recommendation for the teflon sheet you used in the video?
I updated the link in the post. I think I got it on Amazon.
For those that are not seasoned sewist, please post the seam width. Such 1/4″ or 1/2″. I loe this pattern!
sorry – I think it was 1/4″ (if it did not already say it at the beginning of the pattern). I made this freebie a LOOOOOOOONNNNNNNGGGGGGG time ago.
This little bag is so handy! Thanks for the tutorial.