Make a Star Quilt Block with AccuQuilt
When I created the Star Spangled Shield Patterns, I intended to only use foundation paper piecing technique for the Star Quilt Block portion. While this gives a great result, it can take more time than you might have to spend. This is why I wanted to try out the AccuQuilt Star die and make my own Star Quilt Block with AccuQuilt. Let me show you how I did just that!
Supplies:
- Star Spangled Shield Pattern (there are 3 to choose from):
- Star Spangled Shield Baby
- Star Spangled Shield Throw
- Star Spangled Shield Mini (free with Quilt Block Club Membership)
- Fabric (These are the colors I used to make the Throw size Quilt)
- Misty Fuse (I used this as my double sided fusible to adhere the AccuQuilt Stars onto my square blocks in lieu of making the star using the FPP method).
- Parchment paper from my kitchen
- Applique pressing sheet (I used this oven liner from Amazon)
Tools:
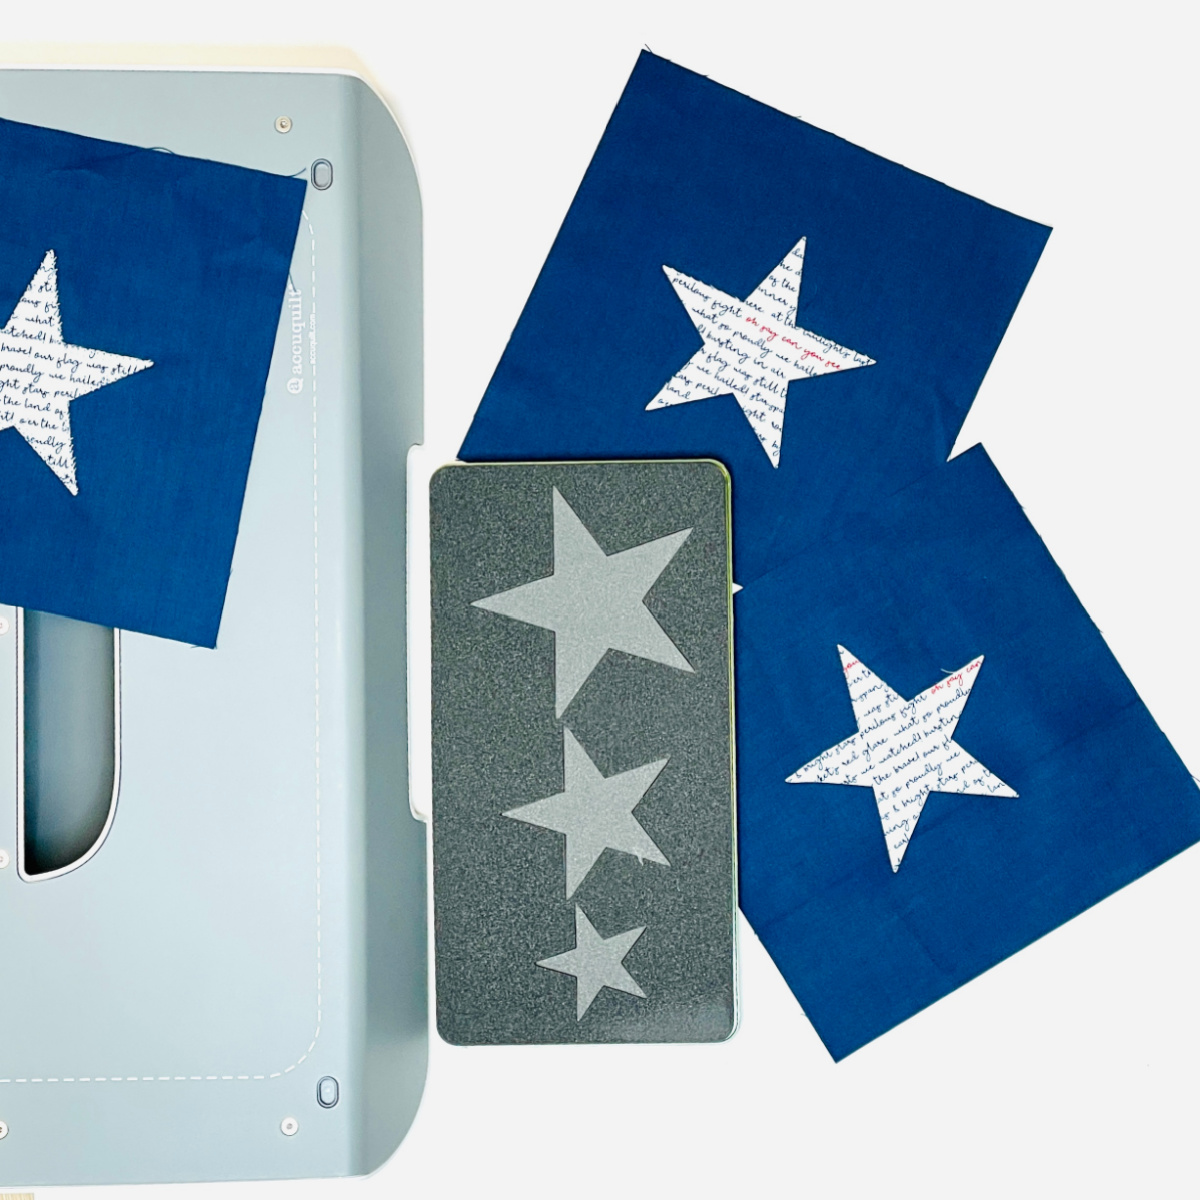
- AccuQuilt GO! Big Cutting System
- AccuQuilt GO! Star Dye #55028
- AccuQuilt GO! Cutting Mat #55202
- Oliso Mini Iron & Wool Pressing Mat
- I also had the Quilter’s Cut ‘n Press II underneath my Wool Mat to prevent condensation and warping of my table surface.
If you prefer not to use foundation paper piecing, there is an alternative method: applique. Applique involves fusing fabric shapes onto a background fabric to create the desired design. In this quilt, we have a star shape that has been cut using an AccuQuilt cutting system and then fused onto the finished block.
Prepare My Fabric for Cutting
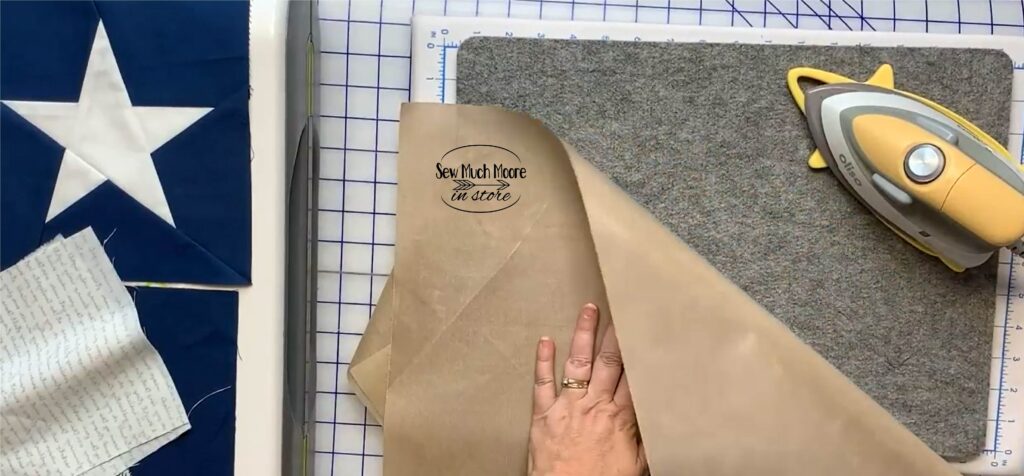
Before we proceed with the applique, we need to take a few essential steps to prepare our fabric for optimal results. One highly recommended technique is using Misty Fuse, a sheer and lightweight double-sided interfacing and webbing that works wonders in creating secure and durable fabric bonds.
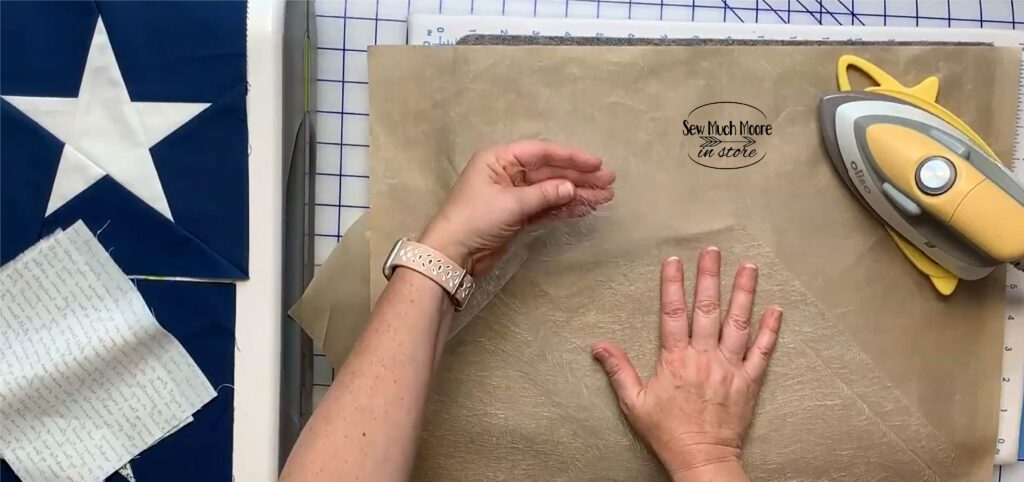
To begin, I suggest setting up a suitable work surface by placing a protective sheet, such as a piece of Teflon or parchment paper, on top. This extra layer serves two purposes: firstly, it safeguards your work surface from any potential adhesive residue, and secondly, it ensures that the fusible webbing adheres seamlessly to your fabric.
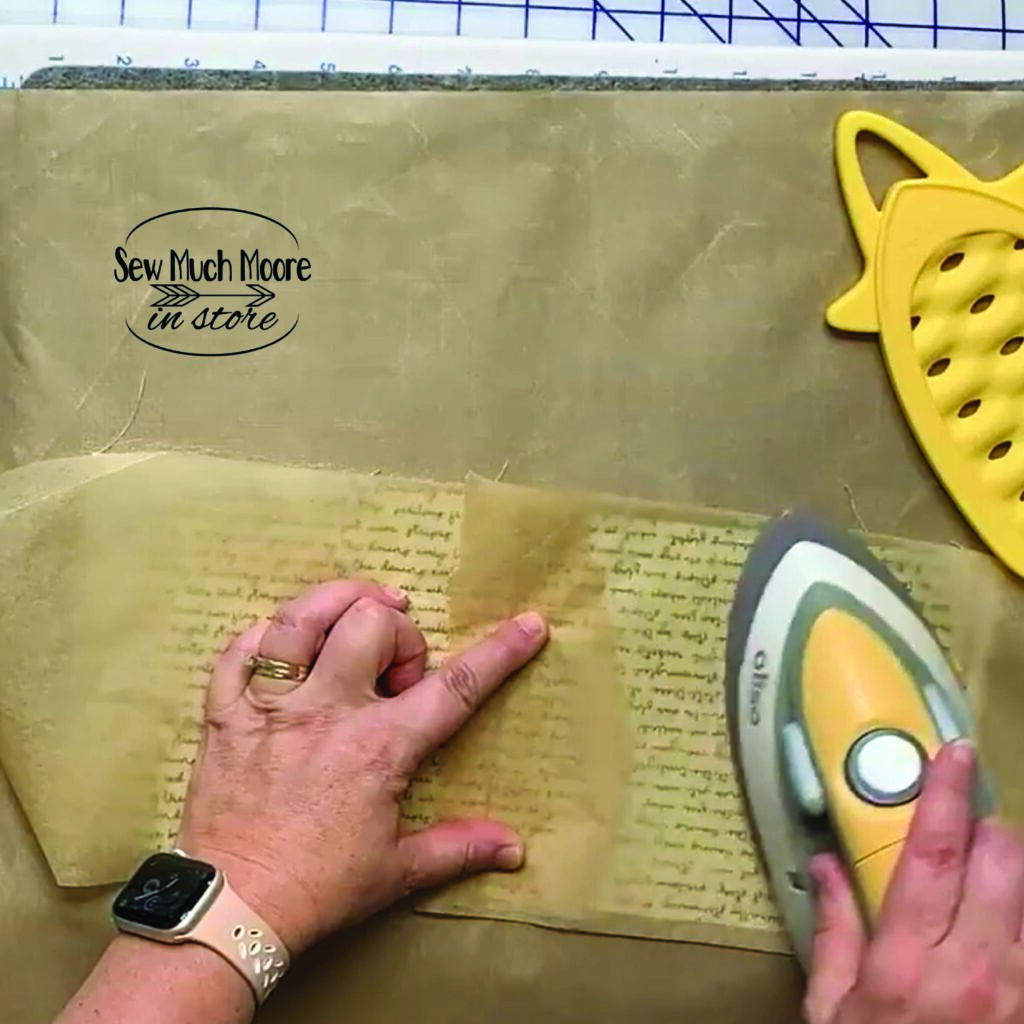
Now, armed with my trusty Oliso Mini Iron featuring a diamond sole plate, I apply heat to the protective sheet and fabric. This strategic approach prevents the fabric from accidentally sticking to the iron, while simultaneously activating the fusible webbing, effectively bonding the fabric layers together. The precise control and even heat distribution of the Oliso Mini Iron guarantee a flawless application every time.
By taking these preparatory measures and using the right tools and materials, we can achieve a secure and professional-looking applique. So, let’s get our fabric ready for the next exciting step in creating our magnificent Star Quilt Block!
Cutting My Fabric
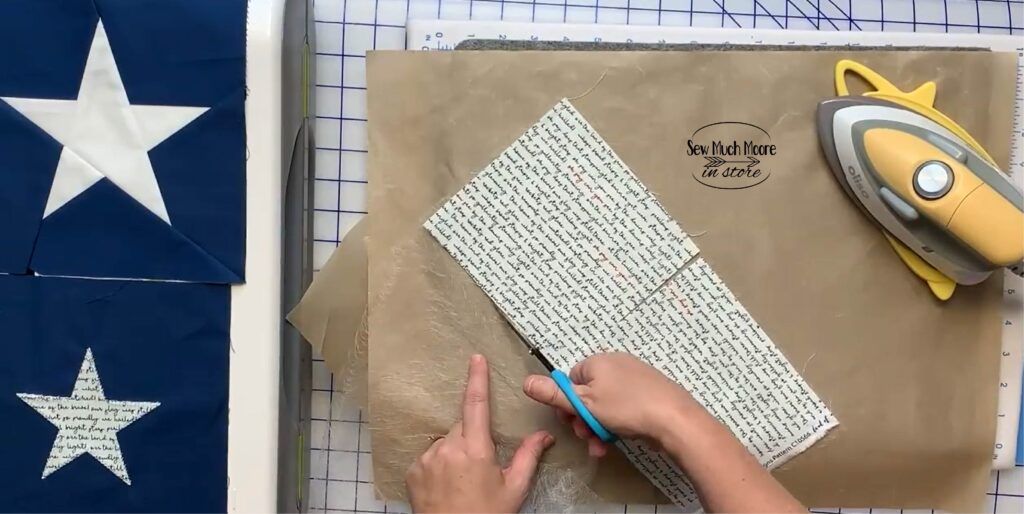
Once the fabric is securely fused onto the square block, the next step is to transform it into a beautifully shaped star. To ensure the longevity of my AccuQuilt dies and prevent any potential issues with the fusible webbing sticking, I employ a simple yet effective technique. Before passing the fabric through the AccuQuilt cutting system, I strategically place pieces of parchment paper on both sides of the fused fabric. This protective layer acts as a barrier between the fabric and the dies, safeguarding their intricate designs and preventing any unwanted adhesion. With the fabric and parchment paper sandwiched between the cutting mat and the die, I carefully roll the ensemble through the AccuQuilt fabric cutter. As the die effortlessly slices through the layers, the parchment paper ensures a smooth and seamless glide, leaving the fusible webbing residue-free. Once the cutting process is complete, I gently remove the excess fabric, unveiling the perfectly shaped star appliqué piece. This technique not only preserves the quality of my dies but also enhances the precision and longevity of my fabric pieces, allowing me to create stunning star quilt blocks with AccuQuilt for years to come.
Fusing My Star onto My Square Block
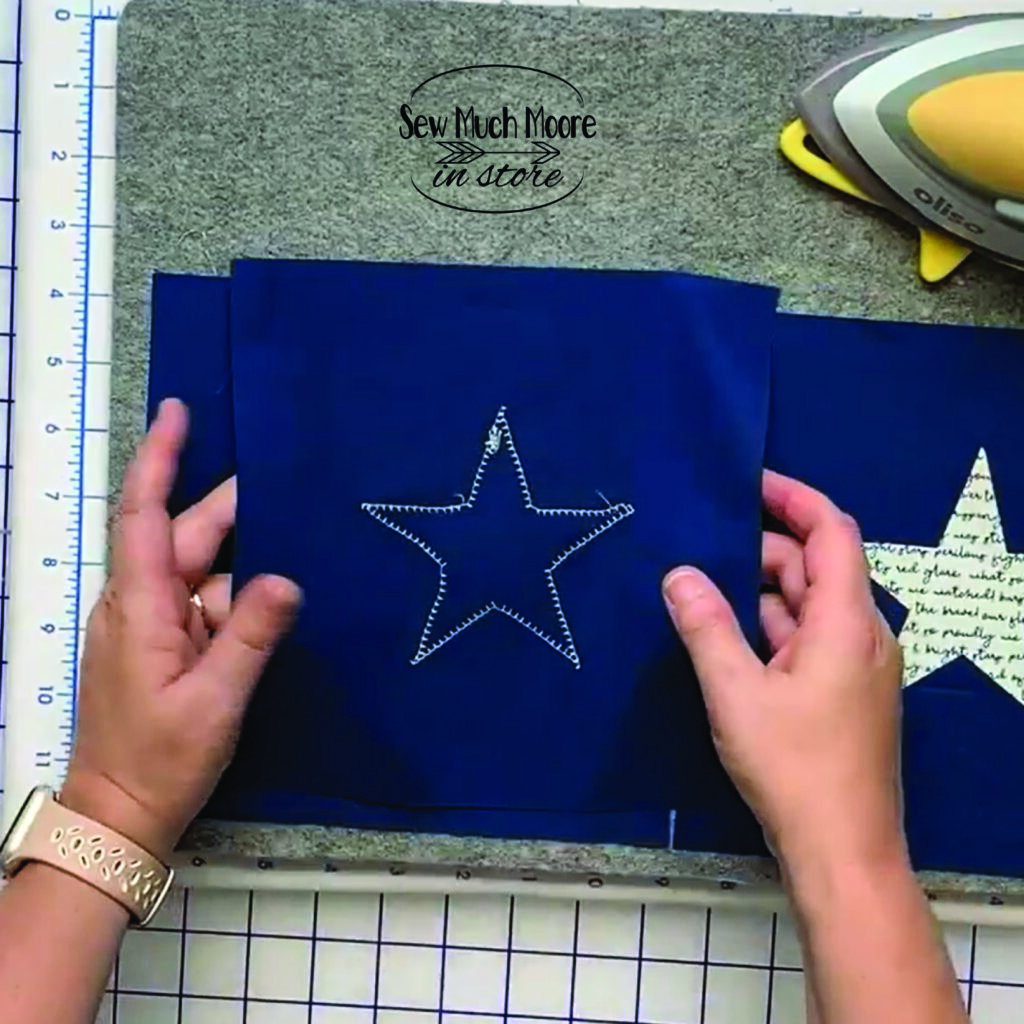
Now comes the exciting part of bringing our star quilt block to life – ironing the appliqué star onto our quilt block. With the fusible webbing securely attached to the back of the star shape, the process of adhering it to the quilt block is remarkably straightforward.


Carefully selecting the ideal placement on the block, I position the star with precision and attention to detail, ensuring it aligns perfectly with the overall design. With the star in position, I gently press the hot iron onto the fabric, allowing the heat to activate the fusible webbing and create a strong bond between the star and the background fabric. The combination of heat and pressure effectively melds the two layers together, resulting in a beautifully appliquéd star that appears seamlessly integrated into the quilt block. As the iron glides across the fabric, I take care to apply consistent pressure, ensuring even distribution of heat and achieving optimal adhesion. This crucial step not only adds aesthetic appeal to the quilt block but also ensures the durability and longevity of the appliqué. The end result is a stunning star that stands out against the backdrop of the background fabric, adding visual interest and dimension to the overall quilt design. With the appliqué firmly secured, our quilt block takes on a new level of artistic charm and becomes a testament to the meticulous process and attention to detail involved in creating a quilt masterpiece. I would recommend that you sew each block into place if you intend to use the quilt. If you are only making a wall hanging, then it is not as important. While the Misty Fuse is a permanent bond, nothing keeps your fabric secure like stitches!
A quick tool review


The process I’ve just described involves the remarkable AccuQuilt GO! BIG system, a game-changer for cutting fabric into precisely sized pieces. As part of this system, I utilized the GO! Fabric Cutting Star Die and the 5” x 10” cutting mat. The cutting mat serves as an opaque carrier for the die, guiding it through the AccuQuilt cutting system with ease and accuracy. By incorporating the Applique Star into my Star Spangled Shield Quilt pattern, I replaced the traditional foundation paper piecing (FPP) Star Block, opening up new possibilities for creativity and saving valuable time in the process. This innovative approach not only simplifies the construction of the quilt block but also adds a touch of modernity and convenience to the overall quilting journey. With the AccuQuilt GO! BIG system, the Star Die and its companion cutting mat, I discovered a delightful way to bring my quilting vision to life while streamlining my creative process.
Watch the Video
If you enjoy visual learning and find videos to be an engaging medium, I highly recommend checking out the captivating video I created, where I take you on a step-by-step journey through the entire process I have just described. This carefully crafted video not only showcases the precise techniques involved in using the AccuQuilt GO! BIG system and the cutting mat to effortlessly cut fabric into the desired star shapes but also provides valuable insights and expert tips to enhance your quilting experience. With this video as your guide, you can witness firsthand the magic of fusing fabric, cutting it with precision, and appliqueing the beautifully shaped star onto your quilt block. Get ready to be inspired as you witness the transformation from raw materials to a stunning work of art, all while gaining valuable knowledge and confidence in your own quilting endeavors. So, grab a cup of your favorite beverage, sit back, and immerse yourself in the mesmerizing world of quilting through the lens of my captivating video.
Quick, Easy and Done!
Discover the world of limitless possibilities with the remarkable AccuQuilt Cutting System, where the art of quilting transcends boundaries and transforms into a captivating journey of creativity. With this revolutionary system at your fingertips, you can effortlessly fashion awe-inspiring quilt blocks adorned with meticulously crafted star patterns that radiate elegance and charm. Whether you find solace in the precise lines of foundation paper piecing or revel in the boundless creativity of applique, both techniques offer an array of stunning results that will leave you in awe of your own quilting prowess.
As you embark on this exciting quilting adventure, let the Star Spangled Shield Quilt serve as your guiding star, igniting your imagination and inspiring you to explore the realm of quilting like never before. With each meticulously placed stitch and every carefully selected fabric, you have the power to bring forth a masterpiece that reflects your unique style and creativity.
I hope this comprehensive tutorial has not only provided you with valuable insights into the remarkable capabilities of the AccuQuilt Cutting System but has also ignited a passion within you to embark on your own quilting journey. So, gather your materials, unleash your imagination, and dive headfirst into the enchanting world of quilting. May your stitches be precise, your colors harmonious, and your quilts be a true reflection of your artistic spirit.
Happy quilting, my fellow creators!
