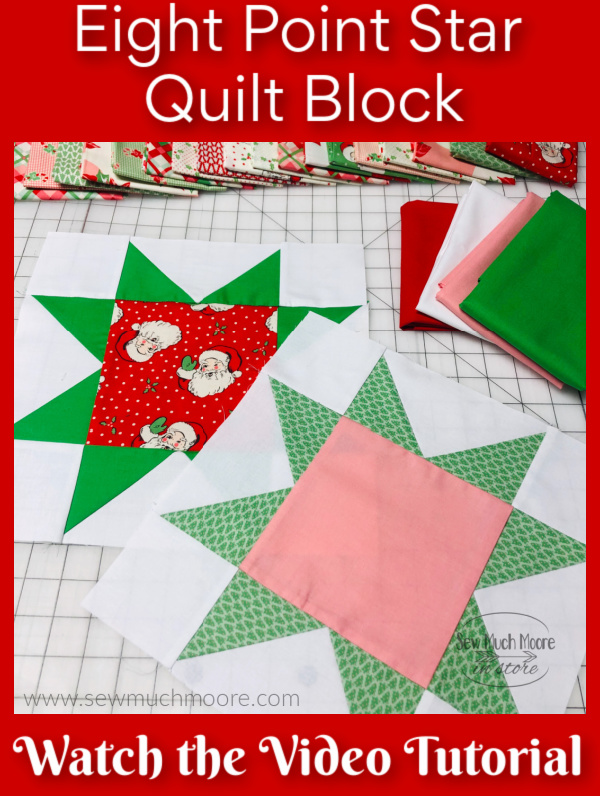
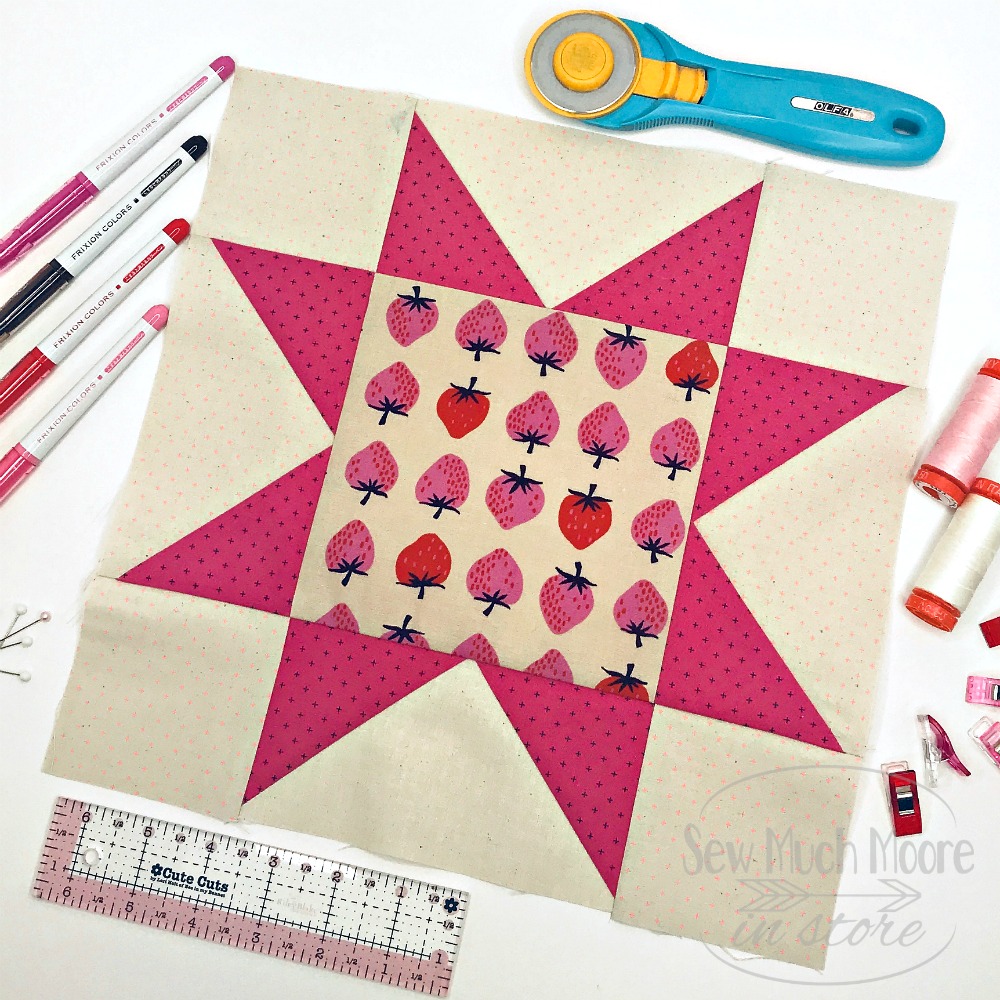
The Eight Point Star Quilt Block
The Eight Point Star Quilt Block has many names! Some may call it the Evening Star Block, while others call it The Sawtooth Star Block. Whatever you decide to name your block it is certainly one that has stood the test of time. In this tutorial, I will show you how to construct this block by making Flying Geese units. Flying Geese can be considered a staple in the quilting world. There are many ways to make Flying Geese. Let me show you one of my favorite Flying Geese techniques while making the Eight Point Star Quilt Block!
This post contains affiliate links for your convenience. ? Read my full disclosure policy here.
Materials List
- You can use solids only or grab your favorite Fat Quarter Bundle
- I used a solid White for my background fabric
Supply List
- Sewing Machine (I used my Juki TL2010Q in the video tutorial)
- Cotton Thread (I recommend Aurifil 50 wt)
- Rotary Cutter with sharp blade
- Frixon Marking Pen (these are great for helping with seam allowance)
- Acrylic Ruler
- Self Healing Rotary Cutting Mat (I have a rotating mat and it’s awesome)
- Iron & Ironing Board (I highly recommend a Wool Pressing Mat)
Cutting & Marking
To get your cutting measurements, you have a couple choices:
Option 1: Download for free.
To receive a 100% discount coupon code for this quilt block pattern, you can subscribe to the Sew Much Moore Newsletter. AFTER you sign up, you’ll get a second email with your coupon code for the Quilt Block Pattern!
(PS – if you have trouble finding the pattern as a subscriber, please contact me)
Option 2: Purchase your cutting measurements
Use this link to purchase the cutting measurements file. You’ll be emailed a download link for a file that references the instructions in this tutorial and provides the cutting measurements for this Quilt Block. You’ll also be able to download this file in my shop.
Once you have your fabric pieces cut, follow the directions below.
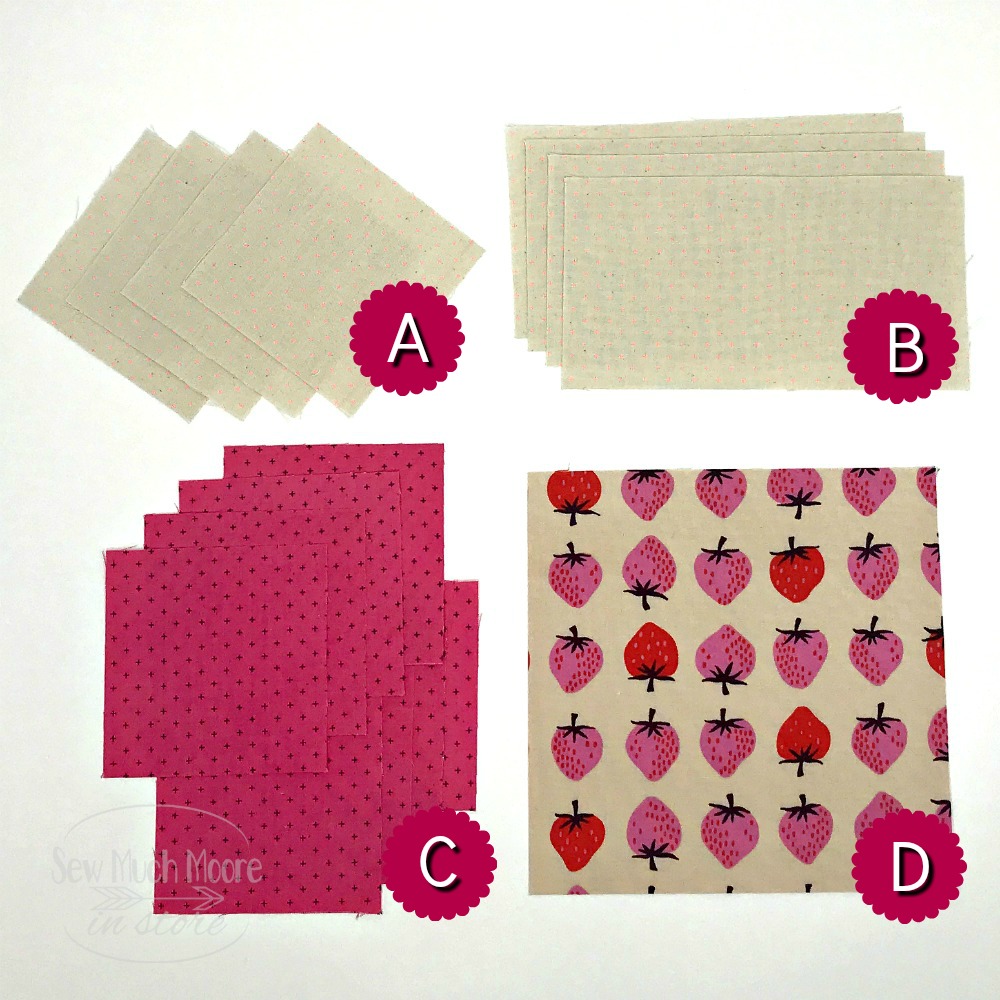
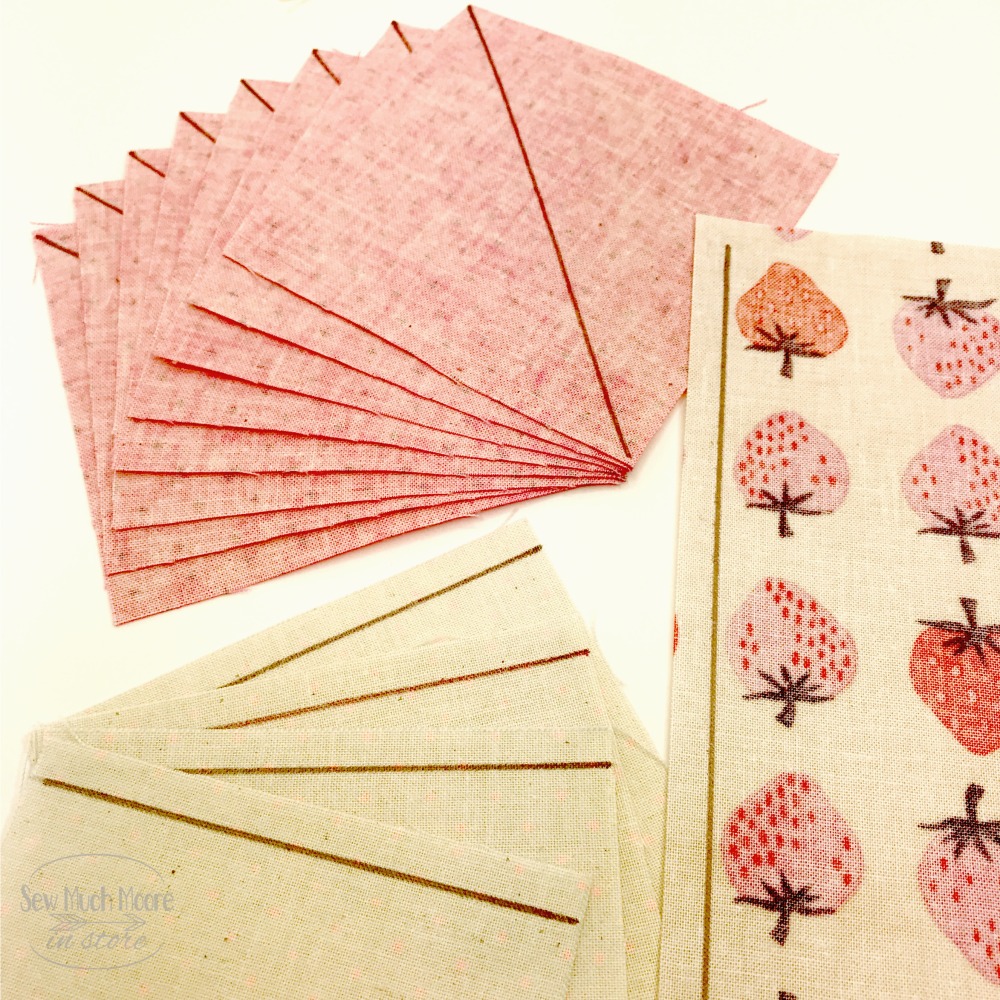
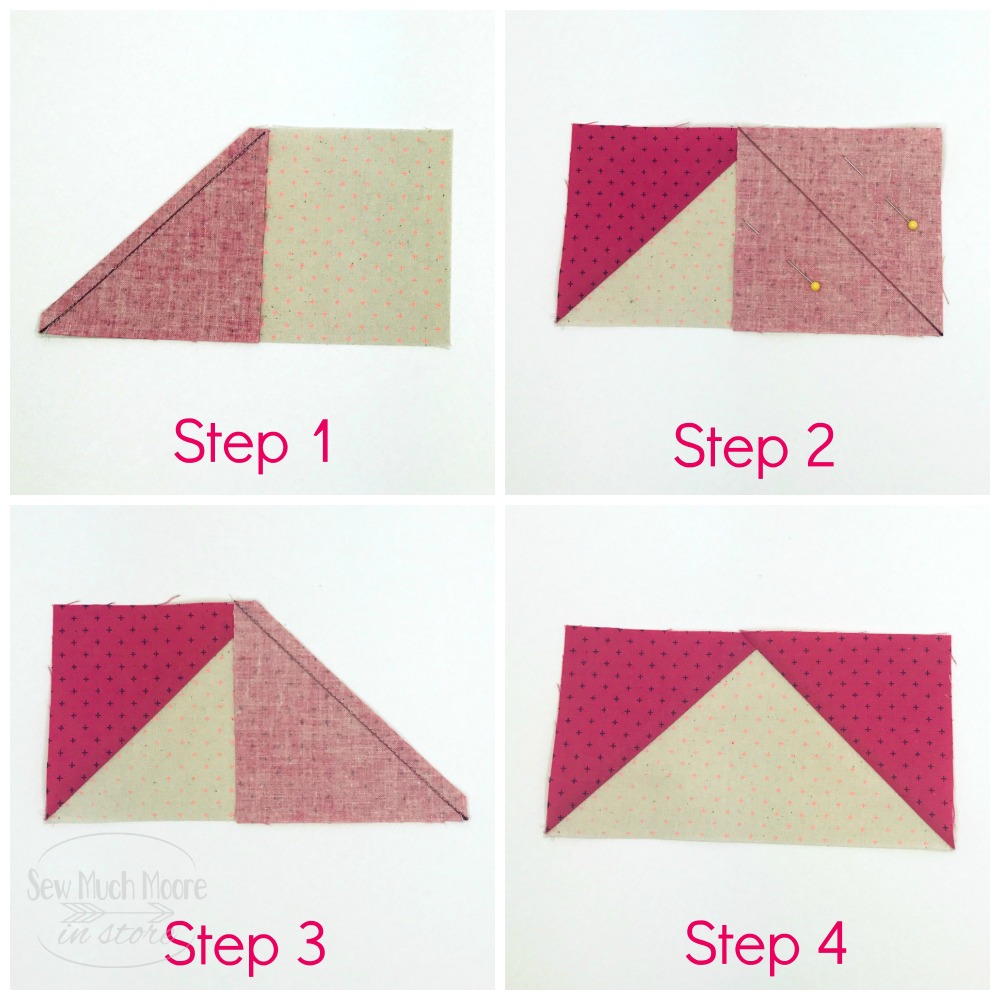
For really accurate piecing, I would recommend marking your sewing lines on your cut fabric pieces. Marking your sewing lines can help you maintain your quarter inch seam allowance, which leads to excellent quilt blocks! One of my favorite marking tools are Frixon markers and pens. The ink in these pens and markers will disappear when pressed with a hot iron – They are super duper handy! Mark pieces (C) with a diagonal line. Then mark your quarter inch seam allowance sewing lines on your remaining fabric pieces (A, B, & D).
Flying Geese Units
- Step One: Begin by laying piece (C) on the top and right side of a piece (B). Sew along the diagonal marked line. Cut off the excess fabric and set your seam with an iron. Open the seam and press.
- Step Two: Next, take another piece (C) and lay it on the top left side of the same piece (B). Sew along the diagonal marked line.
- Step Three: Cut off the excess fabric and set your seam with an iron. Open the seam and press.
- Step Four: Make the other (3) Flying Geese units.
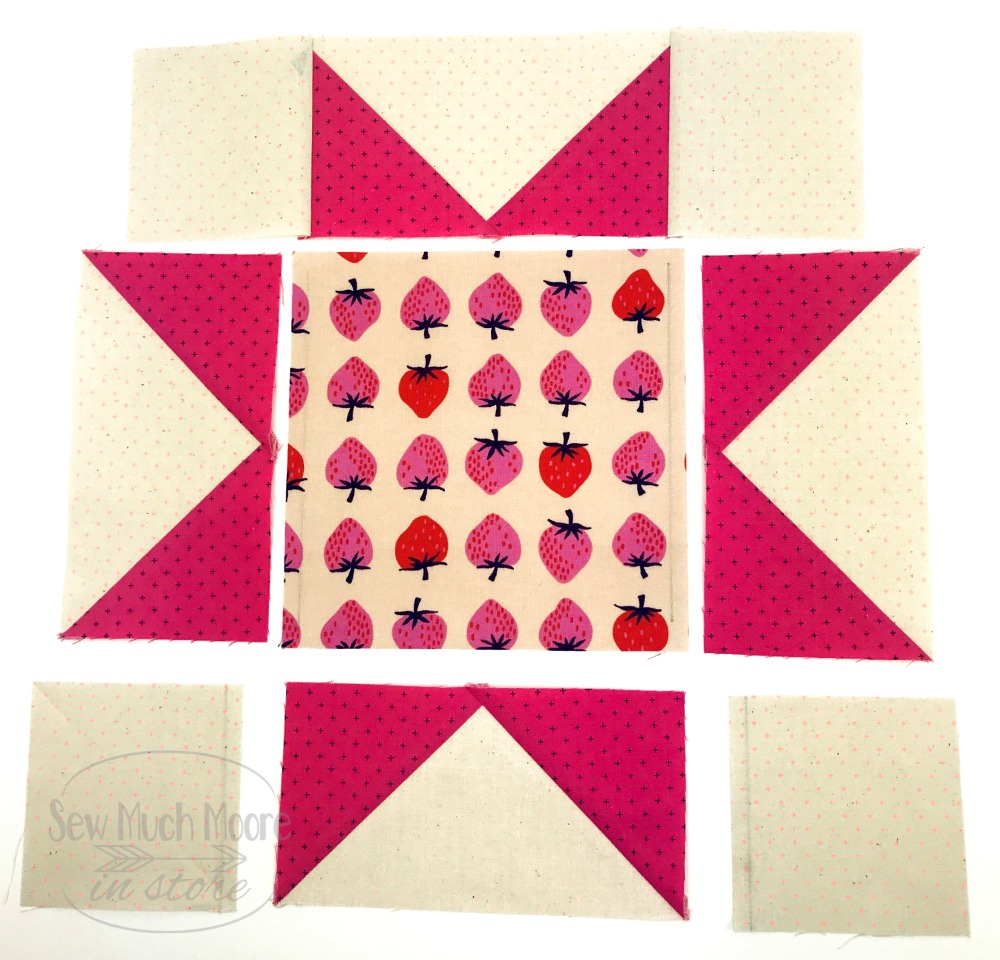
Assembling the Quilt Block
Now that the Flying Geese units are all assembled, we just need to complete the rows. Using your marked quarter inch seam, sew the pieces (A) to both ends of 2 of the flying geese units. Sew the remaining two flying geese units to the center square. Be sure to press your seams in the opposite direction so you can easily nest your rows.
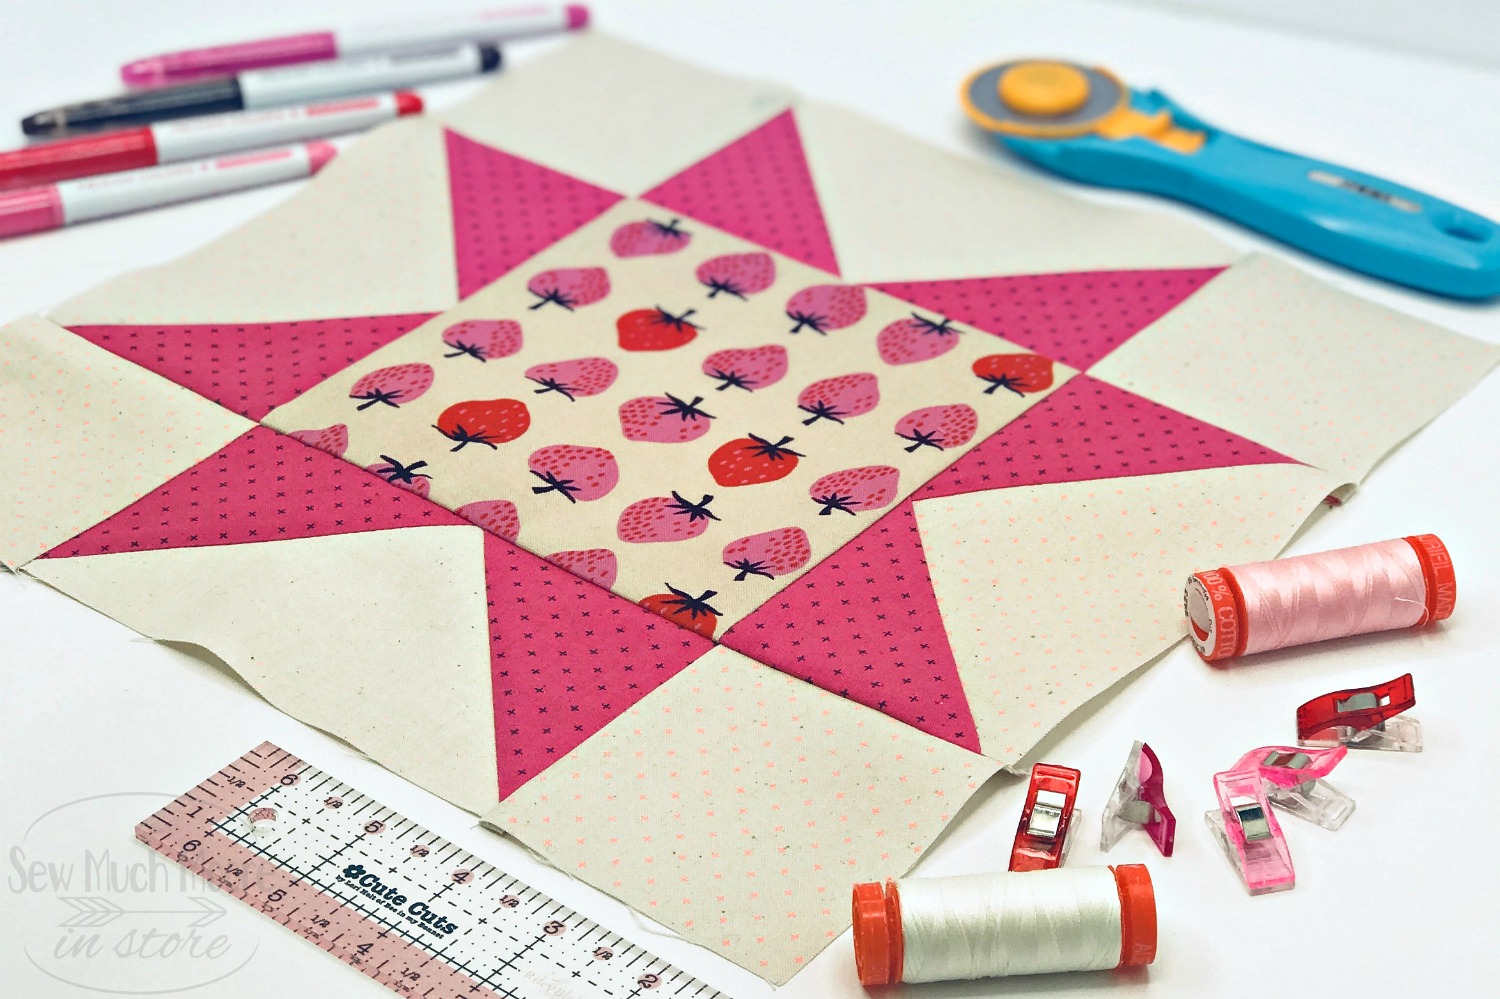
Don’t you just love this block? I especially love this color combination! You could also use just one main fabric print for pieces C & D for a more traditional block. Either way – the Eight Point Star is a really fun and simple Quilt Block. I hope you make lots and lots of them!
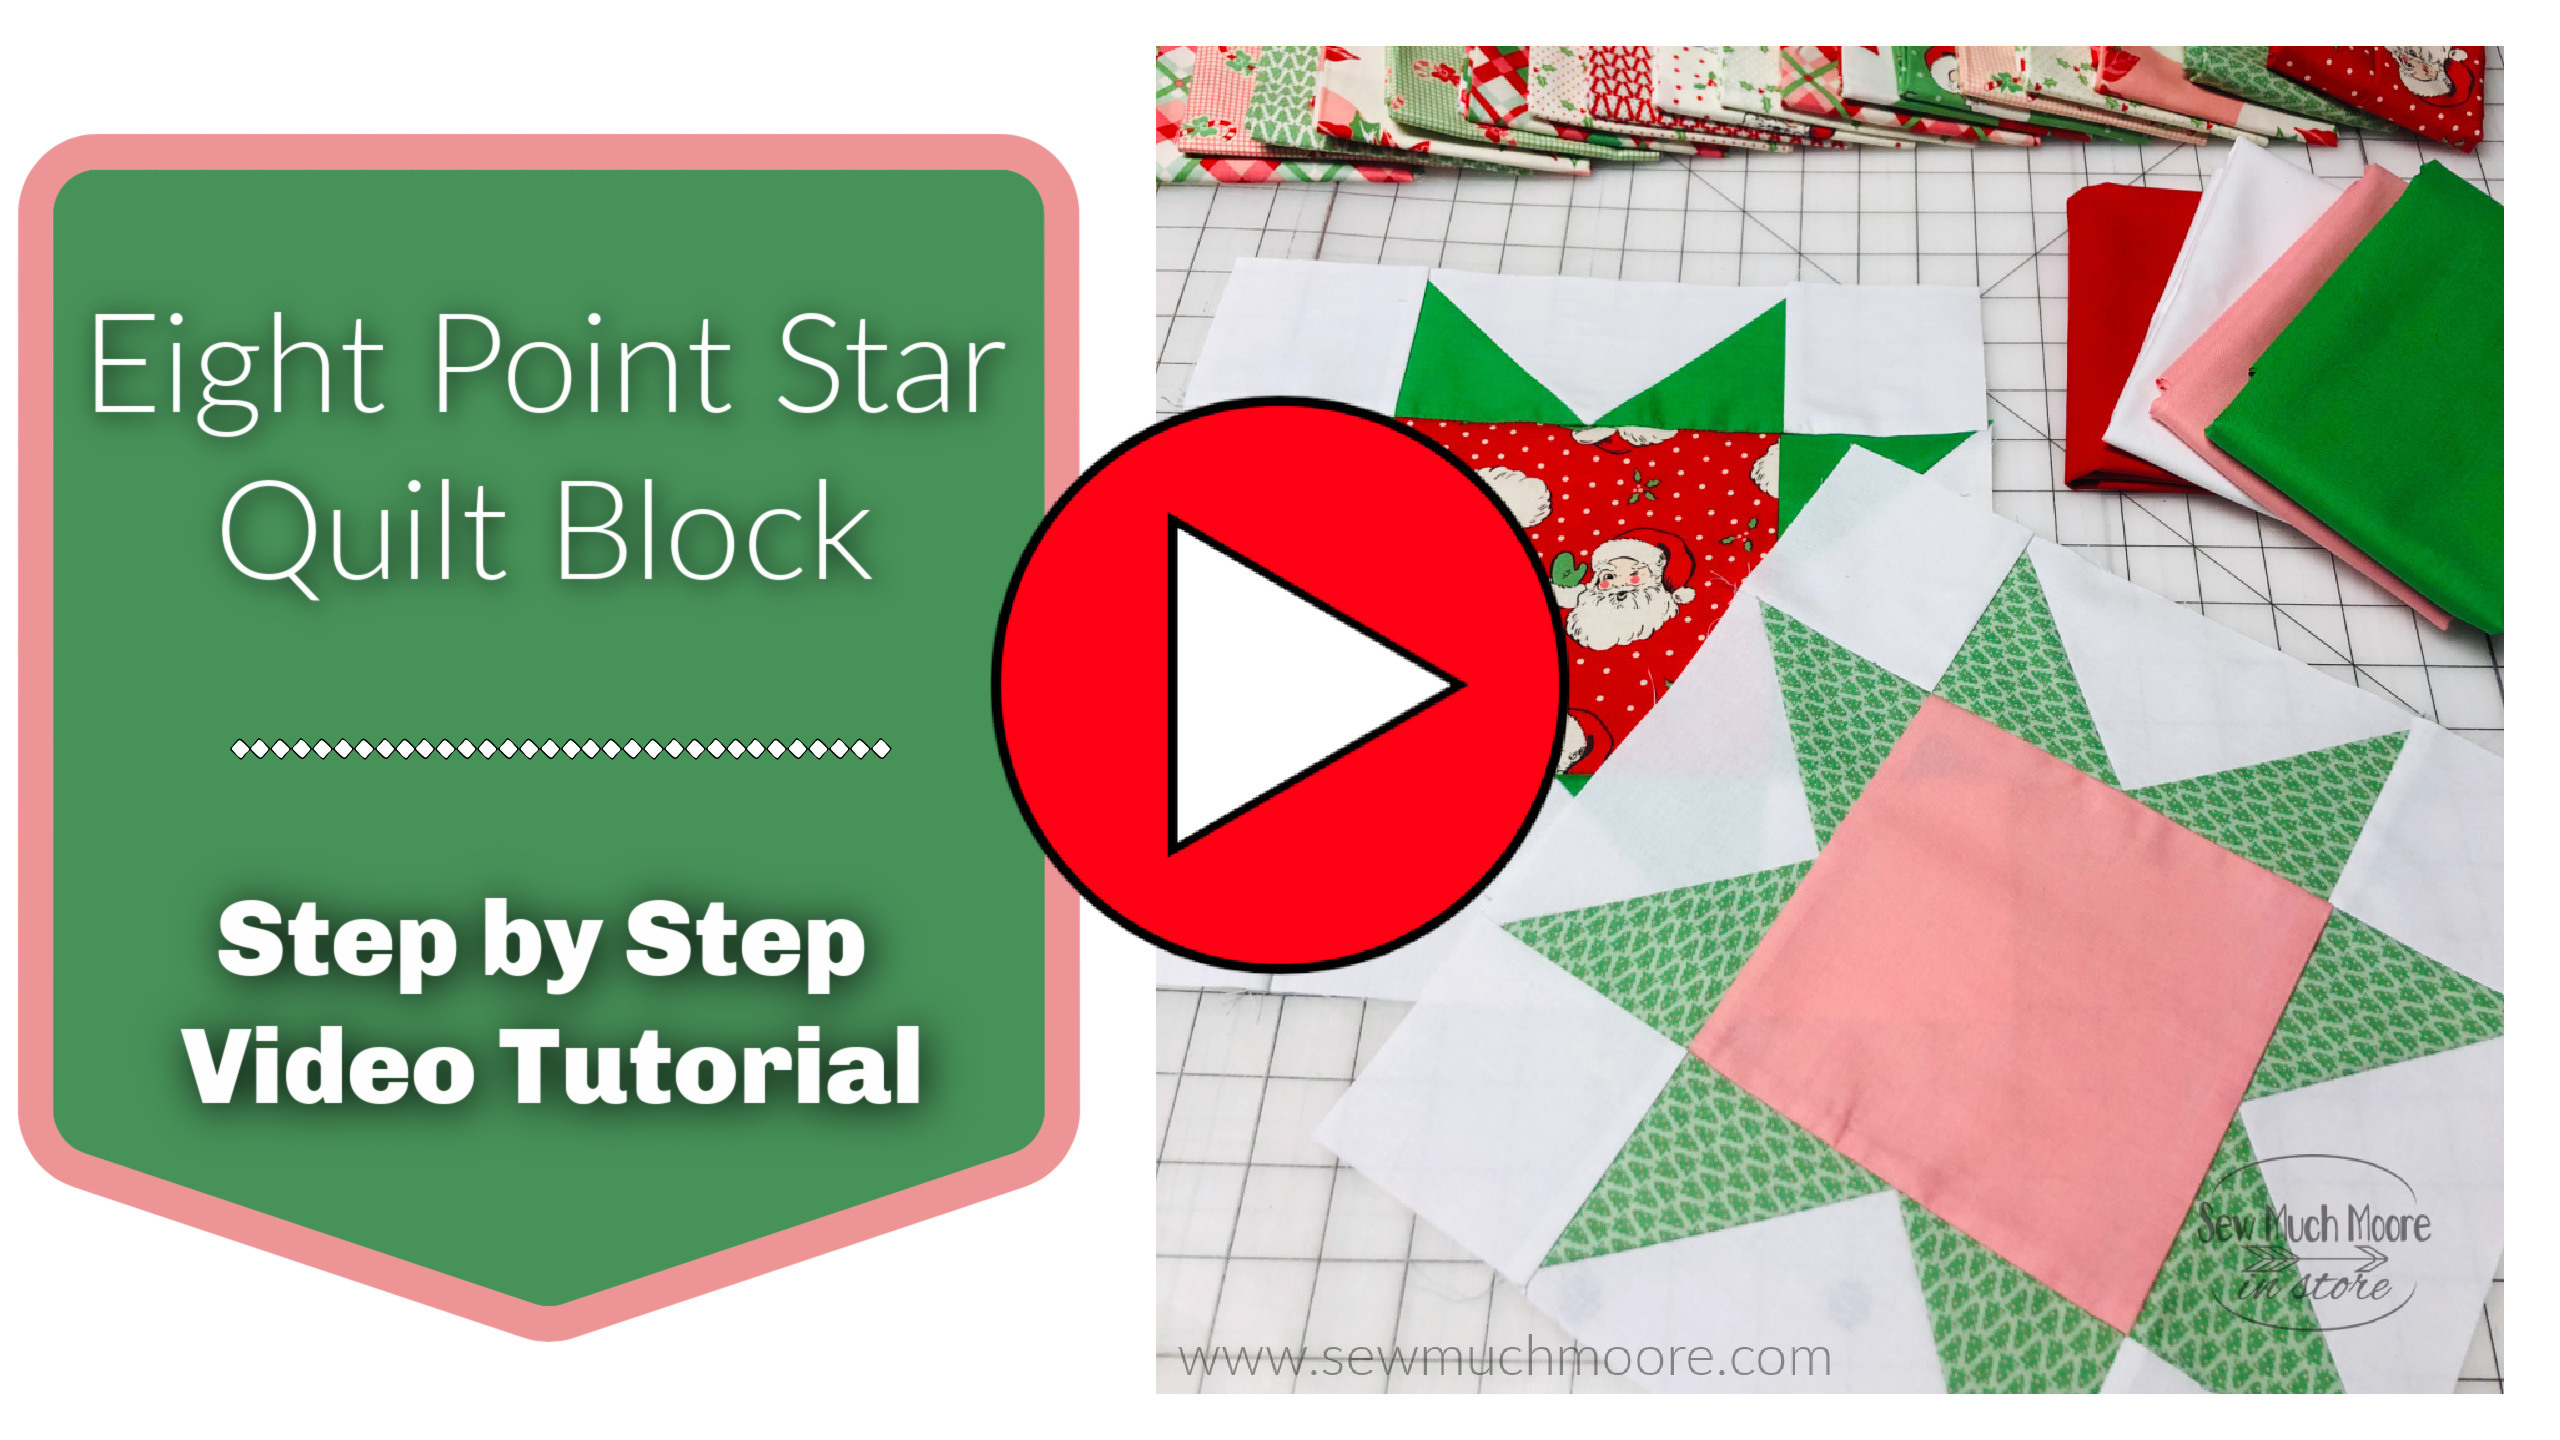
I recorded a video, which shows you step by step instructions of how to make this block yourself!

Thanks so much for the pattern!! Your directions are clear and concise!! LOVE your tutorials!!!