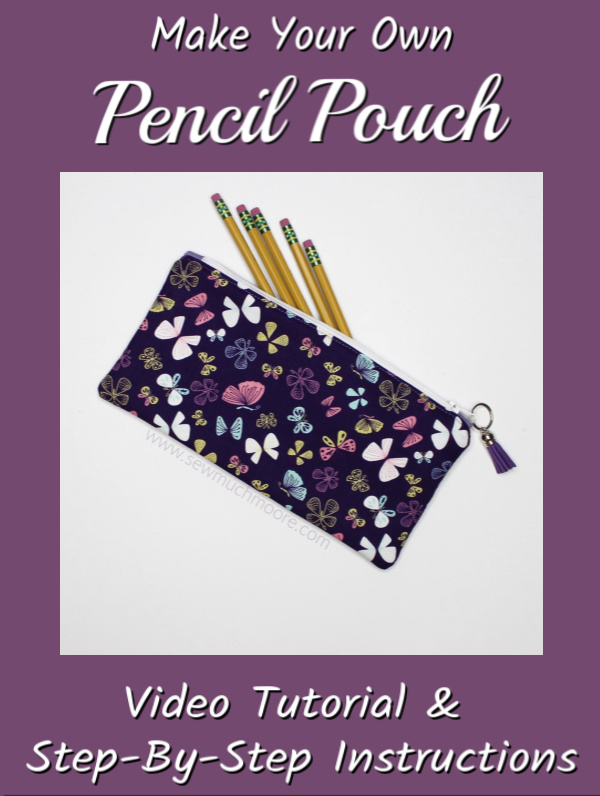
Make your own Pencil Pouch
Making your own pencil pouch is fun and simple! In this tutorial, I will show you how to use a nylon zipper and your favorite fabrics to create your very own pencil pouch. Pencil Pouches are perfect for every day and especially for back to school! This versatile project make a quick and easy gift too! Let’s get started and don’t forget to watch the video too!
This post contains affiliate links for your convenience. ? Read my full disclosure policy here.
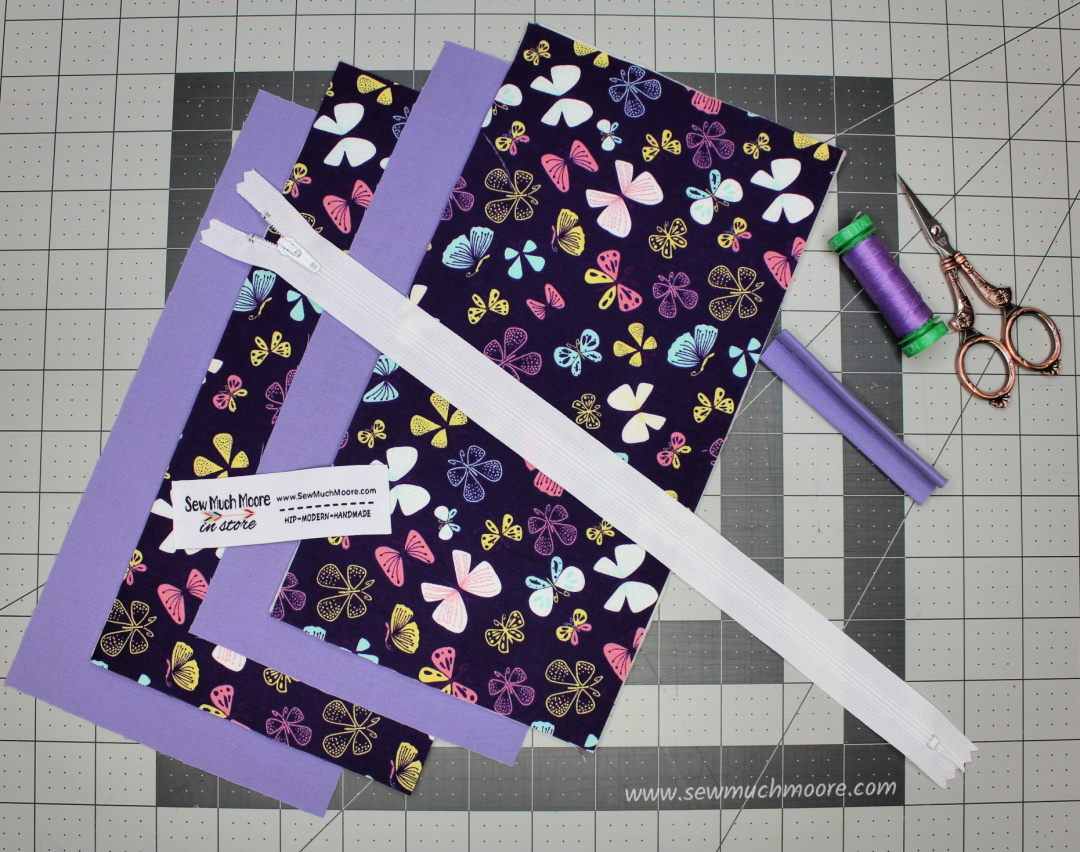
Make your own pencil pouch – Materials List
- Fat Quarters are perfect for this type of project! Shop my Fat Quarters RIGHT HERE!
- Qty (2) Exterior fabric pieces: 10.5″ x 5.5″.
- Qty (2) Interior fabric pieces: 10.5″ x 5.5″
- Qty (2) thin batting pieces: 10.5″ x 5.5″ (I use batting scraps for my pencil pouches)
- Zipper Tab fabric: 2″ x 4″
- Qty (1) 13″ Nylon zipper tape and zipper slider with pull – Check out the zipper choices in my online shop!
- Optional label – Check out Dutch Label Shop
Make your own pencil pouch – Supply List
- Sewing Machine
- Cotton Thread (I recommend this thread)
- Rotary Cutter with sharp blade (no kidding about a sharp blade)
- Cutting Mat
- 505 Fabric Spray Adhesive (I fused my batting to the back of my exterior fabric)
- Seam Roller (I use this instead of an iron)
- Sewing Pins and Wonder Clips
- Thread Snips
assembly instructions
- Firstly, cut off both ends of your nylon zipper. Be sure to move the zipper head to the middle. Next, take your zipper tab piece and cut this in half. Secure the zipper tabs on each end of your zipper, using clips. Sew the zipper tabs to the zipper tape ends. For an in-depth tutorial of zipper tabs, check out THIS ARTICLE.
- Secondly, place the front of the exterior fabric piece, right side up. Place the zipper along the top raw edge, the wrong side down. Clip in place and cover this with the interior fabric piece. Clip all together and sew along the top edge with your zipper foot. Be sure to secure this side with topstitching.
- Next, follow the same steps on the back side of the pencil pouch.
- Finally, OPEN YOUR ZIPPER! (This is important). Secure the exterior and interior pieces together (right sides together) and secure with clips. Sew along the entire perimeter of the project, but leave a 3-4″ opening on the middle of the interior fabric side.
- Now you can flip your project right side out and sew the opening closed
Sewing Tip!
You will be sewing through many layers when you get to the zipper junction. I like to take it slow at this point and use a chopstick to help the fabric through.
I created a YouTube tutorial to help you learn to make your own pencil pouch.
I hope you learned a lot from this tutorial. Don’t forget to subscribe to my YouTube Channel!
I would love to know how you are going to use this technique in your next project.
Be sure to share your creations in my Bag, Wallets and Accessories Facebook Group!
Happy Sewing!

Love it! Thanks so much for sharing these fun projects with us. I can’t wait to make a bunch of these! Sew quick and fun!
Thankyou very much for your instruction and help very kind of you. I cannot wait to give this a go regards Rotha Australia
Thank you. Really like the pattern