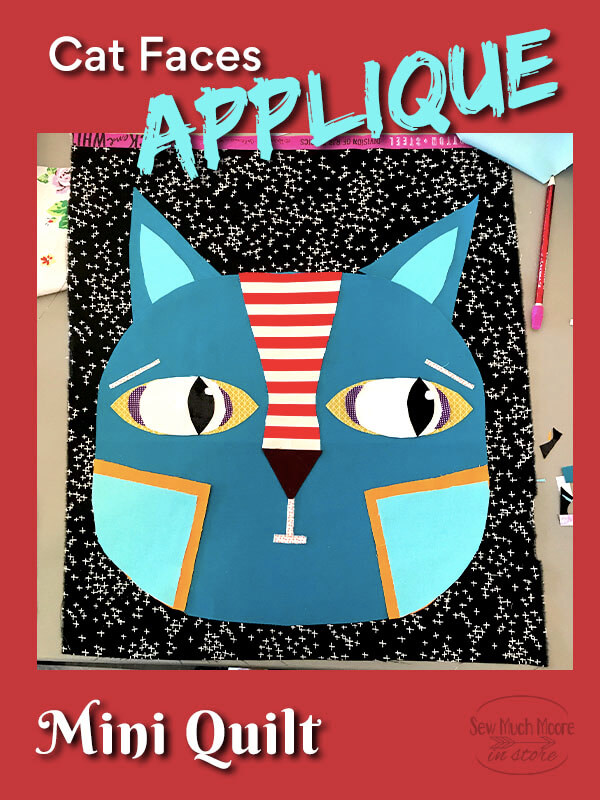
Cat Faces Quilt
In this article, I will show how I made my Cat Faces Quilt! This is a whimsical art quilt that incorporates machine appliqué. I have always been a cat person! I wouldn’t go as far to say that I’m a “Cat Lady” because I only have one cat. I had so much fun making this truly unique quilt. Let me show you how I made it!
The Cat Faces concept and process is an original idea by Melissa Averinos. I took a full day class with Melissa, who is a wonderful instructor. If you ever get a chance to learn from Melissa – I highly recommend her! You can learn more about Melissa RIGHT HERE.
Designing the cats

Melissa instructed us to make simple line drawings of cat faces. As you can see – I will not be doing any tutorials on drawing! LOL! Actually, the simpler the drawing – the easier it is to make out of fabric!
Creating the Cat
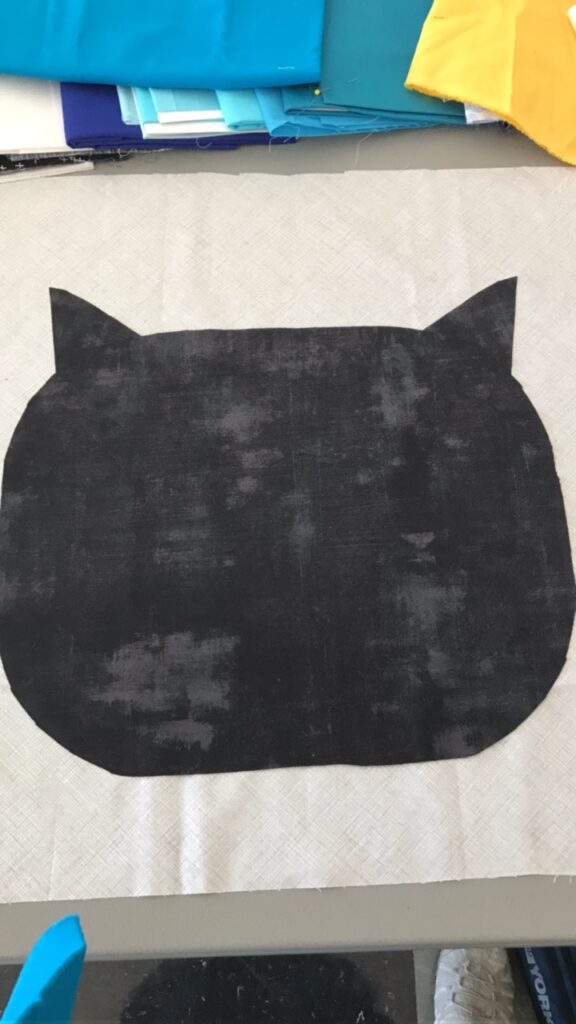
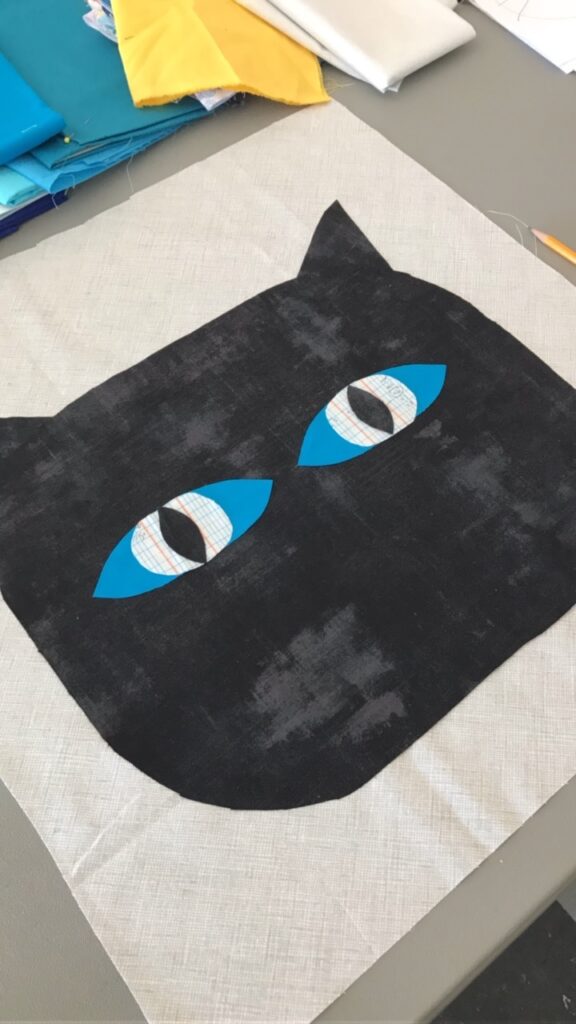
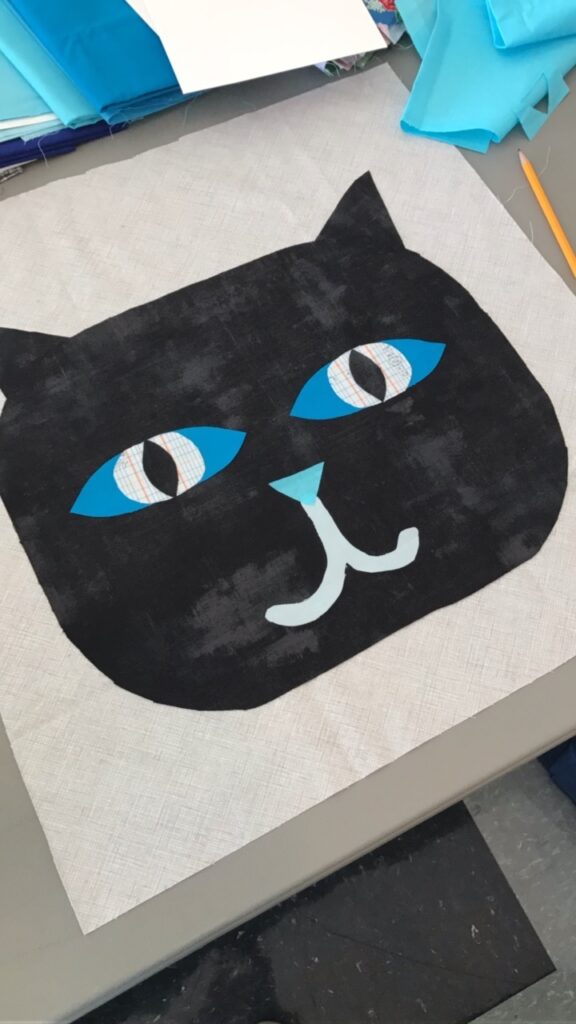
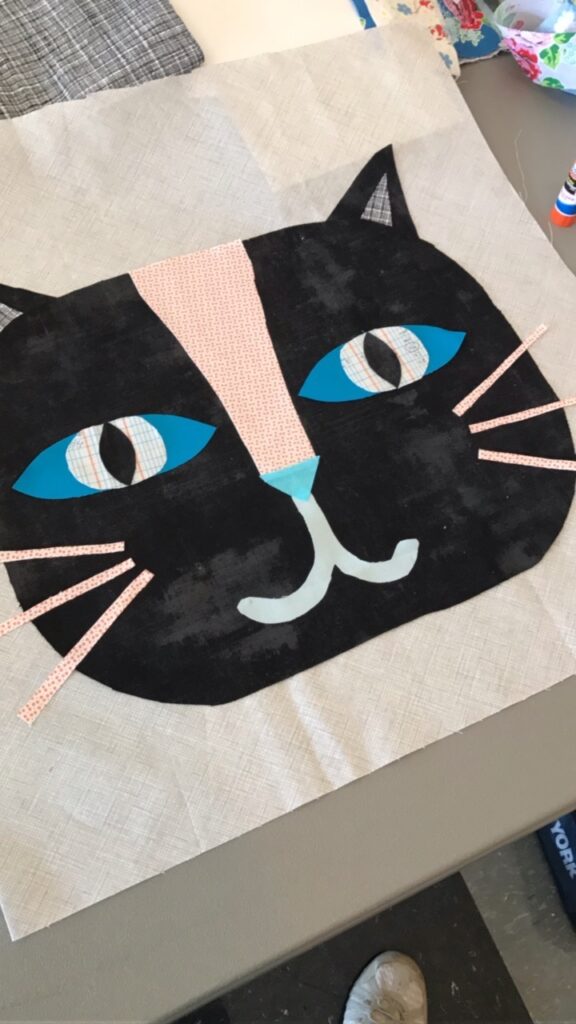
The second part of the process was cutting out the fabric and layering the different elements of the cat face. We initially used a washable glue stick, but later I added Misty Fuse to make the pieces more secure.
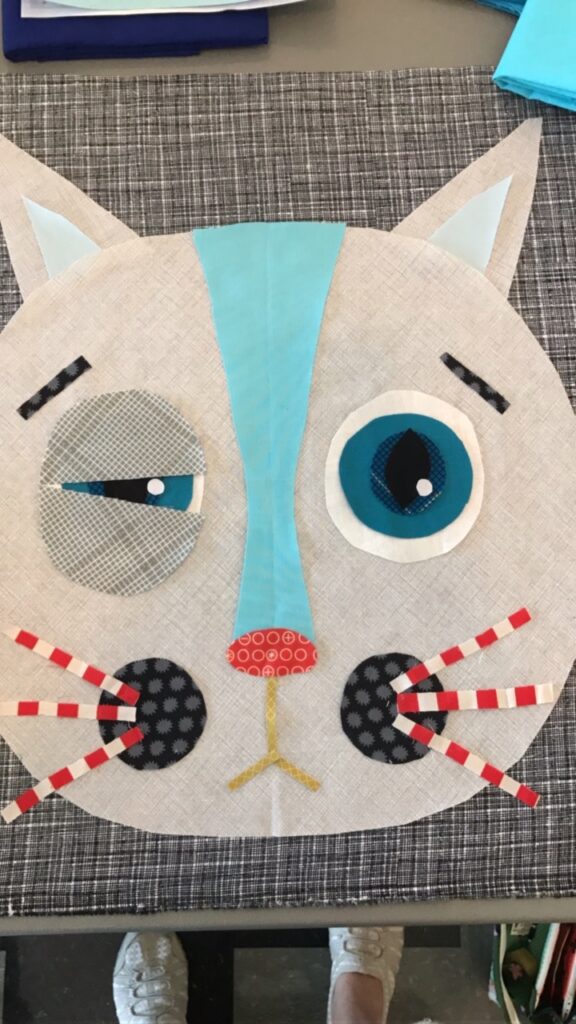
Using a temporary adhesive, such as a glue stick, helped me decide how I wanted each cat face to look. Check out the progression of this cat… Just by moving his eyelids – he takes on an entirely different appearance!

Raw Edge Applique
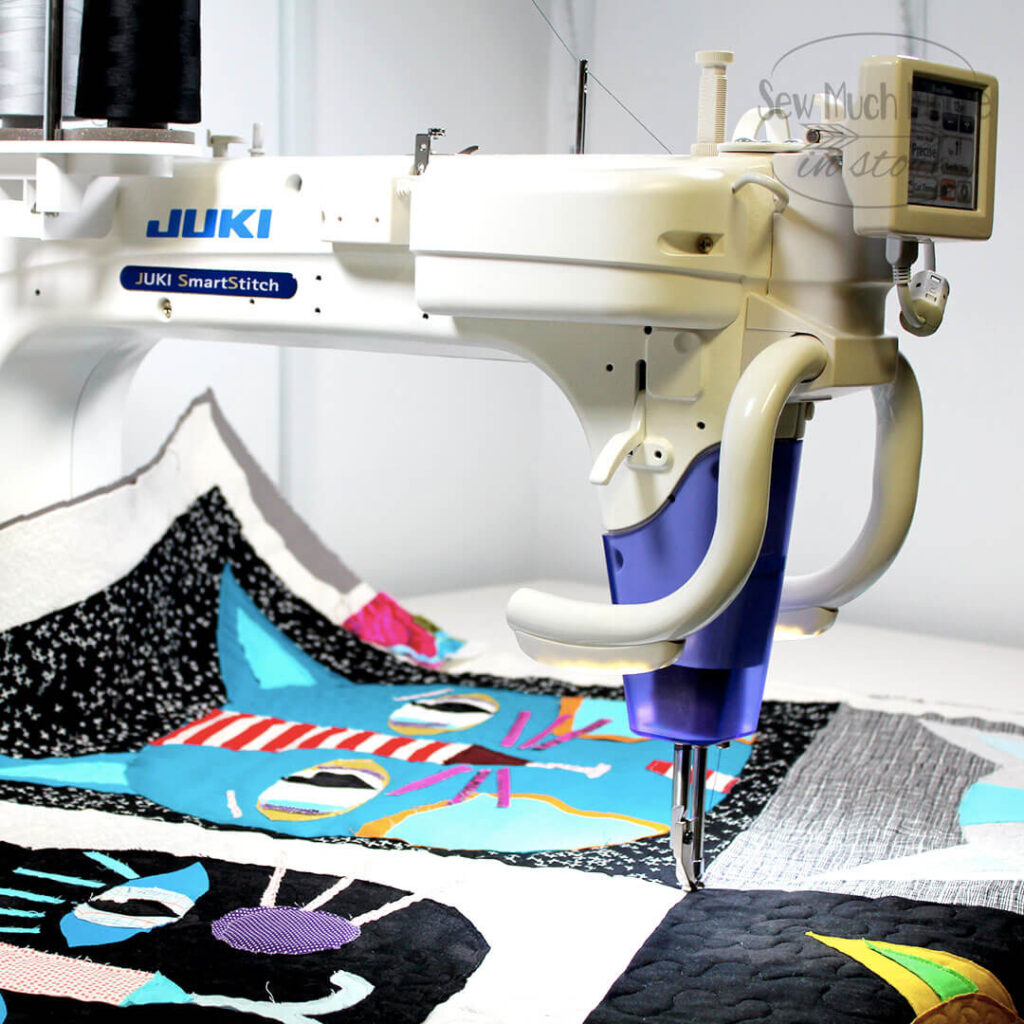
I used my J-350 LongArm Quilting machine to quilt this project. The 18” throat space gives me loads of room to move the quilt underneath the needle.
Initially I spent way too much time worrying about how I was going to quilt this project. In the end, I decided to leave the edges raw. My thinking is that because this is a wall hanging – I wont need to worry too much about the fabric fraying.
This quilting machine is truly wonderful, especially for smaller sewing spaces. What’s really nice is that the head of the machine is completely removable and can be attached to a quilting frame. I’m sure that when my kids are all grown and finished with college, I will be able to take over one of their bedrooms!
I used my open toe foot and also my ruler foot. I switched feet when it made sense and I was happy with the results. I don’t even know why I spent so much time worrying about how to quilt this quilt!
Be sure to watch my video tutorial and checkout some of the tips in action!
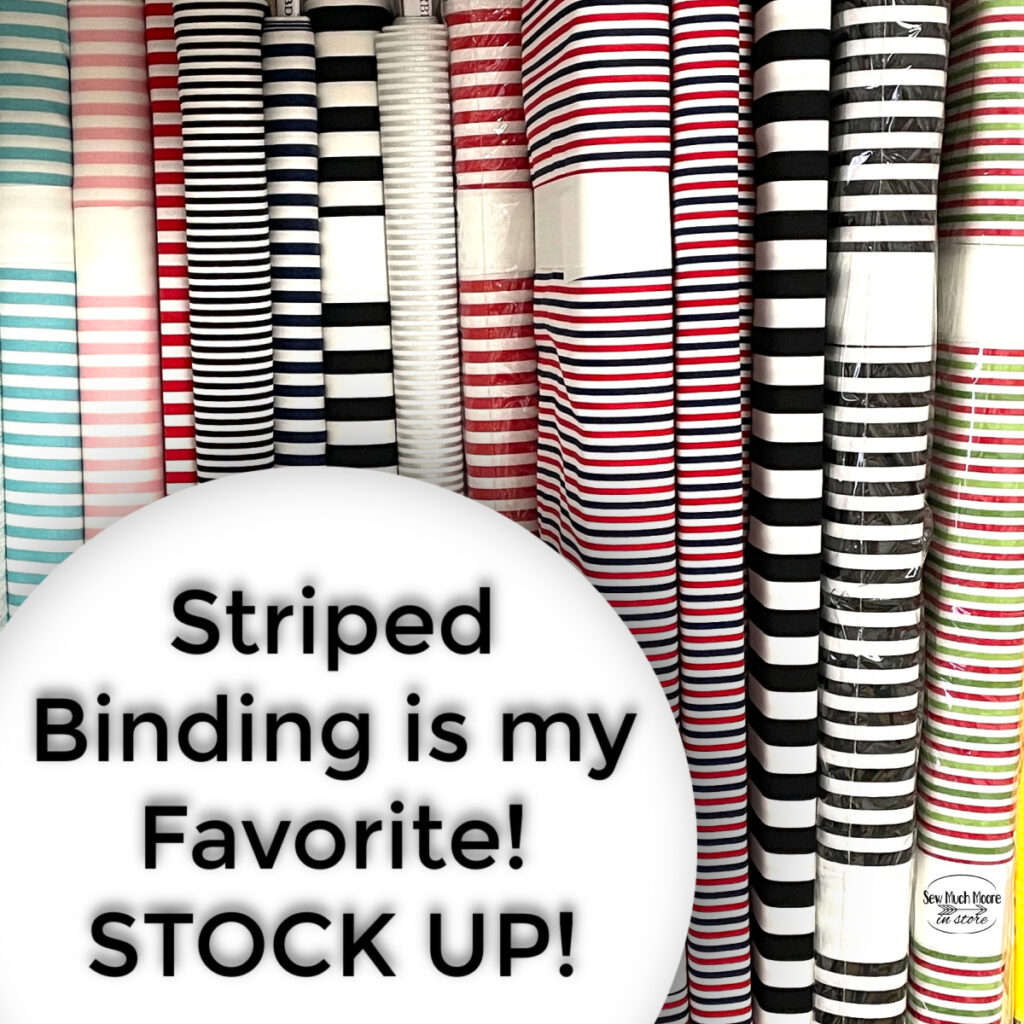
I used stripped binding to finish this quilt. You can learn more about that right HERE.
If you love striped binding (as much as I do), you will love the selection I have in my online shop! CHECK IT OUT!
Finished Cat Faces Quilt
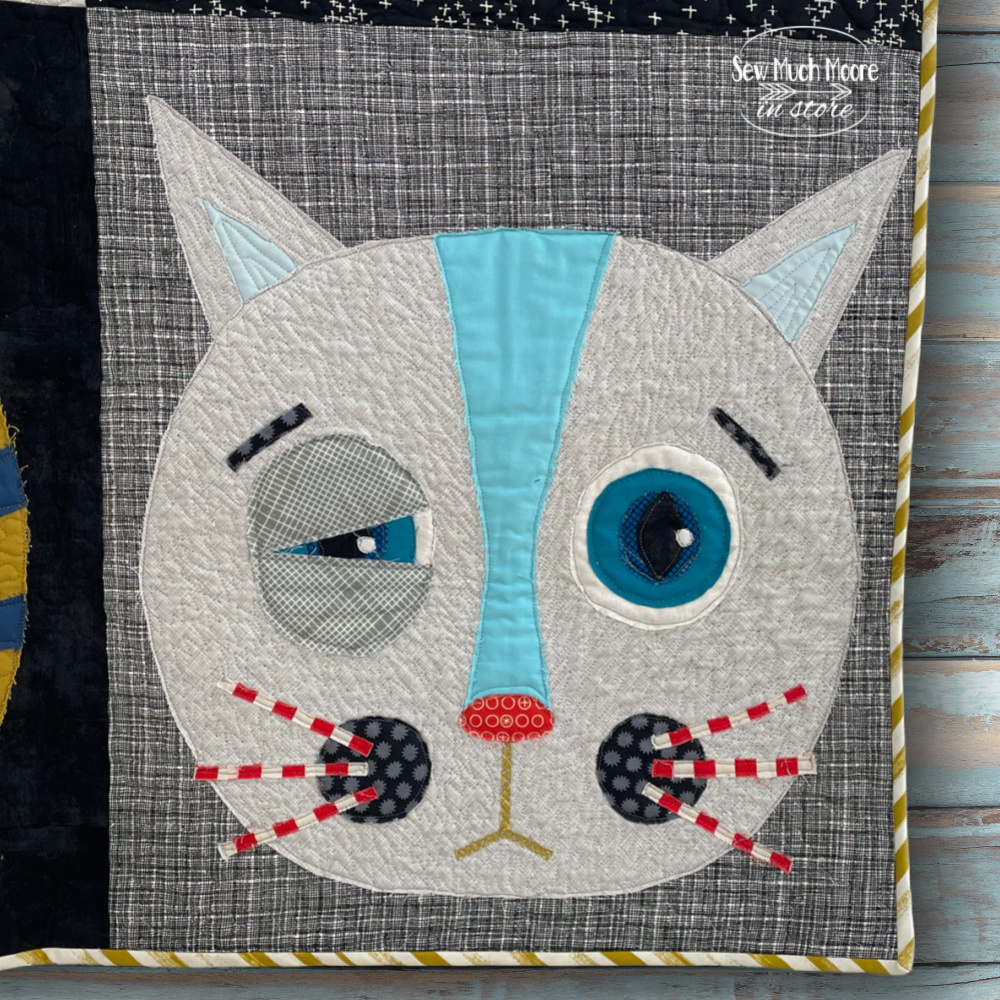
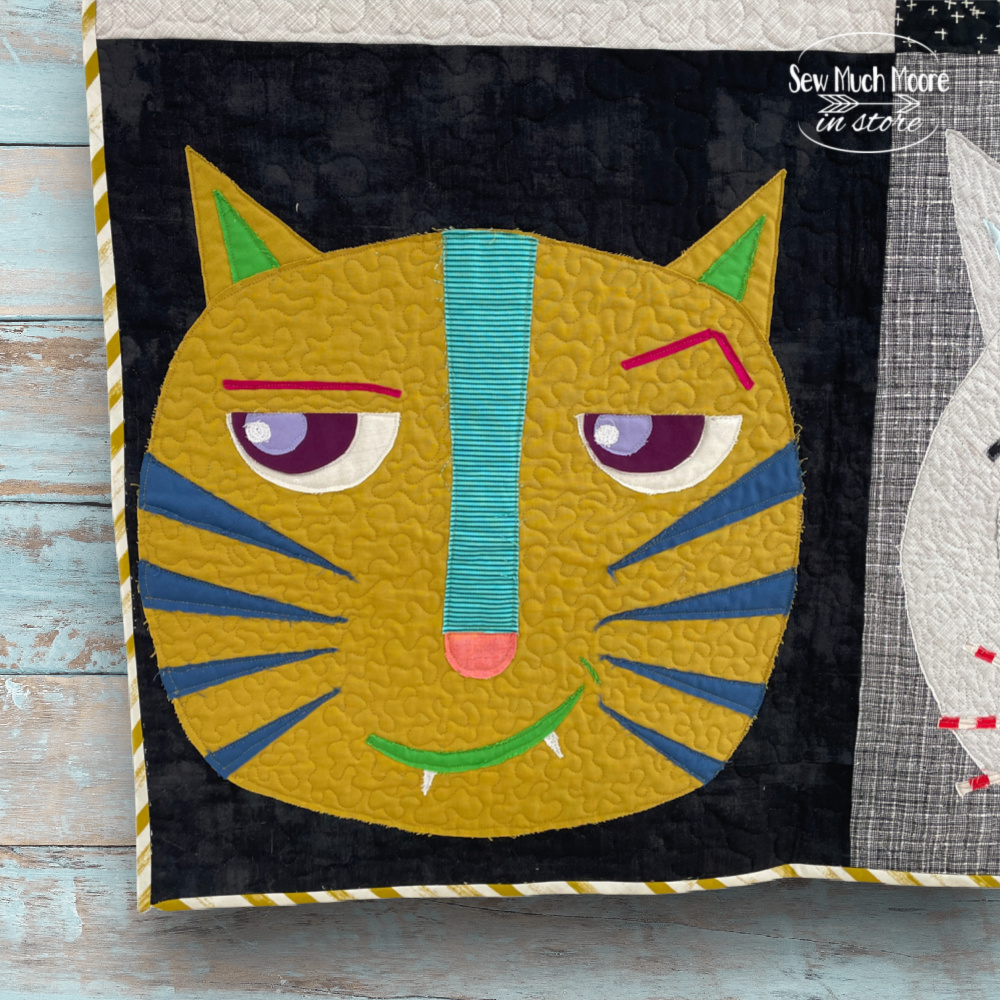
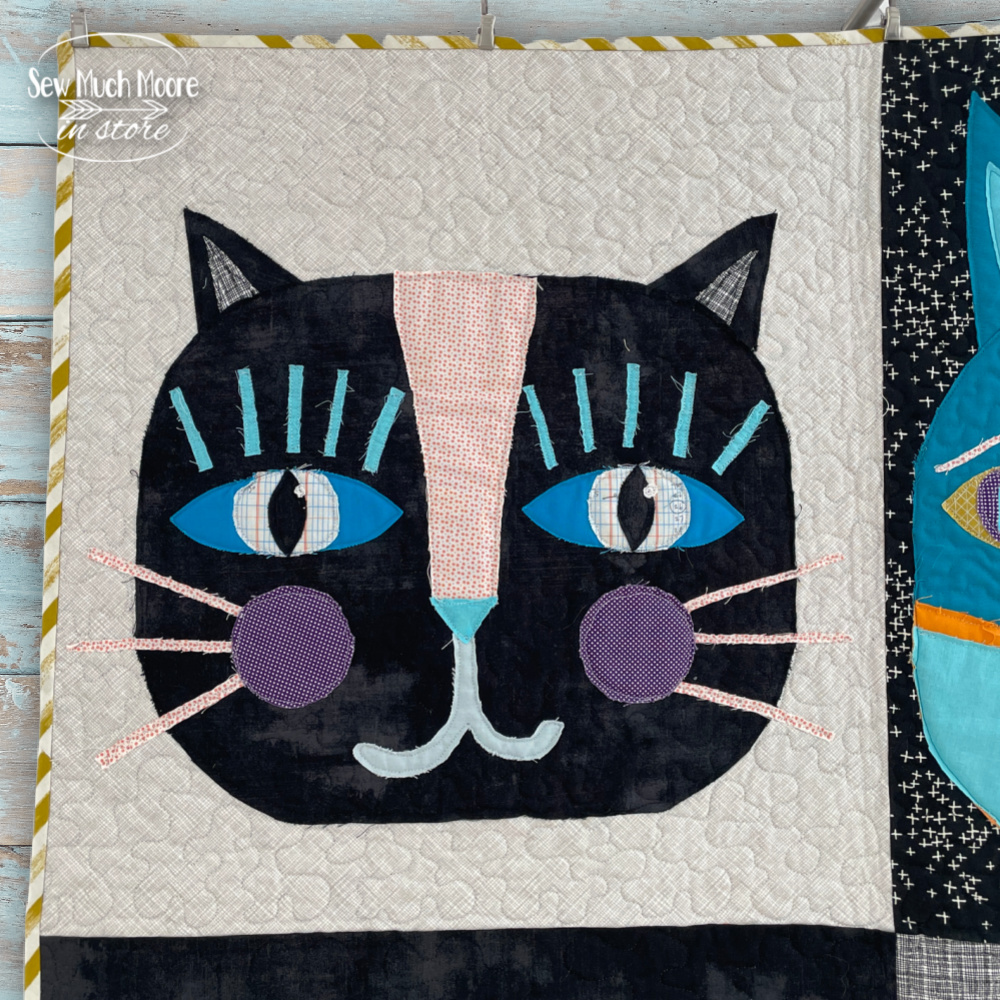
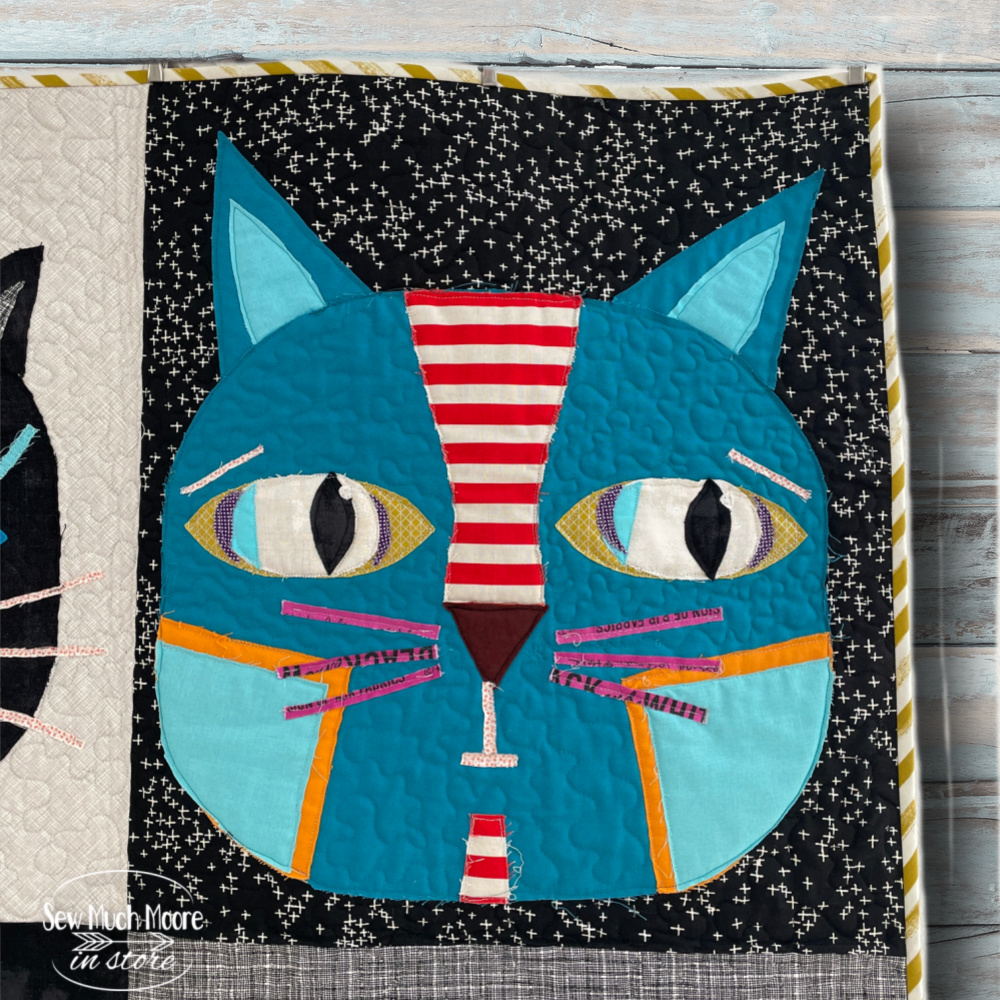
I love how the kitties came together and quilting this (with raw edge appliqué) was very liberating! I am not planning to run this through the washing machine (this is an art quilt that will be for hanging on my wall). If you plan to wash a quilt, I would expect some unraveling of the fabric (even if you stitched it down). Raw edge appliqué is perfect for wall quilts and art quilts! My Cat Faces Quilt finished at 37″ x 42″.
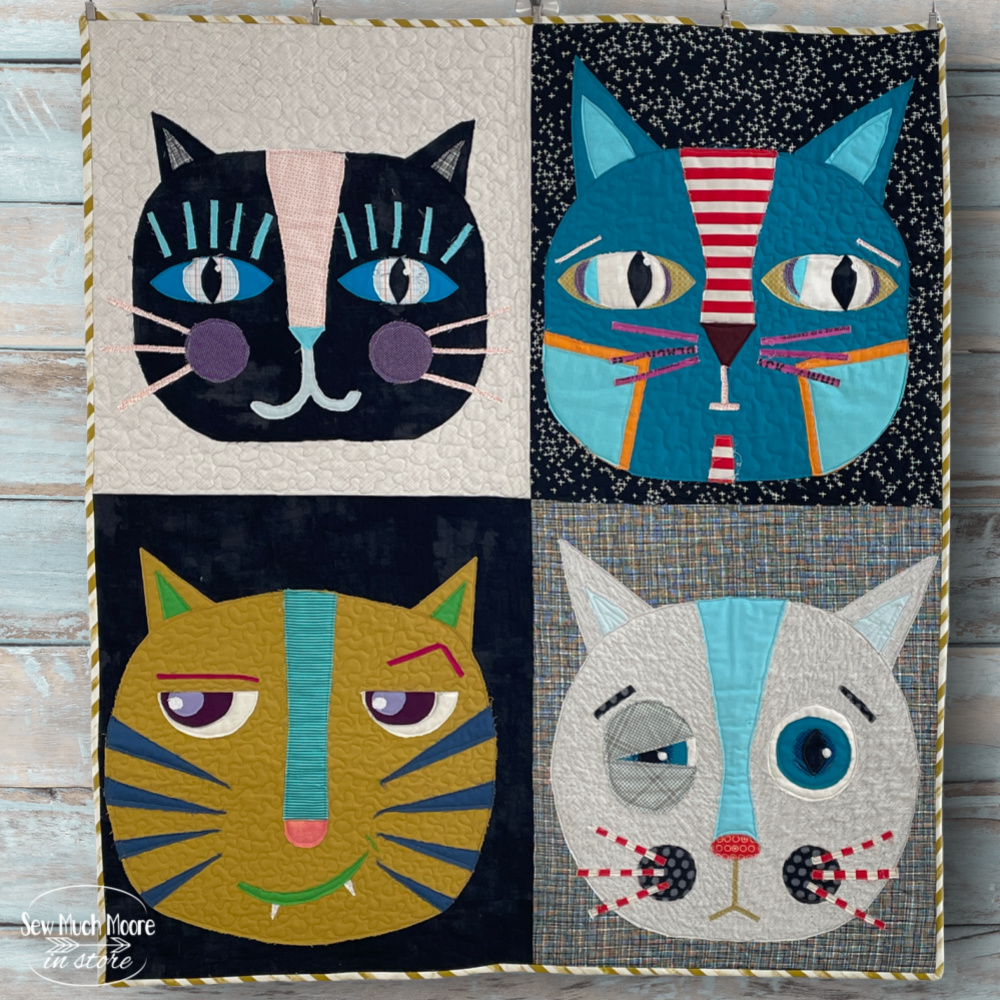

Let me know which kitty is your favorite in the comments below!
such a fun quilt! I love it!
Thanks Toni! I’m glad to hear it!
I would like to make something like this. Maybe not with cats, but with frogs. My 3 year old son loves frogs!
Becky – what a fun idea! I would love to see that! Make sure you share this on my Modern Quilts Facebook Group! https://www.facebook.com/groups/415788172154894
really cute! I liked the cat face that you were quilting in your video. The little fangs were too cute!
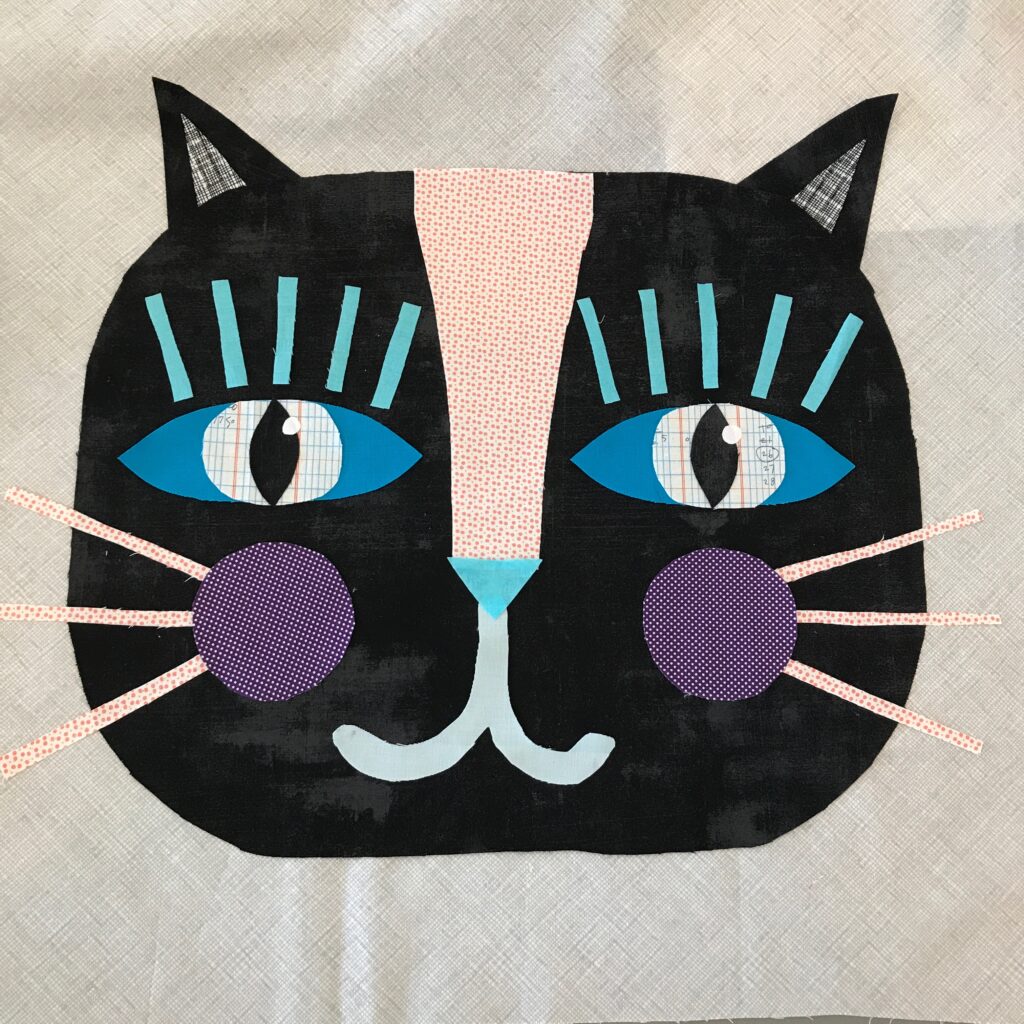
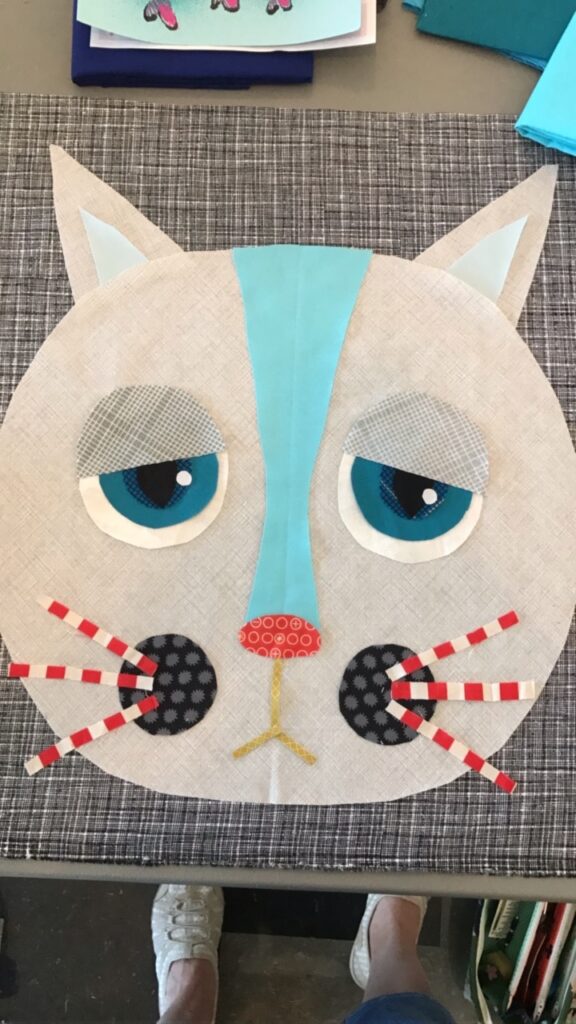
Thanks Cynthia! The yellow faced kitty is supposed to represent the cat that I have right now. She isn’t very nice and will bite! Yikes! In fact – I think she was the one who beat up the white kitty!
This wall hanging is SOoooo cute, thanks for sharing….
You bet! Glad you liked it!
I love this! Can you post a picture of your completed wall hanging?
Great idea! I updated the article to include the finished quilt, plus some closeup pictures of all the kitties!
I am a cat lover and so is my oldest granddaughter. Right now she is going through a difficult time and I think that one of these quilts in a lap size might be the perfect hug from me to her. I also think that a pair of those yummy socks on the designer’s online store might brighten her day and could even make her purr a bit. Thanks for sharing this quilt and the quilting video.
Sincerely,
Alice G
Cutest cats( besides the ones who come to my back door 2x a day) I’ve seen. Really like them.
I absolutely love your cat quilt. it makes me smile everytime! I wish you would make this into a quilt pattern!!!
I’ve had cats in my home all my life, at least after my mom made me give up the dog. I have 3 now. Your cat faces are fantastic and you make it look so easy to make. A fun project to do with the grands. Thanks for sharing. I too am anxious to see your final quilted piece. 🙂
That’s the cutest kitty quilt. I may have to experiment with machine appliqué.
All so cute! If I must pick a favorite, I’ll go with Naughty Cat. Reminds me of our cat, Spike, who would annoy his sister and then sit there looking all innocent.
I like the Glamour Kitty the best because of the beautiful blue eyes but the Cat Fight Kitty was very amusing. When I first saw the Cat Fight Kitty before seeing the name, I thought that it was actually a “Hangover Kitty”. 🙂
The gray kitty is super cute, it looks like he was in a scrap. Then the next one I like is the gold kitty, he appears to look like he is in a gang. You did a super job, I love them all.
This is the cutest idea to give personalities to our cats who are no longer with us and our two newest kittens. I’ll be sending this info along to my sister who is a dog person! Thanks a bunch –
Cat fight kitty is my favorite. I know her identical twin sister, I don’t do mornings kitty!! I love that each kitty has such personality.
Adorable quilt!