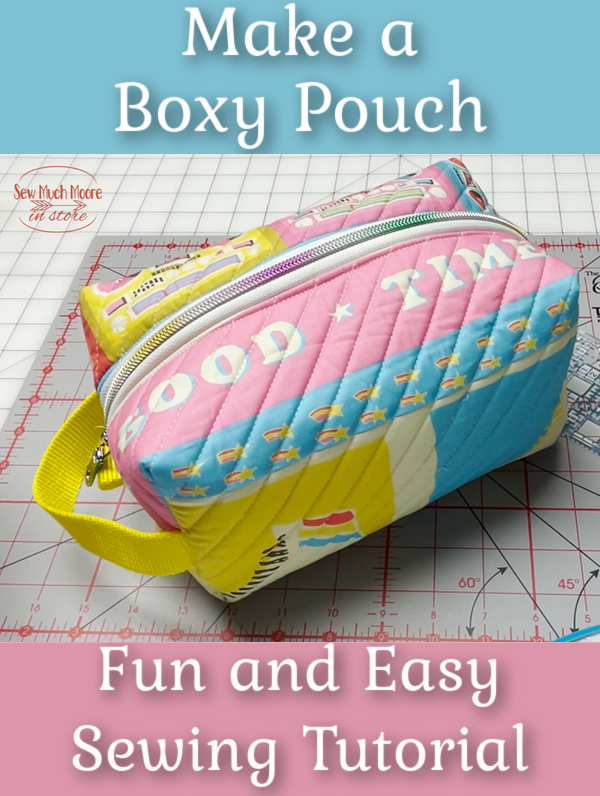
Boxy Pouch Sewing Tutorial
I love a good Boxy Pouch and this sewing tutorial is one of my favorite methods for making this fun and functional bag! You can call this bag a dopp kit, shaving bag or even a makeup bag. Whatever you choose to call it, make it in your favorite fabric and follow the tutorial below for an easy and fun sewing project. These Boxy Pouches make great gifts are best sellers in craft booths too! Let me show you how!
Materials List
- Boxy Pouch PDF Sewing Pattern
- Exterior Fabric (I used a portion of THIS PANEL)
- Interior Fabric (I used THIS fabric for the interior)
- Foam Interfacing
- Webbing for pull tabs and handle
- Zipper (I used ZIPPER BY THE YARD for my Boxy Pouch)
Basic Sewing Supplies
- Sewing Machine (I recommend THIS machine)
- Thread – I would recommend this thread
- Rotary Cutter with sharp blade (I use this brand – 45mm)
- Acrylic Ruler (I like this brand)
- Rotary Cutting Mat (I recommend this rotating mat – it’s amazing!)
- Clover Wonder Clips
- Iron & Ironing Board (This is the brand of iron I use and recommend)
Boxy Pouch Assembly
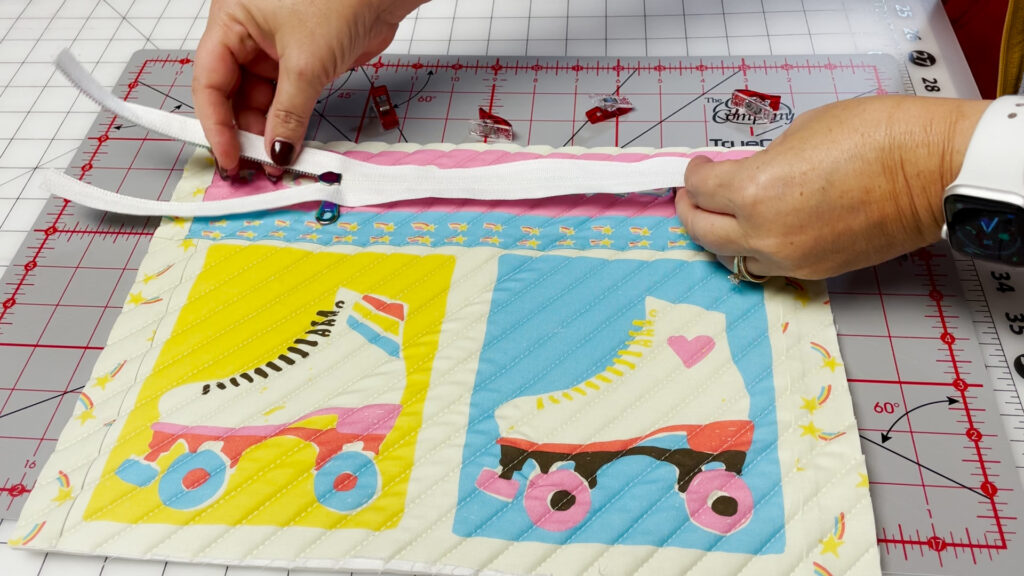
For this Boxy Pouch, I used a Foam Interfacing (instead of batting). The Foam interfacing really provides great structure to the Boxy Pouch. I also pieced a really fun fabric panel and also used rainbow coil zipper by the yard!
Which machine should I use?

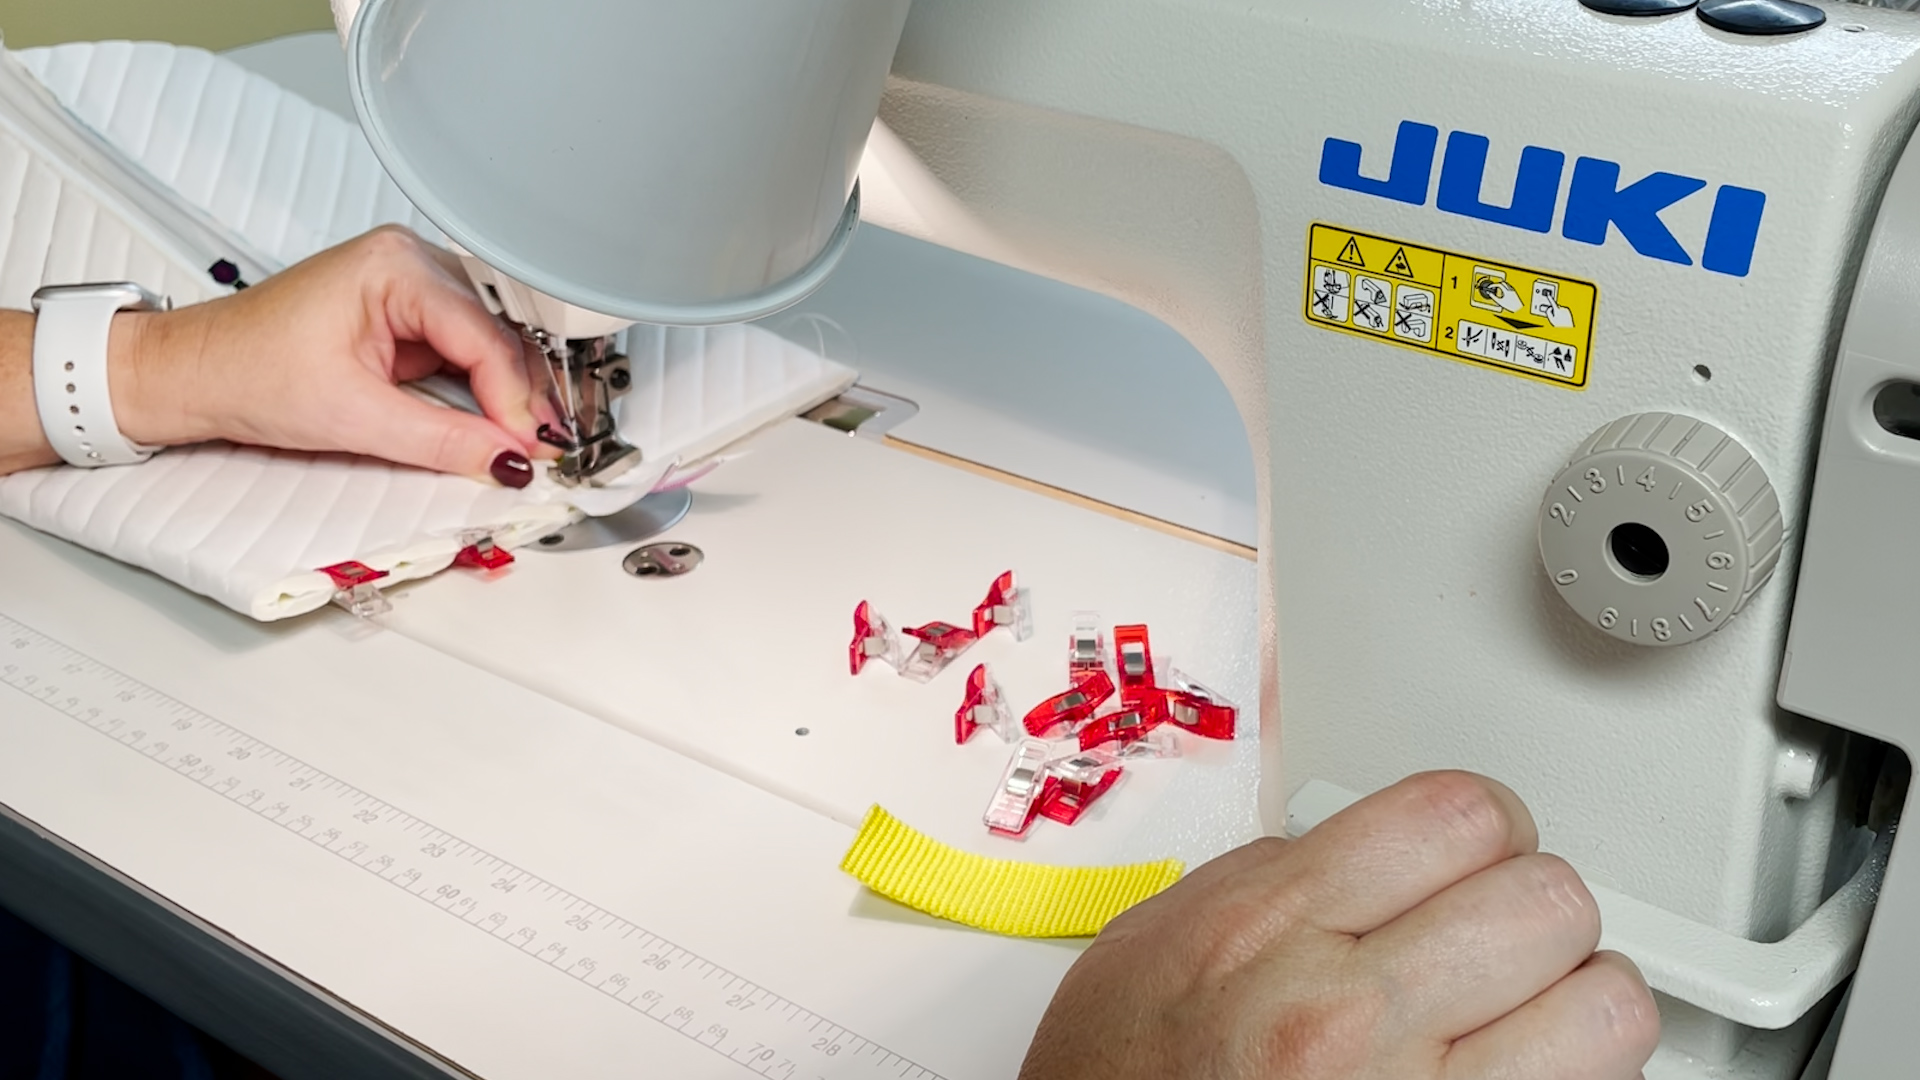
It’s really nice to choose the machine for the different steps of assembly. I used my Juki TL2010Q (with my Grid Glider table mat) to attached the zipper to the panels and then I used my Juki DU1181N to install my pull tabs and handle. And all honesty, my Juki TL2010Q could’ve handled the entire job but since I have a choice I used both machines.
Make Your Own Boxy Pouch
I’ll just take my word for it, make your own boxing pouch! Watch the video link below and don’t forget to download your PDF pattern. My PDF pattern provide step-by-step instructions so you can make as many of these fun boxy patches as you’d like. Remember, you can get this pattern for free when you sign up for my weekly newsletter.
Share your Boxy Pouch creations!

Join my Facebook group and share your box pouch creations! I can’t wait to see what you make!

I love these bags. What type of quilting bar are you using, for the quilting.