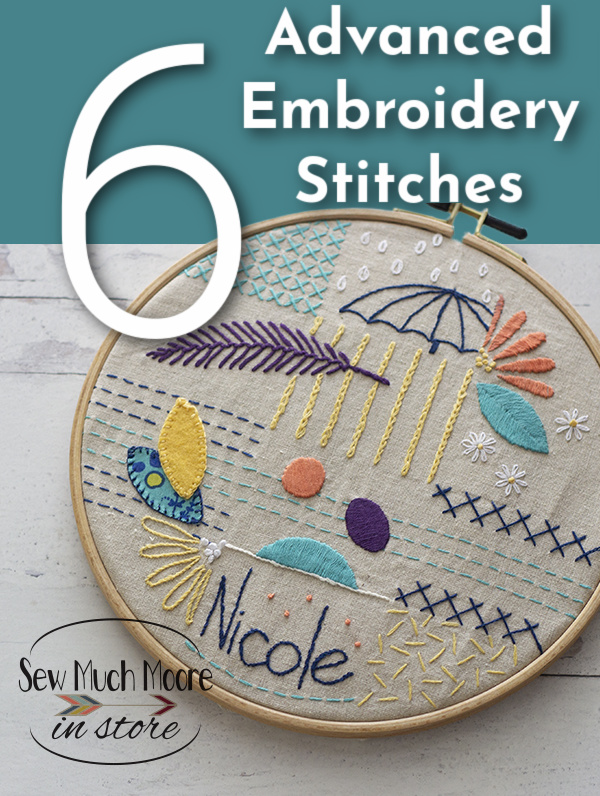
Six Advanced Embroidery Stitches
Hand Embroidery is such a wonderful art and skill to have! There are so many wonderful possibilities and creations to make when you know how to hand embroider. Follow along as my friend Karen, with Studio 21 Market, shares her embroidery sampler design and shows us six advanced embroidery stitches. Be sure to watch the video and download your pattern.
Since Aurifil is my embroidery thread of choice, partnering with them was an easy decision. If you haven’t already, head over to our first post which helps you get started. We will pickup where we left off from our first and second episodes.
Embroidery Sampler Material List
- Embroidery Sampler Pattern
- Aurifil Aurifloss
- Embroidery Needles
- Thimble of your choice (here are a few to choose from)
- Background Fabric 15″ x 15″
- (linen-cotton blend recommended)
- Backing fabric for finished the back (9”x 9”)
- PVC embroidery frame (recommended)
- Scissors for trimming fabric when complete
- 8” embroidery hoop
TO TRANSFER DESIGN
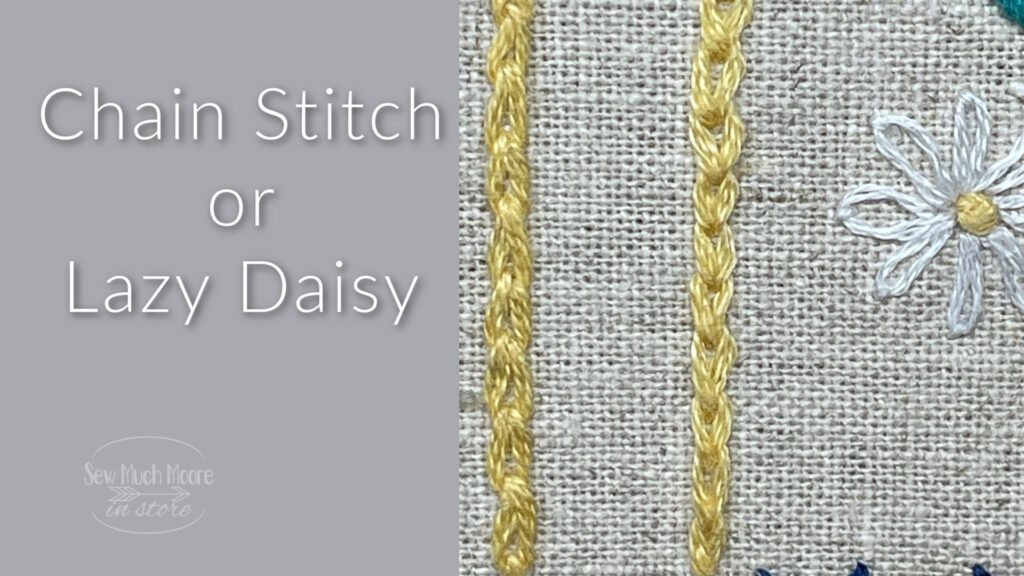
Chain Stitch or Lazy Daisy
These are fun and really pretty versatile. Though technically two different stitches, they’re quite similar, so we’re teaching them together. The lazy daisy stitch is used for the little daisies and pulled fairly tight to create an elongated loop. For the raindrops, we’ll not pull as tight so the result is a more rounded loop.
In essence, the chain stitch used the same method of wrapping the needle to make the loop, but instead of finishing with an anchoring stitch, it is continued to make the next link in the chain. The chain stitch is done in vertical rows here for a graphic effect.
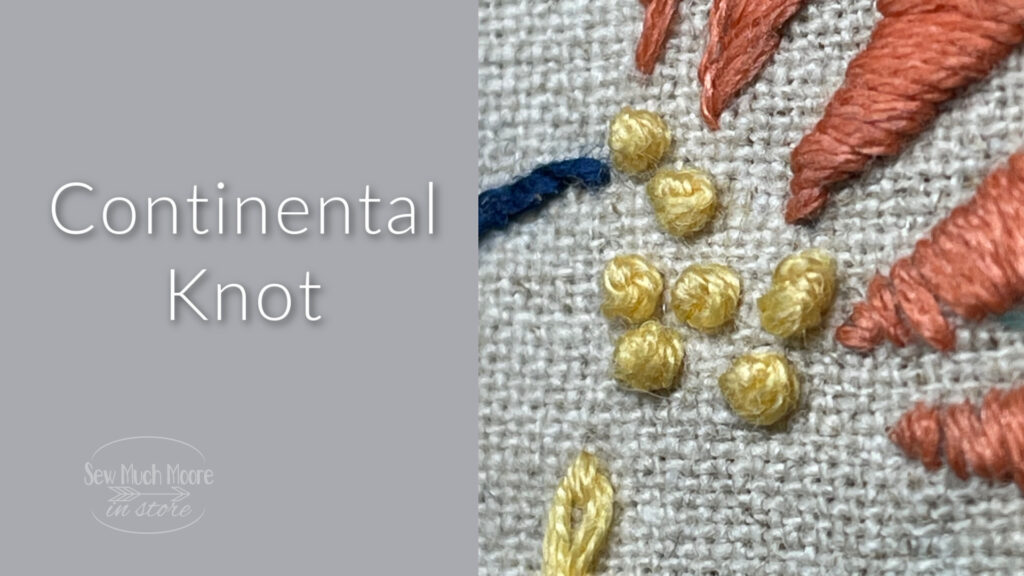
Continental Knot
This is Karen’s favorite knot stitch, mainly because it can use 3-6 strands and will still be centered over the spot where the thread comes up from the back. Replay the video a few times to see the method. It’s kind of fun to watch it curl into a little knot. One trick for knots is to keep the looped thread close to the fabric—that’s key to stitching nice little knots. (And if you find you’re not a fan, feel free to make the more common French knots.)
Blanket Stitch
Though a simple whip stitch could be used to hold the edges of appliqué pieces. the blanket stitch also makes a nice ridge of embroidery thread along the outer edge of the fabric or wool leaf. (For the appliqué fabric leaf, use a thin two-sided fusible with paper backing on one side, and follow the manufacturer’s instructions.)
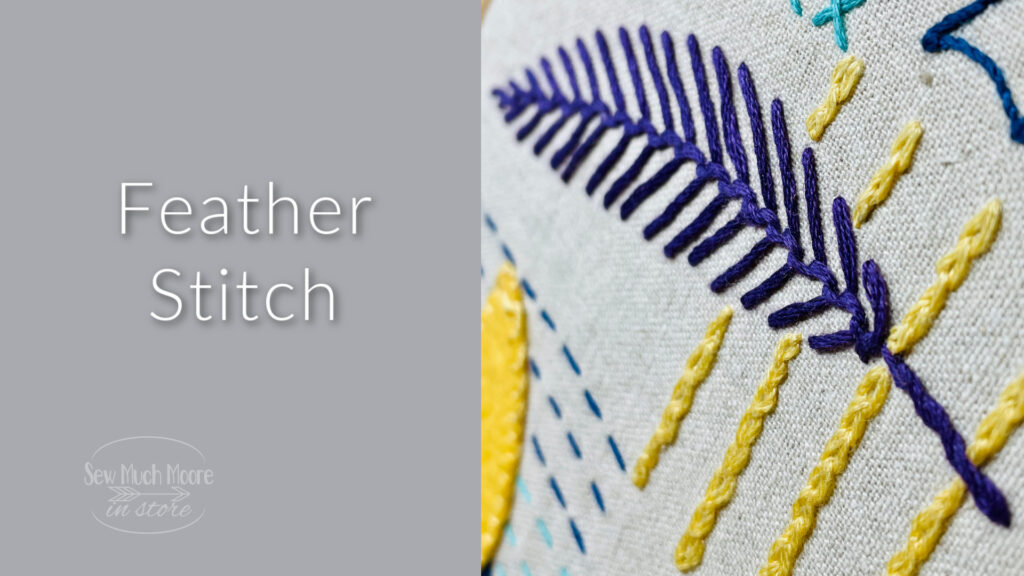
Feather Stitch
This one is so graphic and moves quickly once you get it started. It can be used with varying widths the way we used it on this feather shape, or with an even width to make a row of stitching.
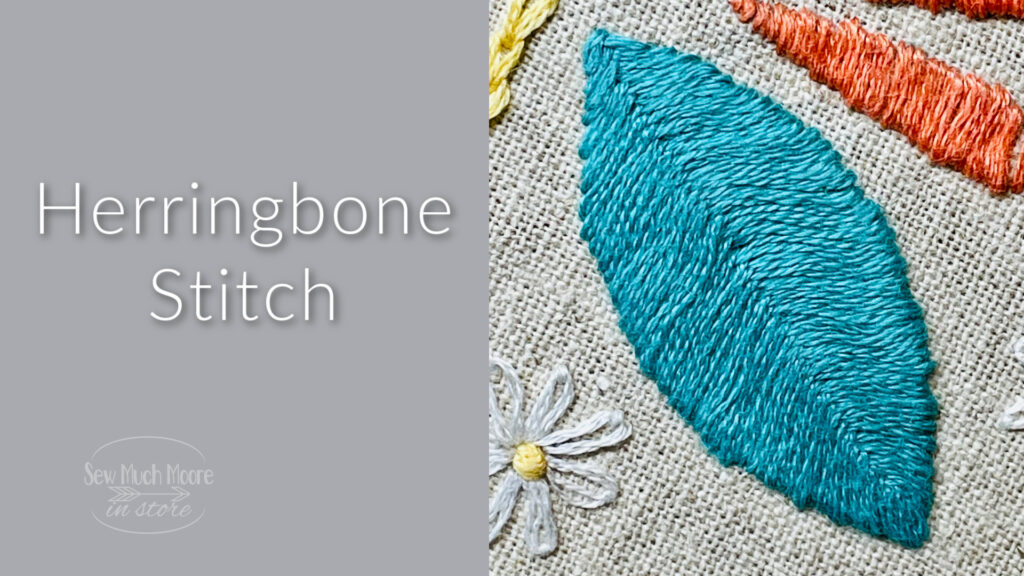
Herringbone Stitch
This is the (closed) herringbone stitch. A leaf shape is so awesome when this stitch is used. I’ve done it on tiny little meandering leaves and also on larger leaves like this one. With the overlapping center threads, it makes such a wonderful texture for a leaf without leaving any gaps or spaces down the middle.
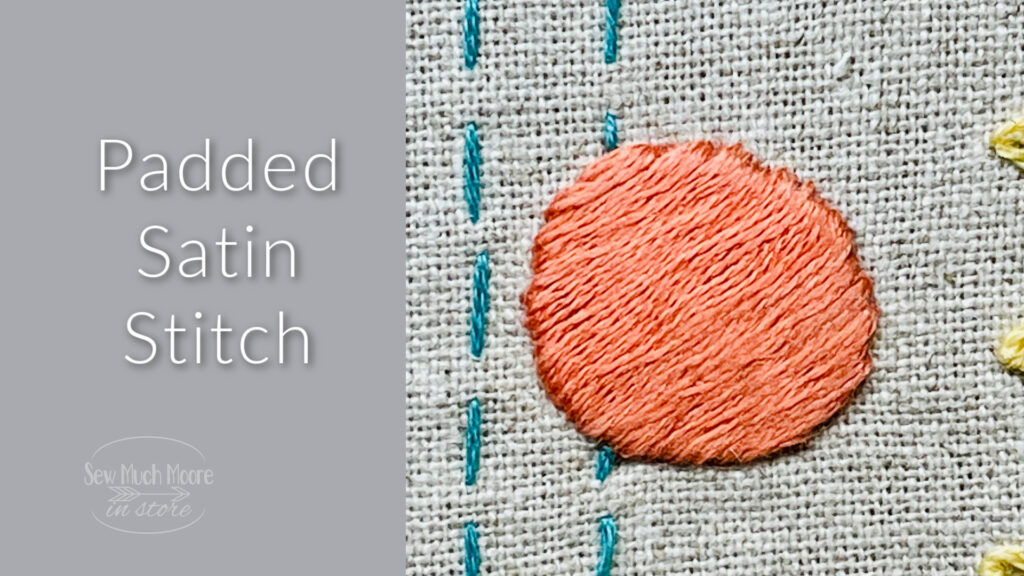
Padded Satin Stitch
So, yeah, it’s not necessary to pad a satin stitch. And it is more time-consuming. But I wanted to include it so if there are instances where you’d like a satin-stitched area to be raised from the cloth a little more for the texture you’d like to achieve, now you know how. The dimension is outstanding!
If you haven’t already, be sure to check out the entire Embroidery Sampler Series and stop to say hello to my good friend Karen with Studio 21 Market!
