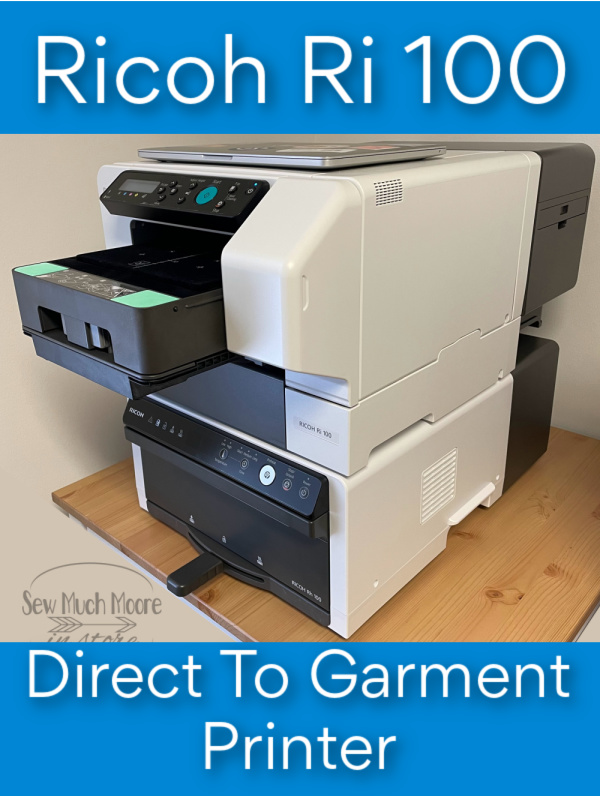
Ricoh Ri 100 DTG Printer
I never thought I would be excited about a printer until I learned about the Ricoh Ri 100 DTG (Direct-To-Garment) printer! There are so many possibilities for a small business! I can even see an ambitious hobbyist enjoying this printer as well! At the bottom of this post, I have an un-boxing video and first project posted. Let me tell you a little bit about this printer!
Free Software for the Ricoh Ri 100 Printer
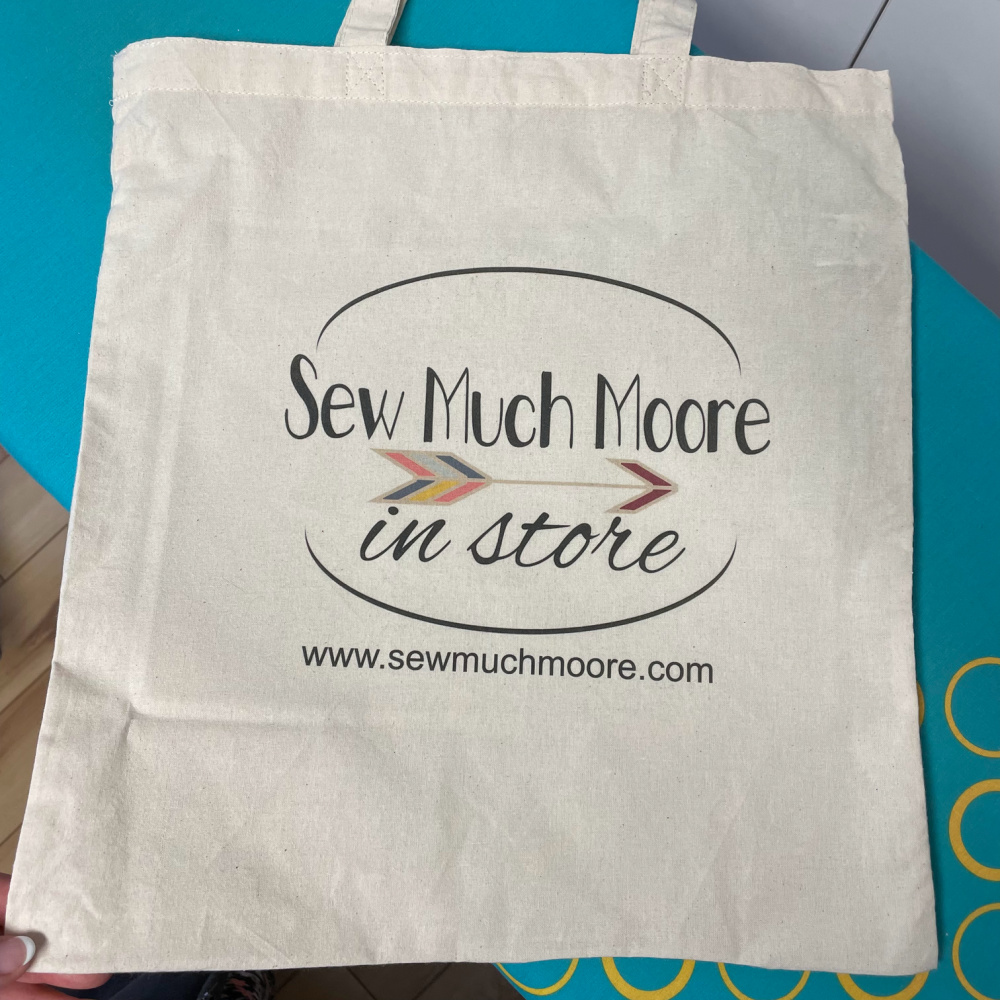
One of the best things I’ve learned about this printer is its ability to produce a finished product with very little effort. I was able to take a canvas tote blank and personalize it for my business in less than 5 minutes! I did have to iron the bag first, since my Amazon order came in a pack of 5 and they were kind-of jammed inside a shipping envelope. Once I prepped the canvas blank, it was easy to grab my Logo file, add my URL to the bottom and print!
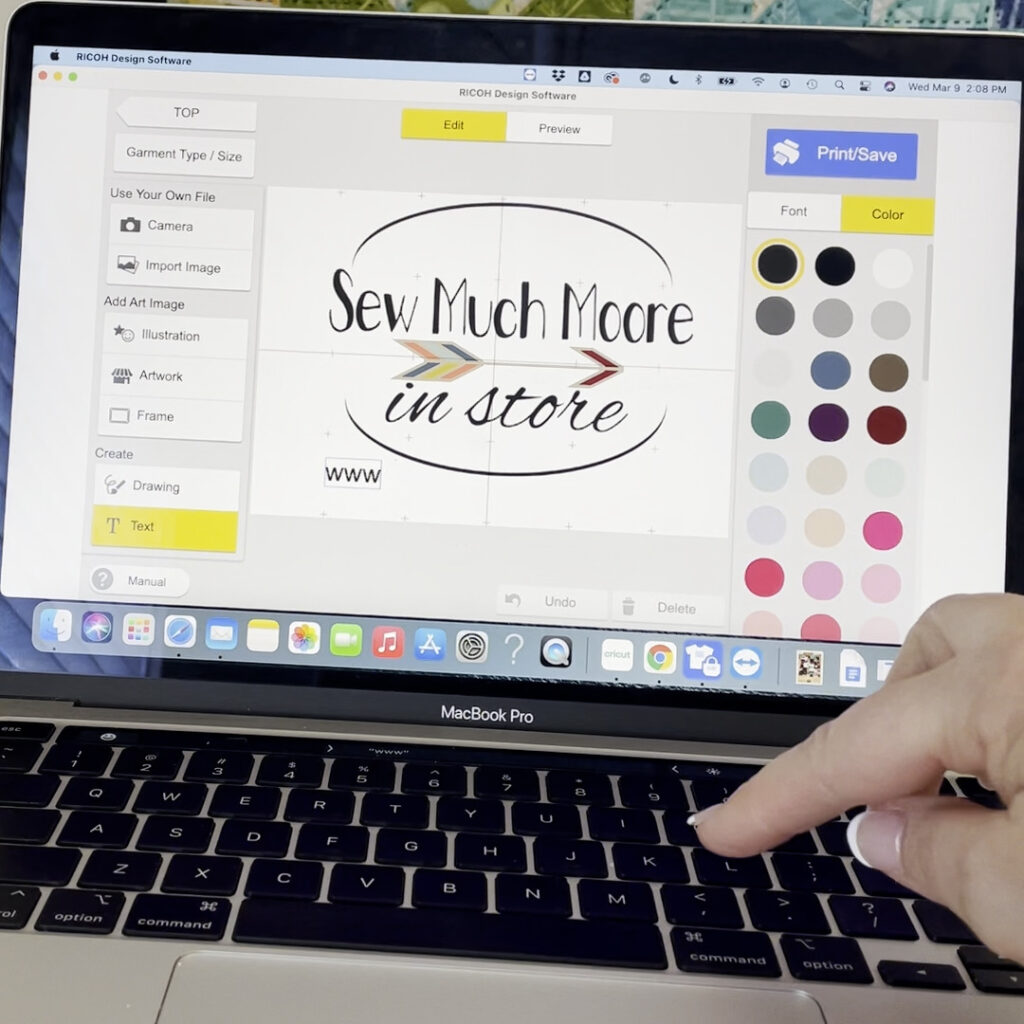
You can easily download the software to your personal computer. I am using my MacBook Pro. The software also works for Windows operating systems as well. It is really simple to use. You can also design your own art and import the finished image into the Ricoh Ri 100 software. RICOH Design Software lets you easily edit and import images before printing. Use the desktop software, convenient iPad app, or simply send prints from your smartphone with ease.
Loading the print tray
You can get two different types of trays for printing. I have both, but have only tried the largest tray. The large tray has a print area of 11.7” x 8.3”. The small tray has a print area of 5.8” x 8.3”. Loading your product onto the tray is simple!
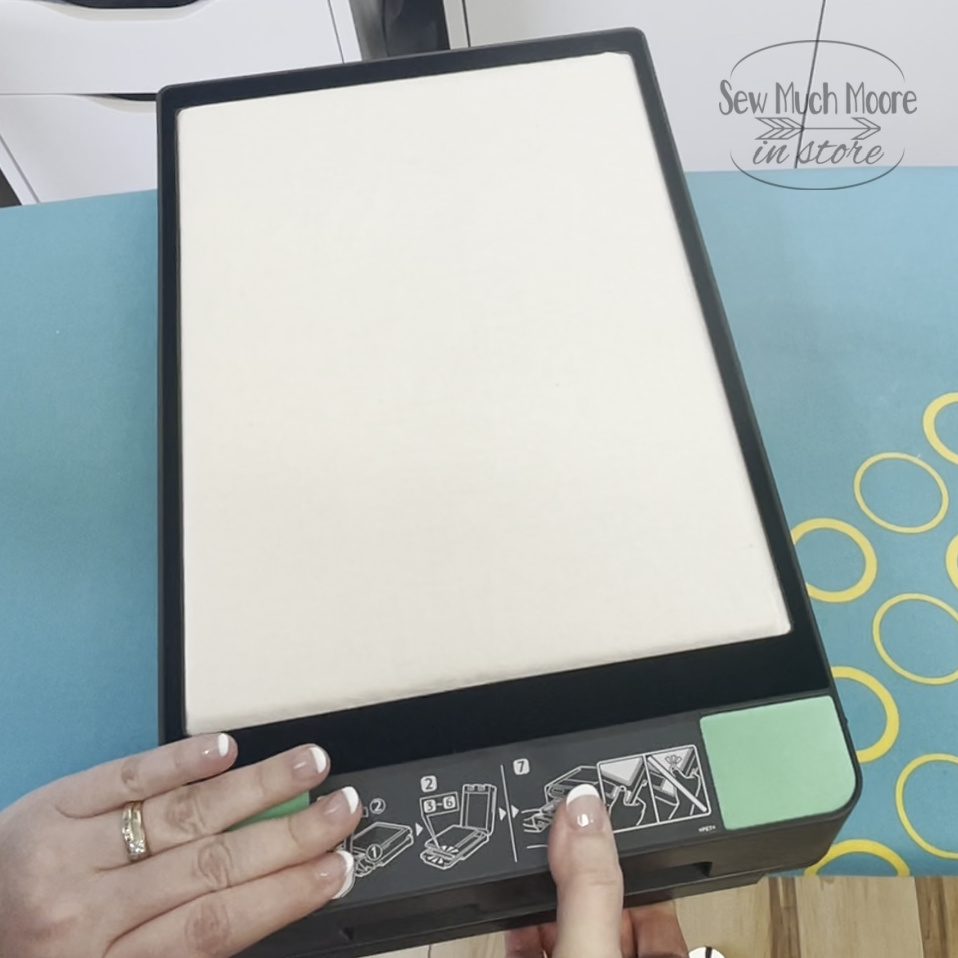
Setting the canvas bag in the tray was simple. Even beginners can accomplish this task with ease. There is enough room underneath the tray to fit an entire yard of fabric, sweatshirt and lots of other products as well! With a print size of 11.7” x 8.3”, your options seem limitless!
The RICOH Ri 100 adds value to your bottom line because of the multitude of products it can print on, such as:
• T-shirts
• Pillowcases
• Tote bags
• Infant onesies
• Towels
• And much more!
High Quality Images
I’m so happy with how my logo turned out! First, you can insert the tray into the finisher to smooth out creases. (I didn’t know this at first and used my iron. I could have saved myself the time and just used the finisher for this step). Next is to insert the project into the printer. Printing takes approximately two minutes. Just load and unload the tray – it is that easy.

Once the printing is done, then I just used the finisher (with built in safety features) to fix the ink and lock in the design. The entire process took less than 5 minutes!
Finished product – quickly!
In the past, I have been cutting fabric (with a cutting machine) and fusing it onto a project. I have also used vinyl, take the time to weed the vinyl and fused it onto a project. I will still do this for products that are based in darker fabrics. The RICOH Ri 100 all-in-one printer system prints images directly onto light-colored cotton garments using state-of-the-art DTG technology with the lowest initial investment. This machine is not for use with dark-colored cotton or polyester garments. (I have seen it used for polyester garments, but because the printer gets hot – caution is required for sure). The canvas bag turned out great! Take a look!
I’m really pleased with the quality of this printing! You can achieve superior prints thanks to RICOH’s inkjet technology, which prints directly onto the fabric. Preserve the look and feel of garments while still maintaining a high level of image vibrancy. With a low price and an easy-to-use design, the RICOH Ri 100 makes it easy to begin DTG printing right away. Because all printing is on-demand, you can fulfill even highly-customized orders quickly and efficiently.
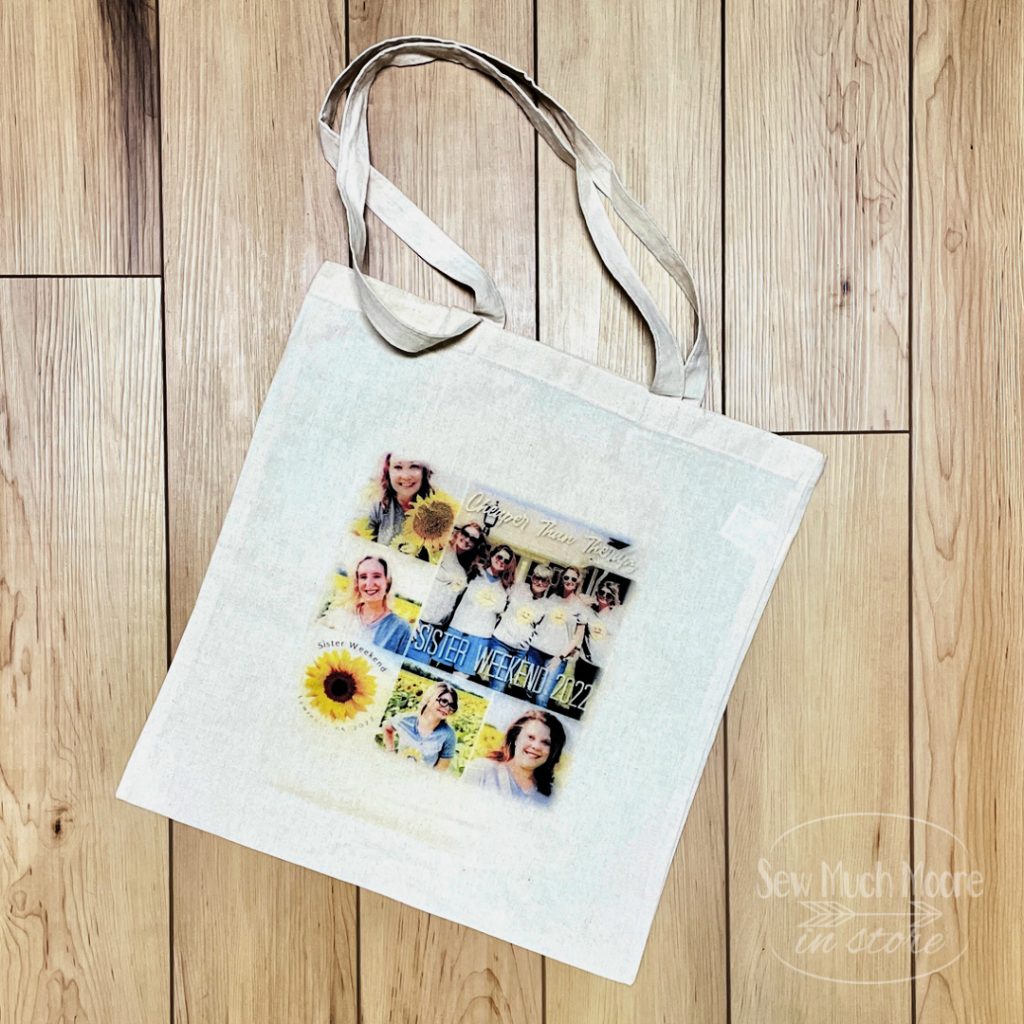
I also made a custom gift for my sisters, to commemorate our Sister’s weekend together! I love how it turned out!
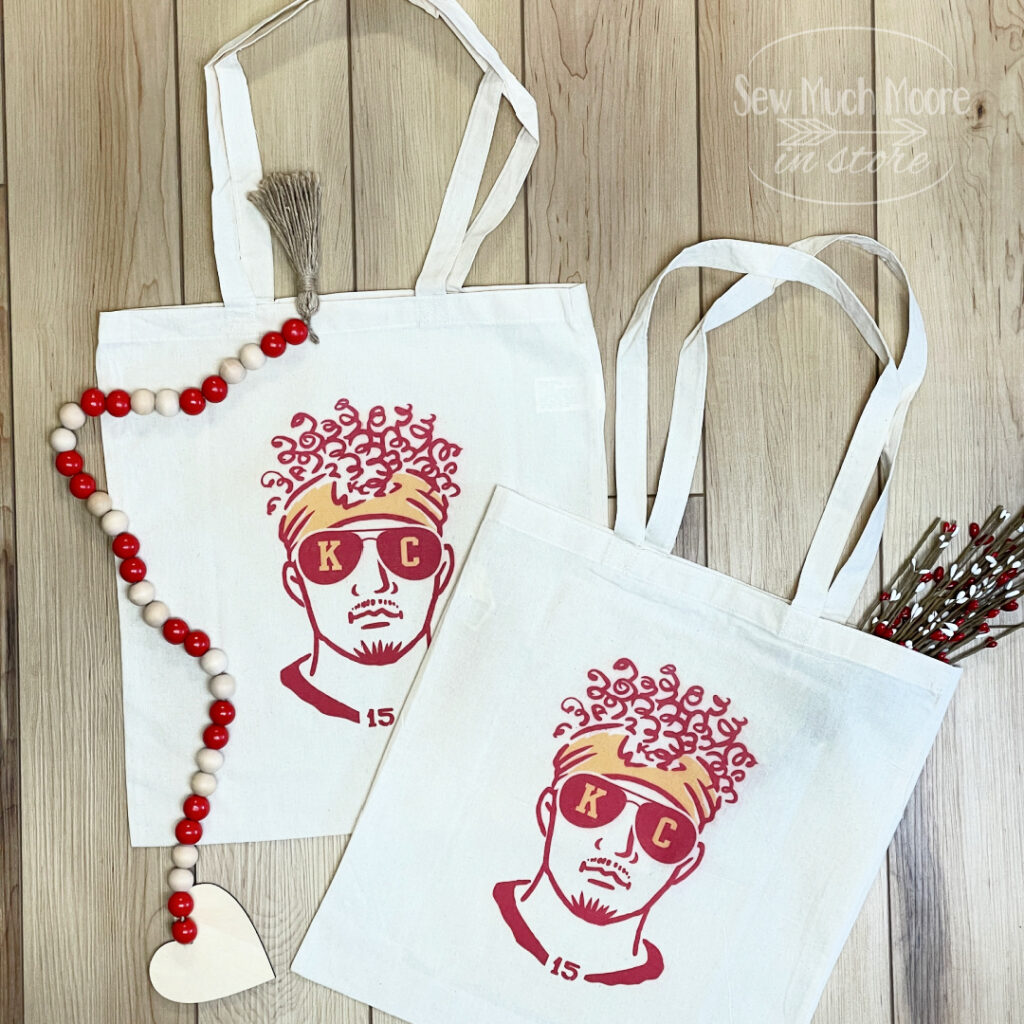
If you didn’t already know – I live in the Kansas City area and am a Chiefs Fan! I made a fun Patrick Mahome’s Custom Tote Bag – it turned out so cute! I found the image on Etsy from a talented digital designer. You can download the art right here.
I’m looking forward to more projects with the Ricoh Ri 100 DTG Printer! Watch the video below to see how simple the setup was and how quick this project came together!
Watch the Video
Be sure to sign up for my weekly newsletters for upcoming projects! If you are looking for small business help and ideas, visit my Creative Day Job website!

This is nice for those with a Ricoh printer. But I don’t do enough of such work to justify the cost. So, I think you’re talking to a very small subset of people who will read this. I’m a home hobbyist and for the little I do, like quilt labels, my existing printer works just fine.
Thanks for your comment! I agree that this product is not for everyone, but it’s always nice to see what options are available. I hope this post inspired you to create something special with your home printer! Happy Stitches!