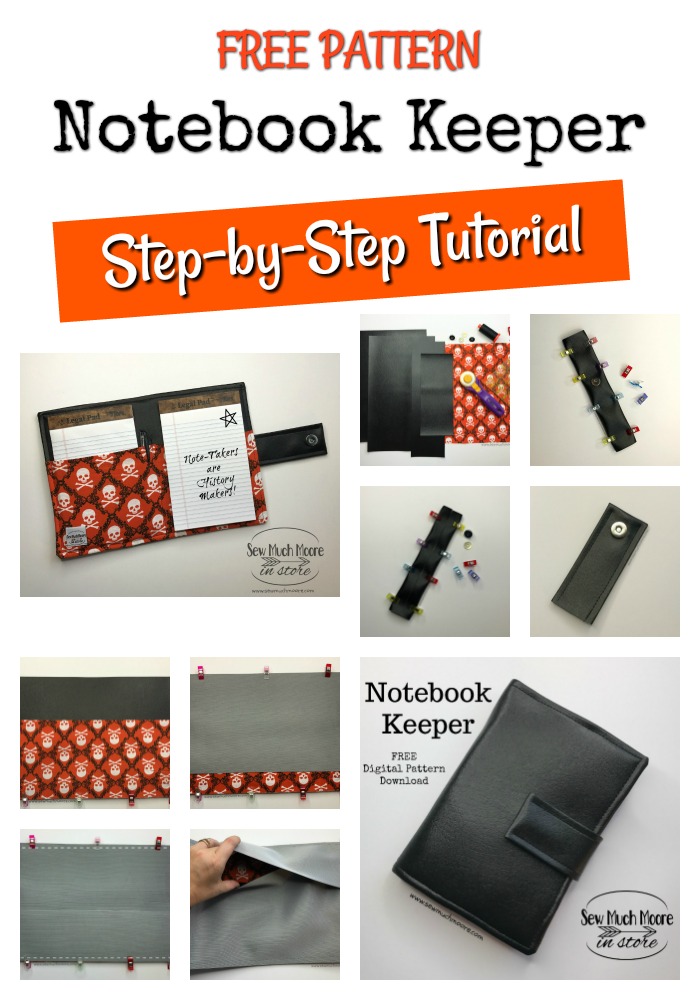
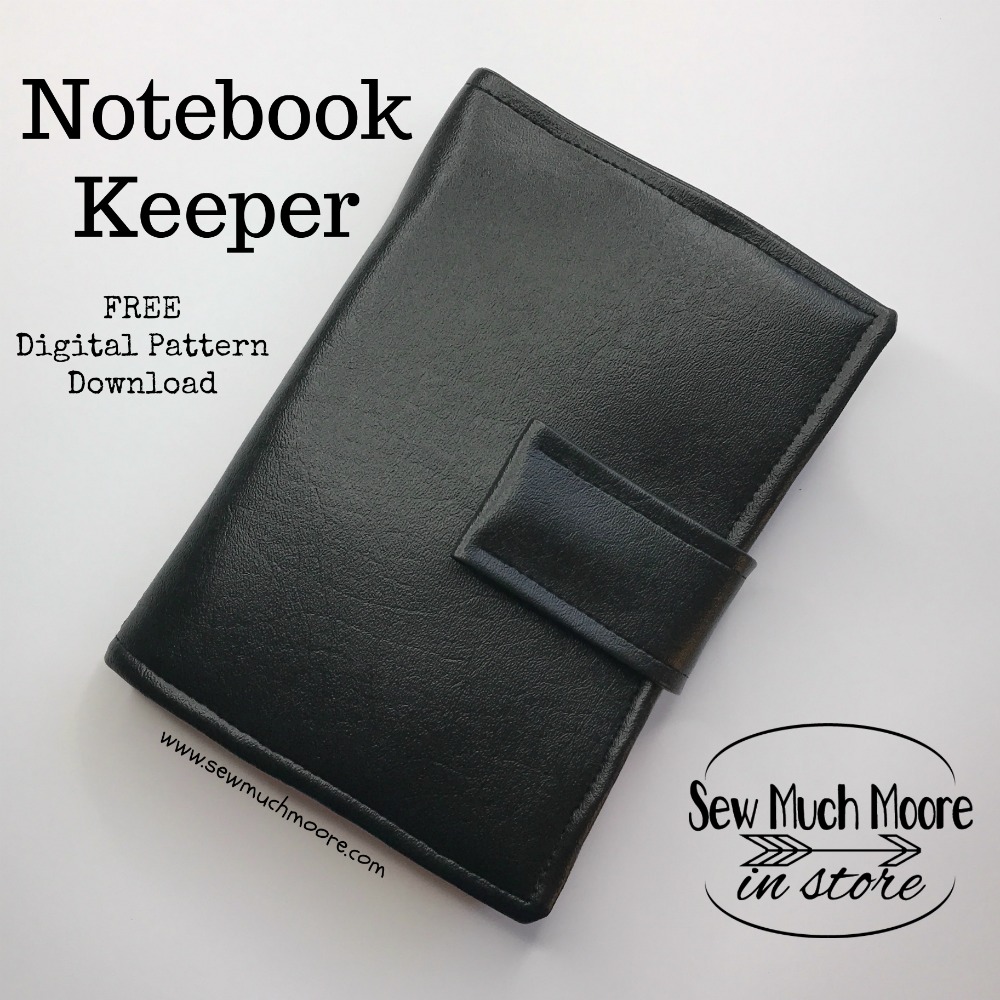
Notebook Keeper Tutorial
Are you a note-taker and a list maker? Do you constantly find yourself jotting things down? I most certainly do! Who doesn’t love a daily to-do list? I even make a list for my kids and husband! As I strive to stay more organized, I wanted a place to keep my lists! Check out this tutorial for my Step by Step instructions to make your own Notebook Keeper!
To get your cutting measurements, you have a couple choices:
Option 1: Download for free.
To download the cutting measurements for free, you can subscribe to the Sew Much Moore Newsletter. AFTER you sign up, you’ll get a confirmation email – and you have to confirm or my email service can’t send you the free pattern access email. But once you do confirm, you’ll get access to not just this but several other free patterns. Woot!
(PS – if you have trouble finding the pattern as a subscriber, please contact me)
Option 2: Purchase the cutting instructions
Use this link to purchase the cutting instructions. You’ll be emailed a download link for a file that references the instructions in this tutorial and provides the cutting measurements for this pattern. You’ll also be able to download this file in my shop.
This post contains affiliate links for your convenience. ? Read my full disclosure policy here.
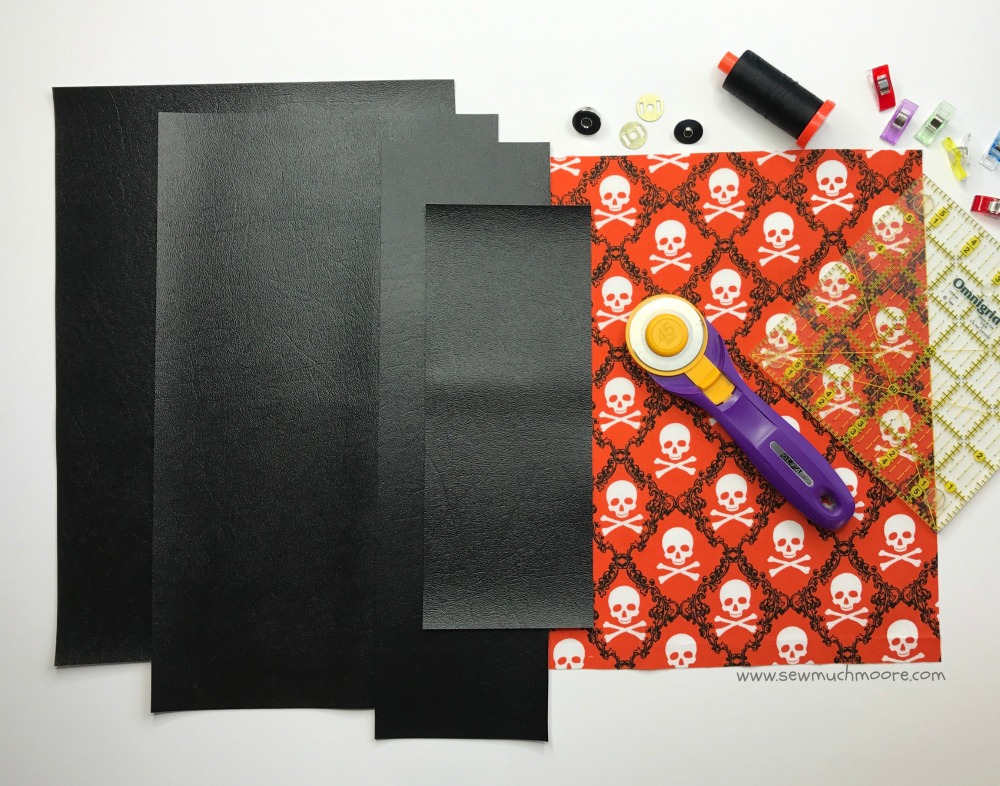
Notebook Keeper Supply List
- Notebook Keeper Pattern
- Qty (1) Fat Quarter of Vinyl Fabric
- Qty (1) Fat Quarter of Pocket Lining Fabric
- Qty (1) piece of thick batting (I used my scraps from quilting)
- Qty (1) piece of Pellon Peltex 70 (see pattern for exact measurements)
- Qty (1) magnetic closure
- Small Legal Pads
Basic Sewing Supplies Needed
- Sewing Machine
- Teflon Sewing foot for vinyl or leather (these will vary by machine)
- 40 wt. Cotton Thread
- Rotary Cutter with a sharp blade
- Water Soluble Marking Pen
- Acrylic Ruler
- Rotary Cutting Mat (I recommend this rotating mat – it’s amazing!)
- Clover Wonder Clips
- The Purple Thang
- Iron & Ironing Board
Notebook keeper tutorial
Iron your cotton lining fabric nice and flat to remove any and all wrinkles. Sometimes, I like to spray my fabrics with my spray starch to make it easier to manage. Use your cutting measurements to get your pieces all cut and in order. Not pictured below are the cotton batting and Peltex materials. Go ahead and cut those as well.
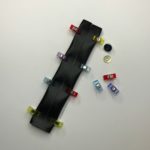
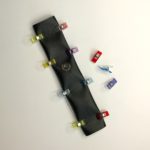
Notebook Keeper – Making the tab closure
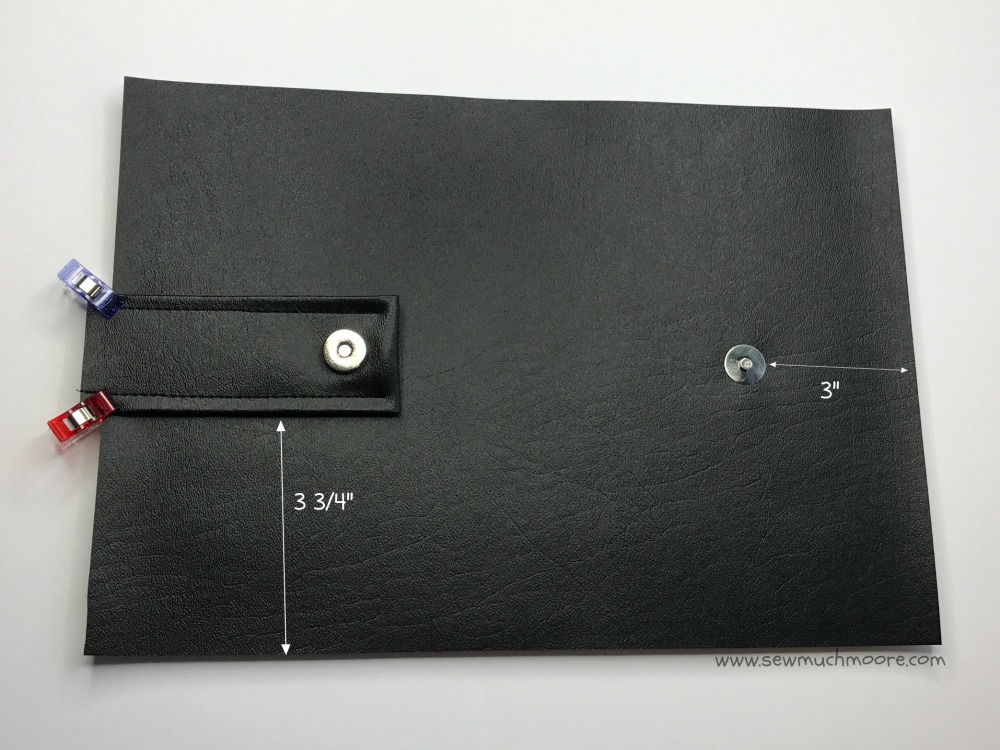
First, we will make the tab closure. Take the tab closure vinyl fabric and place it right side down. Fold the long sides towards the center so that both long ends meet in the middle, evenly. Next, measure 4″ down from one of the short sides of the tab piece and install the magnetic male closure. With the long sides still folded in, fold the tab piece in half so that both short ends are flush. Sew along both long sides to enclose all raw edges on this tab piece.
Notebook Keeper – assembling the exterior pieces
Next, we will install the tab & female magnetic closure onto the exterior of the Notebook Keeper. Place the exterior vinyl fabric, right side up. Place the tab, magnet side up, on top of the exterior vinyl fabric piece. Measure about 3 3/4″ from the bottom left of the vinyl fabric to the bottom edge of the tab. The raw edge of the tab can be adjusted to either be flush against the raw edge of the exterior vinyl fabric or further out. Secure in place with Clover Wonder Clips. On the right side of the exterior vinyl fabric you will attach the female magnetic closure directly across from the tab piece and 3″ – 4″ away from the right raw edge of the exterior vinyl fabric.
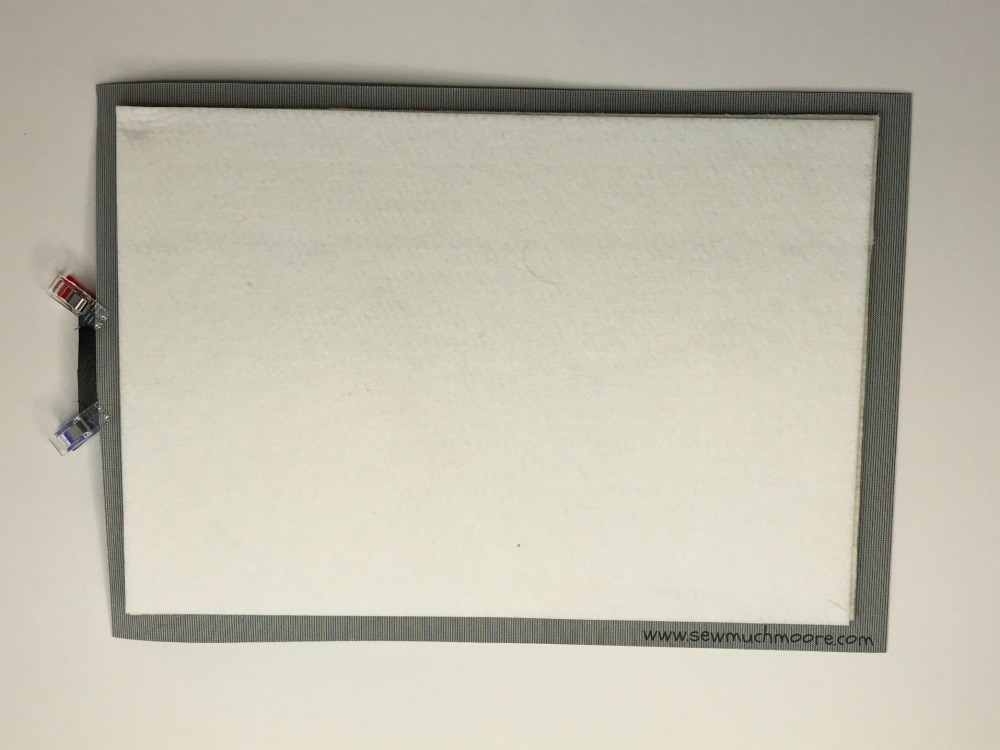
Fuse the Peltex piece to the batting piece. You can either sew this together by basting around the perimeter or you can fuse in place with Spray Adhesive. Turn over the vinyl fabric (ensuring the tab piece is still in place), and secure the batting/Peltex piece to the wrong side of the exterior vinyl fabric. The batting side should be laid against the wrong side of the vinyl fabric.
Notebook Keeper – adding all the layers
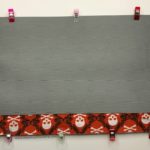
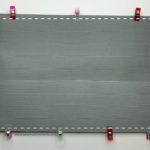
Now, we will layer the Notebook Keeper. Fold the cotton lining fabric in half (wrong sides together). Place the right side of the notebook lining on the right side of the exterior vinyl fabric. Next, place the top piece of the vinyl lining flush against the top of the exterior vinyl fabric, right sides together. Now, place the bottom piece of the vinyl lining flush against the bottom of the exterior vinyl fabric, right sides together. Secure all layers with Clover Wonder Clips. Turn over the layered project so you are looking at the side with the Peltex. Sew around the entire perimeter of the project.
Tip: Make sure your stitch length is less than 2 and that your thread weight is lower than 50. You should make your stitches right next to the Peltex, without sewing through the Peltex. I would also recommend backstitching over the tab area as well as the sections where the top and bottom vinyl linings meet. Trim away excess fabrics, at least 1/4″ from the seam.
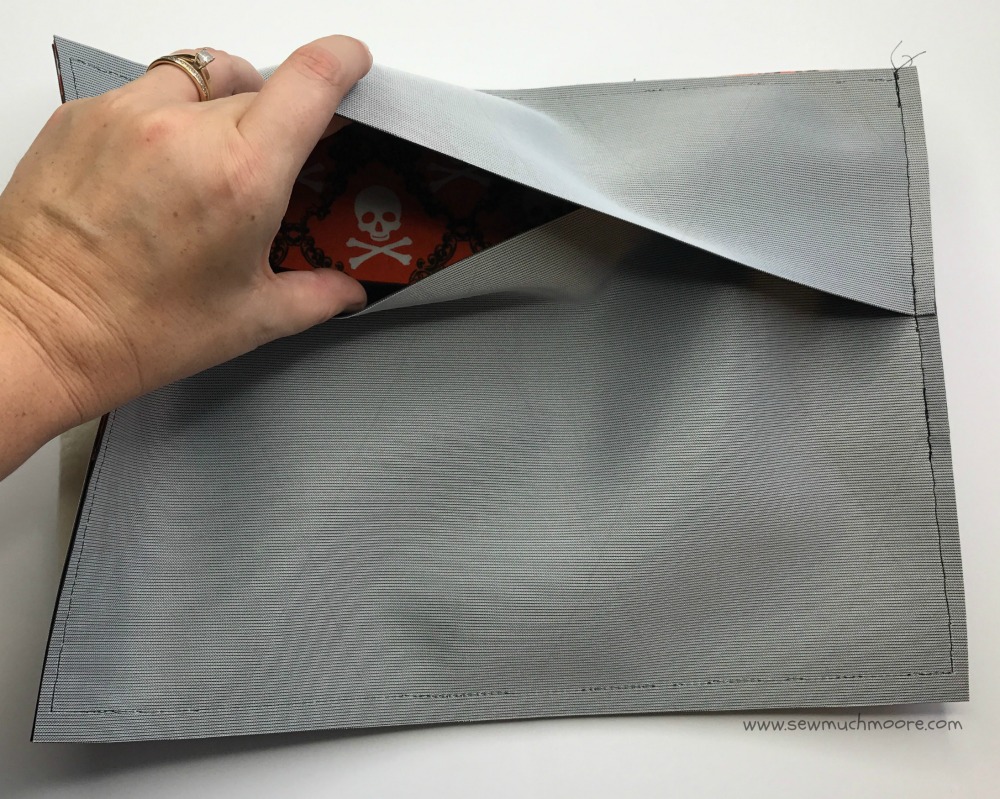
Using the opening, turn the Notebook Keeper right side out.
Notebook Keeper – the Final Touches
Use your The Purple Thang and push the corners out. Using 40-30 weight thread, topstitch along the outside perimeter of the Notebook Keeper. Using your Acrylic Ruler, find the center of the Notebook Keeper and mark a line from the bottom to just past the top of the cotton lining. Sew along the marked line.

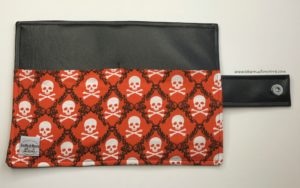
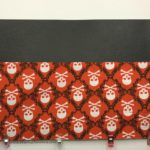
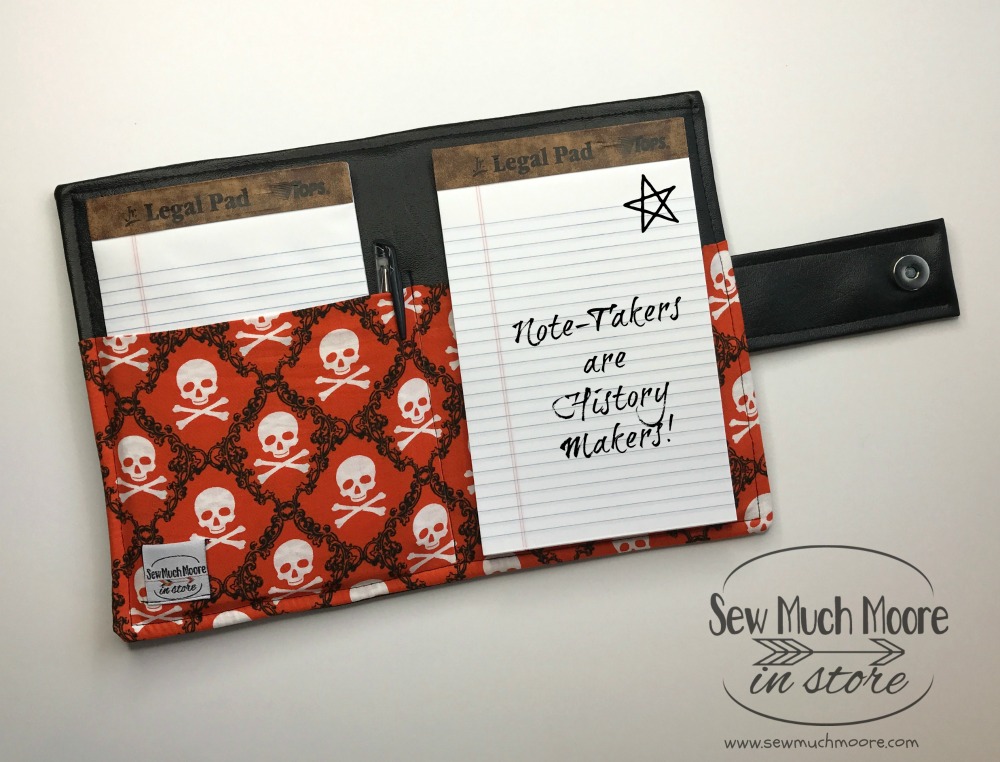
Place your small Legal pads and even a pen or pencil in your lining pockets and you are all set!
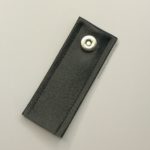
I just love how fun and easy these are to make! Using faux leather (or vinyl) makes these notebooks very durable!
You can still use Quilting Cottons if your sewing machine cannot handle the thickness of all those vinyl layers. I would just recommend reinforcing it with some Shapeflex by Pellon.
Thanks for checking out this tutorial! Don’t forget to get your FREE Pattern and let me know if you have any questions. I would love to hear from you!
Also – Remember………..Note-Takers are History Makers!
Until next time, Happy Sewing!

This is good. Thanks!
Thanks for this tutorial. What are the finished dimensions of this piece?
Great Question! When the notebook keeper is closed, the finished measurements are 6″ x 9″. When the notebook keeper is open, the finished measurements are 12.5″ x 6″ (not including the tab). Hope that helps!