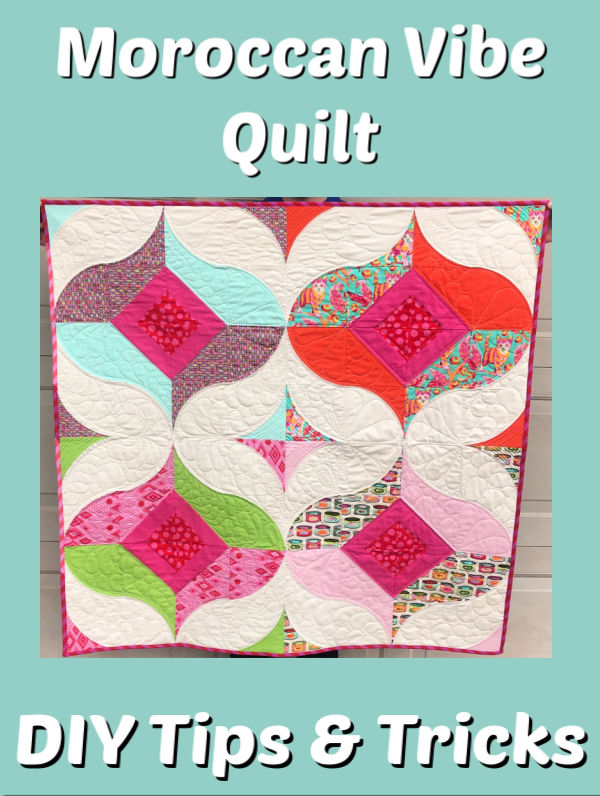
Moroccan Vibe Quilt
I know! Sewing curves seems scary, but it doesn’t have to be! I first learned how to sew a curve when my local quilt guild hosted a Schoolhouse for the Quick Curve Ruler, by Sew Kind of Wonderful. All the students learned how to sew curves, using this incredibly fun and easy ruler – and you can too! Let me show you all about our project, called the Moroccan Vibe Quilt!
This post contains affiliate links for your convenience. ? Read my full disclosure policy here.
MATERIALS LIST
- One Wonderful Curve (book by Sew Kind Of Wonderful)
- Qty (8) fat quarters assorted prints (I used Tula Pink Tabby Road and coordinating solids)
- Qty (1) fat quarter for block centers
- Qty (2) yards background fabric
- Qty (1/2) yard fabric for center diamond sashing
- Qty (2/3) yard for binding
- Qty (3.5) yards for backing (I went scrappy and pieced some of my leftover Tula)
- Quilter’s Dream Supreme Batting (because it’s the best and I love it so much)

SUPPLY LIST
- Sewing Machine with a quarter inch presser foot
- Cotton Thread (I recommend Aurifil 50 wt)
- Rotary Cutter with sharp blade (no kidding about a sharp blade)
- Quick Curve Ruler by Sew Kind of Wonderful
- Frixon Pen (always handy for when you need to mark something)
- Cutting Mat (I love my rotating mat for this project)
- Iron & Wool Pressing Mat (if you don’t have one – get one!)
- Sewing Pins or Wonder Clips
- Pair of bent nose tweezers (these are not required, but sooooo helpful)!
Be sure to check out my Amazon Shop to get all your Quilty supplies!
Cutting the Fabric
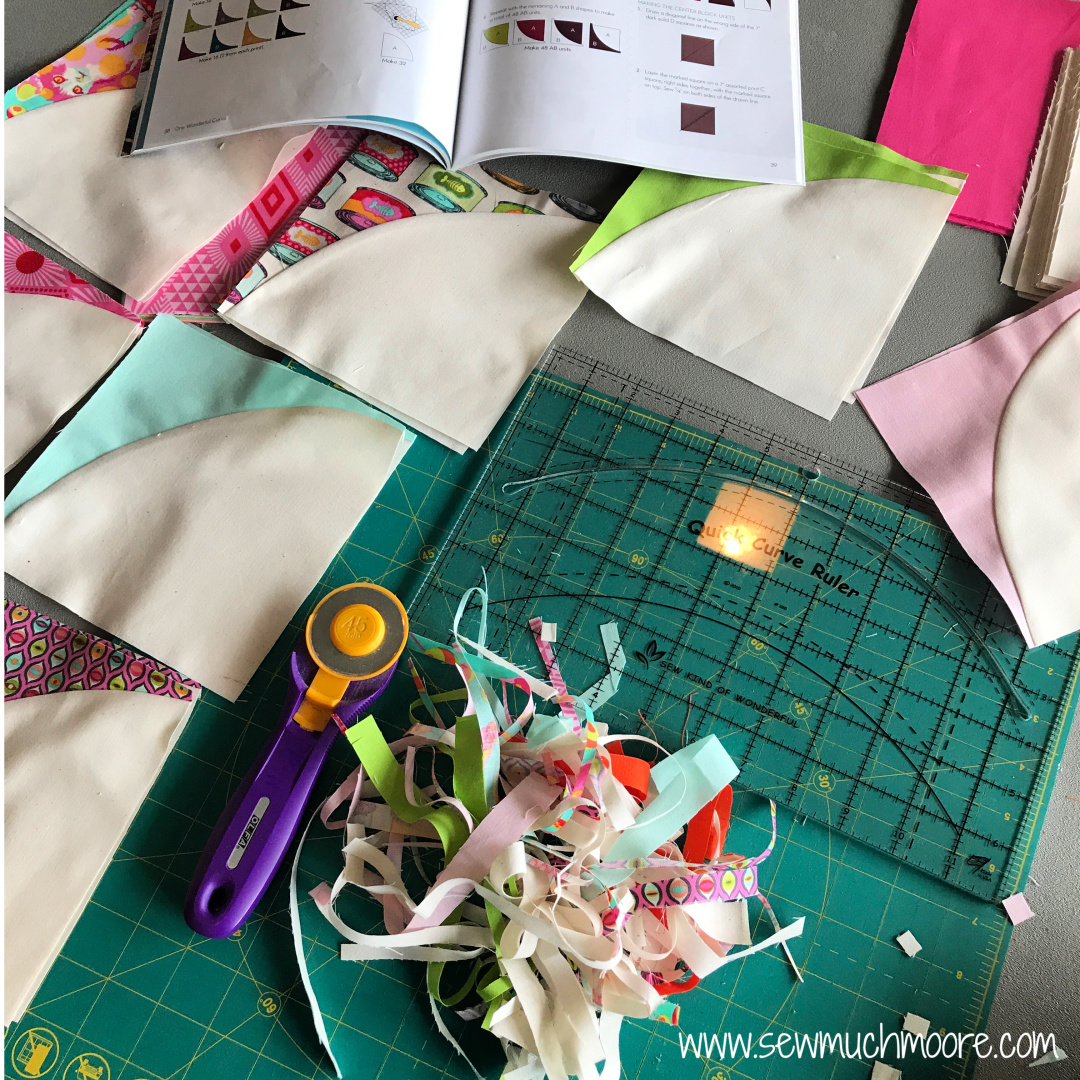
I’m inserting this video, which demonstrates the pattern book and also shows how the Quick Curve Ruler works. For this pattern, you will be cutting all your fabric in preparation for sewing. Once you sew your first curve set together, the video also demonstrates how to square up your piece. The more you make these blocks, the easier it becomes!
I spent some time (and money) on Tula Pink fabric because I love to fussy cut! I wanted to be sure the kitties were all facing the correct direction. This meant some wasted fabric, but I save my scraps for my 100 Modern Quilt Blocks project. Yay! I was able to get my first block done during our Schoolhouse.
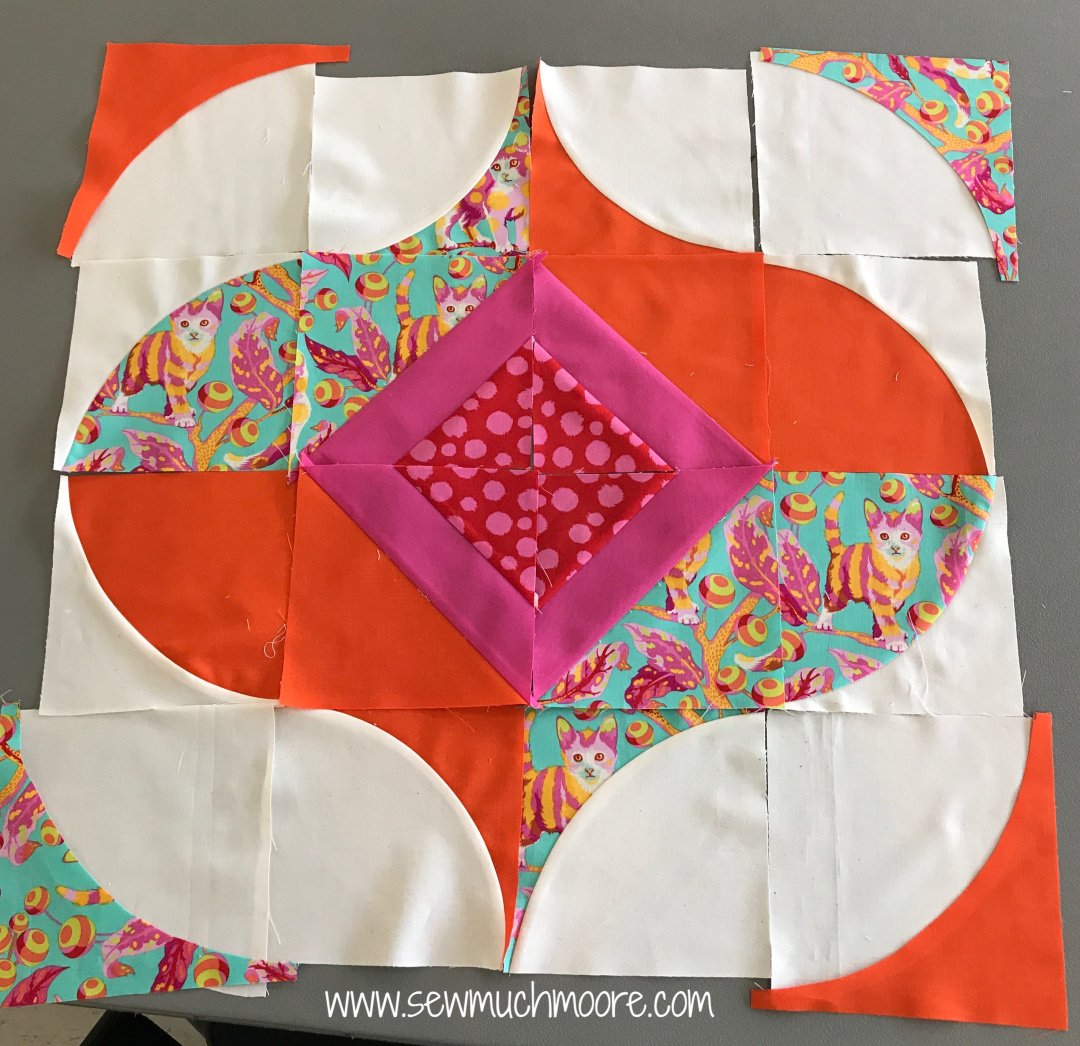
Assembling the Quilt Top
Making the remaining 3 blocks was fun and easy. Like I said, once you start making these – you won’t want to stop!
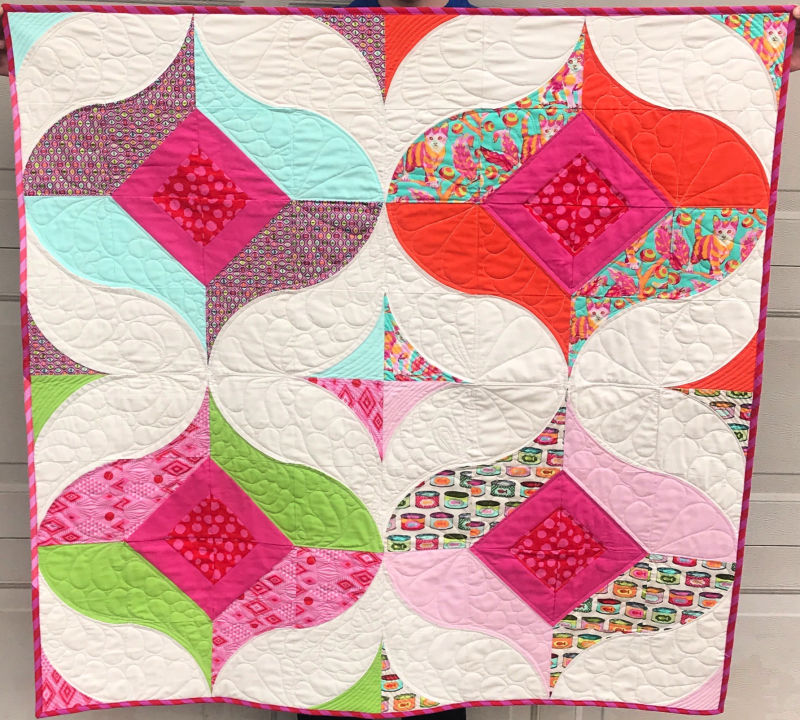
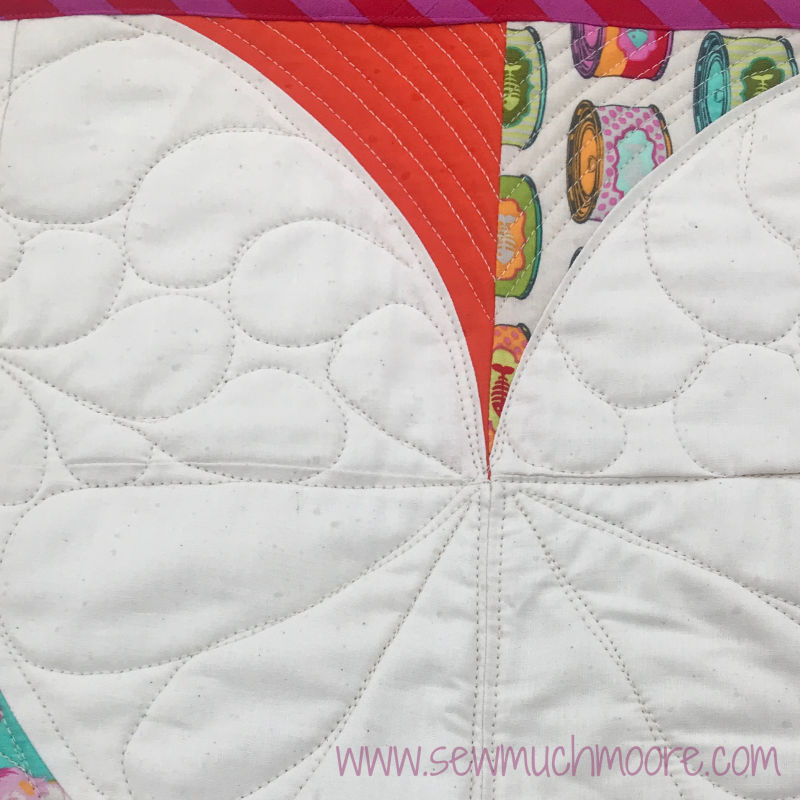
I used my Juki Miyabi to quilt this up. I also invested in some Quick Curvit Quilting Rulers to help me with the Quilting. These rulers helped me follow the curve on the Moroccan Vibe Quilt top. I love how the finished quilt turned out! Instagram was a great way for me to get some feedback, so I took a poll to help me decide upon the lovely striped bias binding. I ran out of the dark pink strip and pieced in some of the light pink stripe to finish it off! Also, I used up my remaining Tabby Road Fabric pieces to make the backing. Isn’t it scrappy and happy??!?

As Helen Robinson says, “The curves created with the Quick Curve Ruler remind us of the Middle East and its iconic curved dome buildings. The Moroccan Vibe has a variety of layout options – a long runner or a runner with each large block rotated a quarter turn.”
I hope you make a Moroccan Vibe Quilt for yourself. When you do – don’t forget to share your project in our Facebook Group! See you there!
Happy Quilting!

I love this quilt! Another great finish! ?
Love this quilt and would love to make one! Makes me think of honeymoon when we went to Morocco 🙂
Gorgeous, Nicole! I agree, curves aren’t as scary as they sound. ?
That is so beautiful. That’s one I’d like to make. So glad you posted. Thanks. Happy New Year 2025.