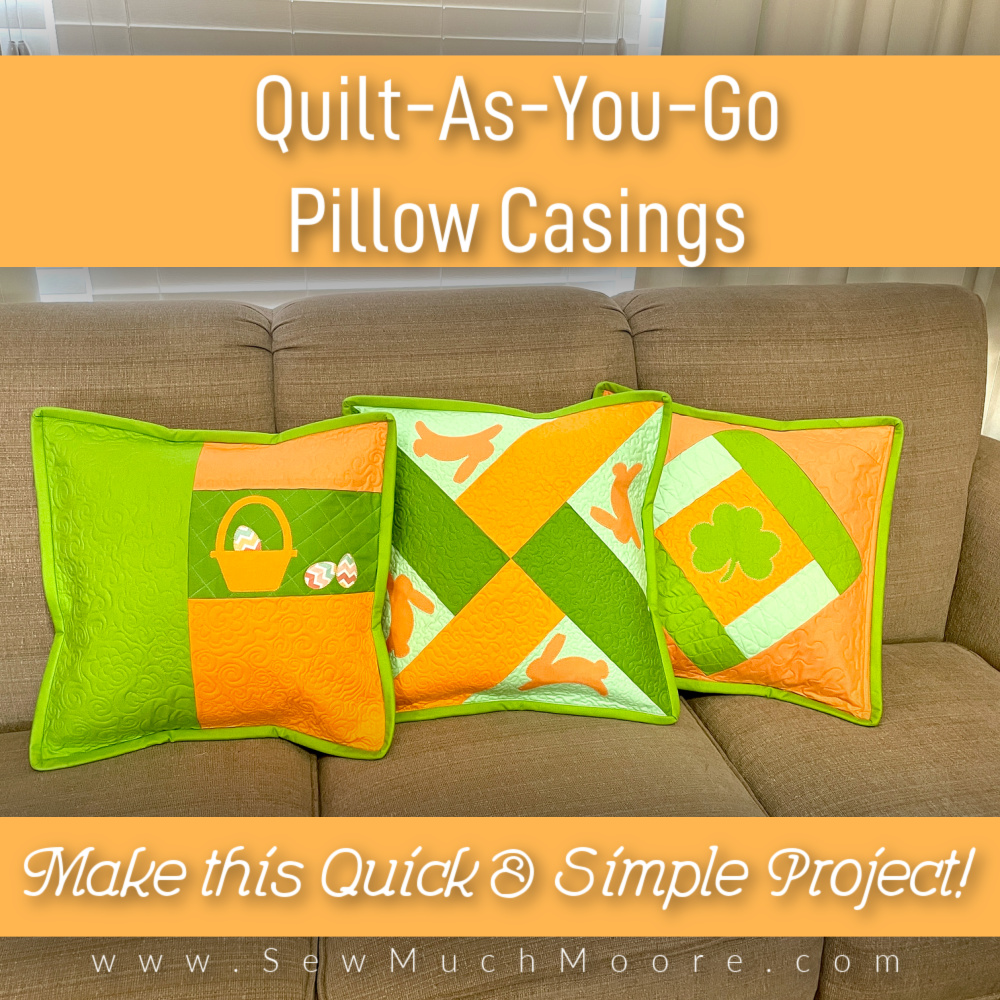
QAYG Pillow Casings
Quilting enthusiasts often look for projects that blend creativity, ease, and practicality. The June Tailor Quilt-As-You-Go (QAYG) Pillow Casing set stands out as a perfect example. This sew-by-number pattern printed directly on batting simplifies the process, making it an excellent project for both beginners and seasoned quilters. This article will guide you through making your own set of QAYG pillow casings, adding a personal touch to your home decor.
Supply List
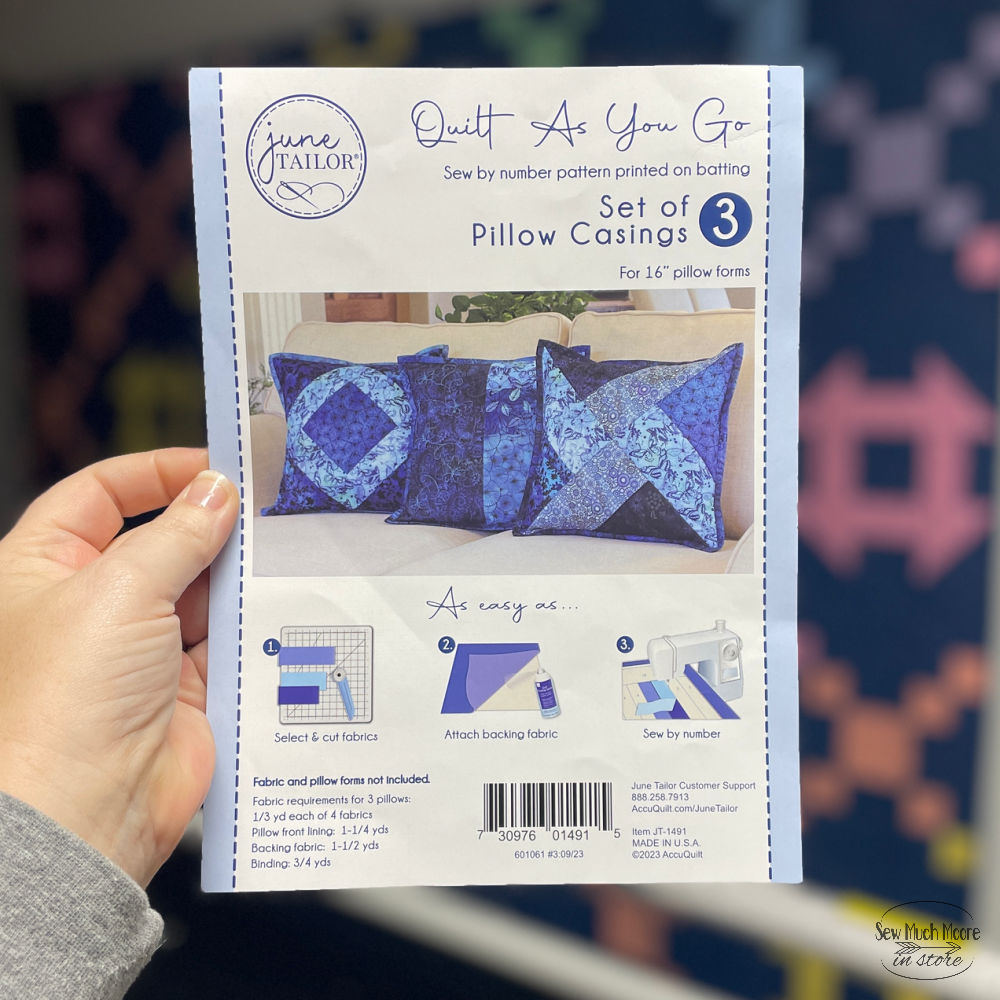
Before diving into this project, gathering your materials is essential. Here’s what you’ll to create (3) pillows:
- June Tailor QAYG Pillow Casing Kit: Includes printed batting and instructions.
- Fabric: 1/3 yard each of four different fabrics.
- Pillow Front Lining: 1 1/4 yards.
- Backing Fabric: 1 1/2 yards.
- Binding Fabric: 3/4 yards.
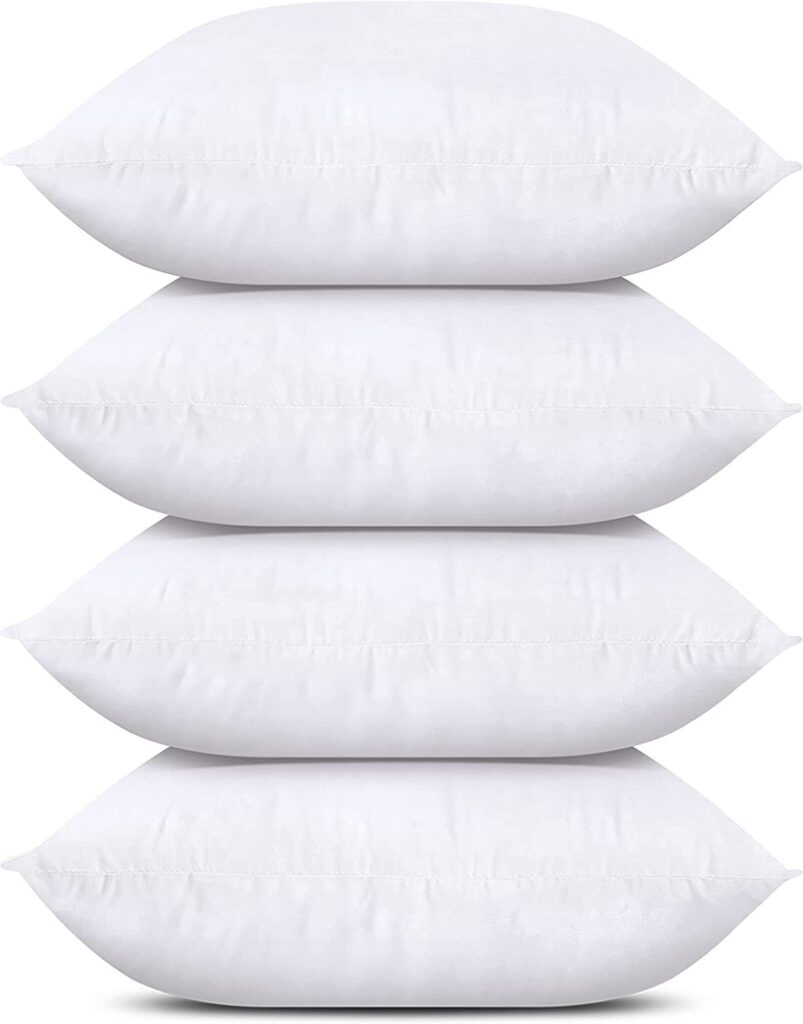
- Pillow Inserts: three 16-inch pillows.
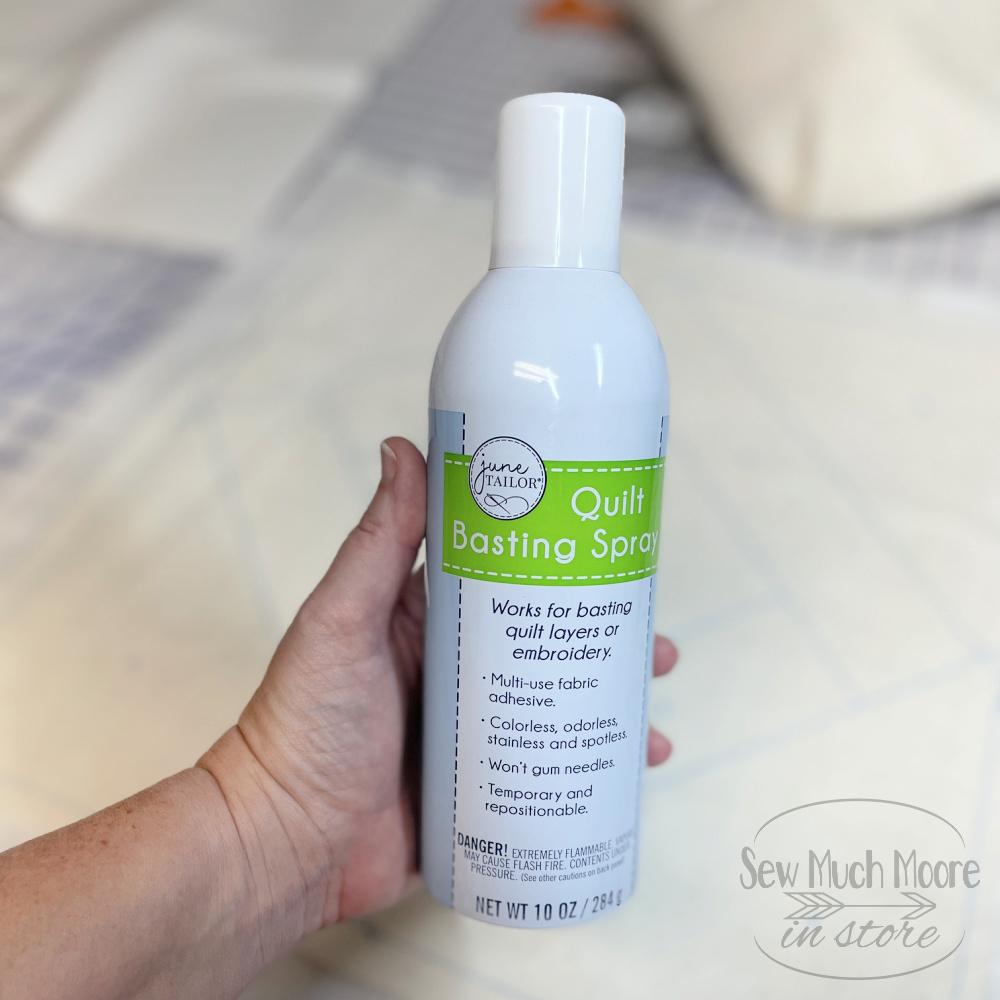
- June Tailor Quilt Basting Spray: For attaching the backing fabric.
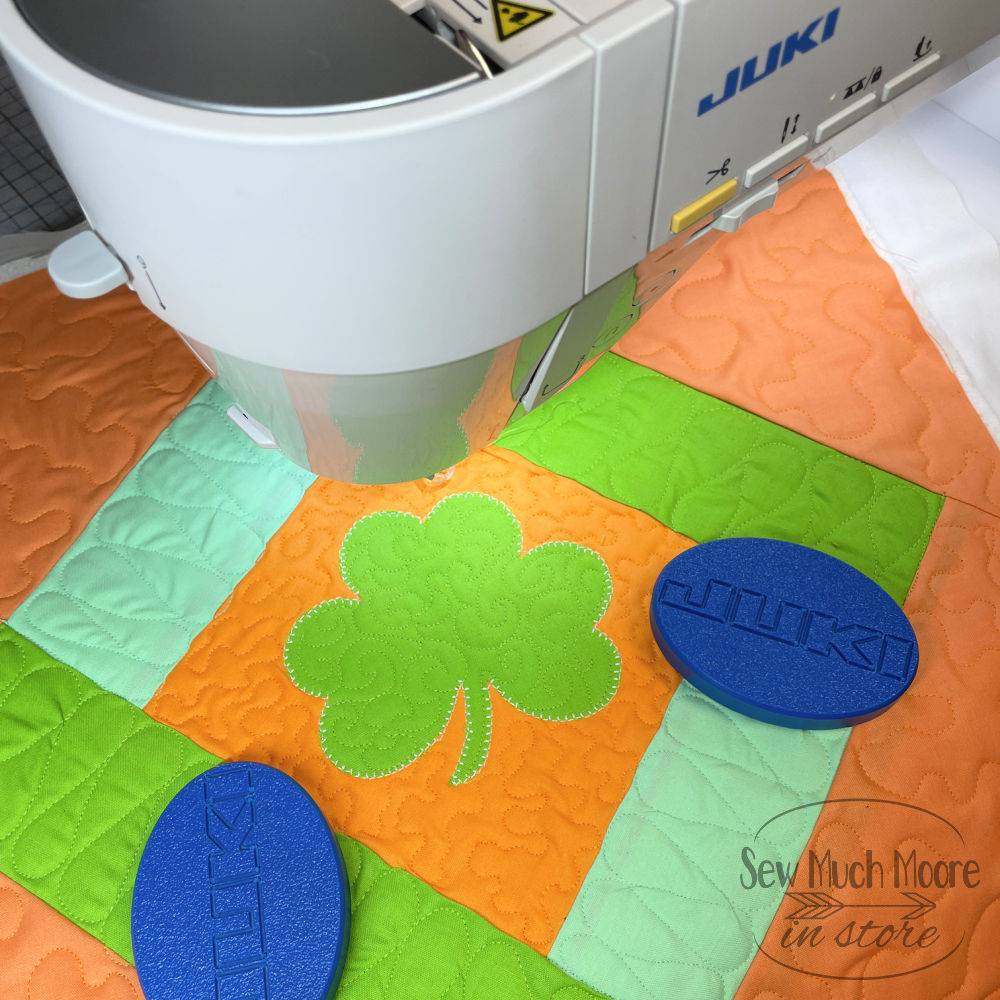
- Sewing Machine: I used my Juki DX-4000 QVP for its reliability and precision.
Project Assembly
Following the June Tailor instructions, I found assembling the pillowcases to be straightforward and enjoyable. The sew-by-number pattern on the batting guides you through each step, ensuring your fabric pieces align perfectly. After cutting your fabrics according to the supply list, use the quilt basting spray to attach the backing fabric to the printed batting. This project not only is simple but also offers room for customization and creativity.
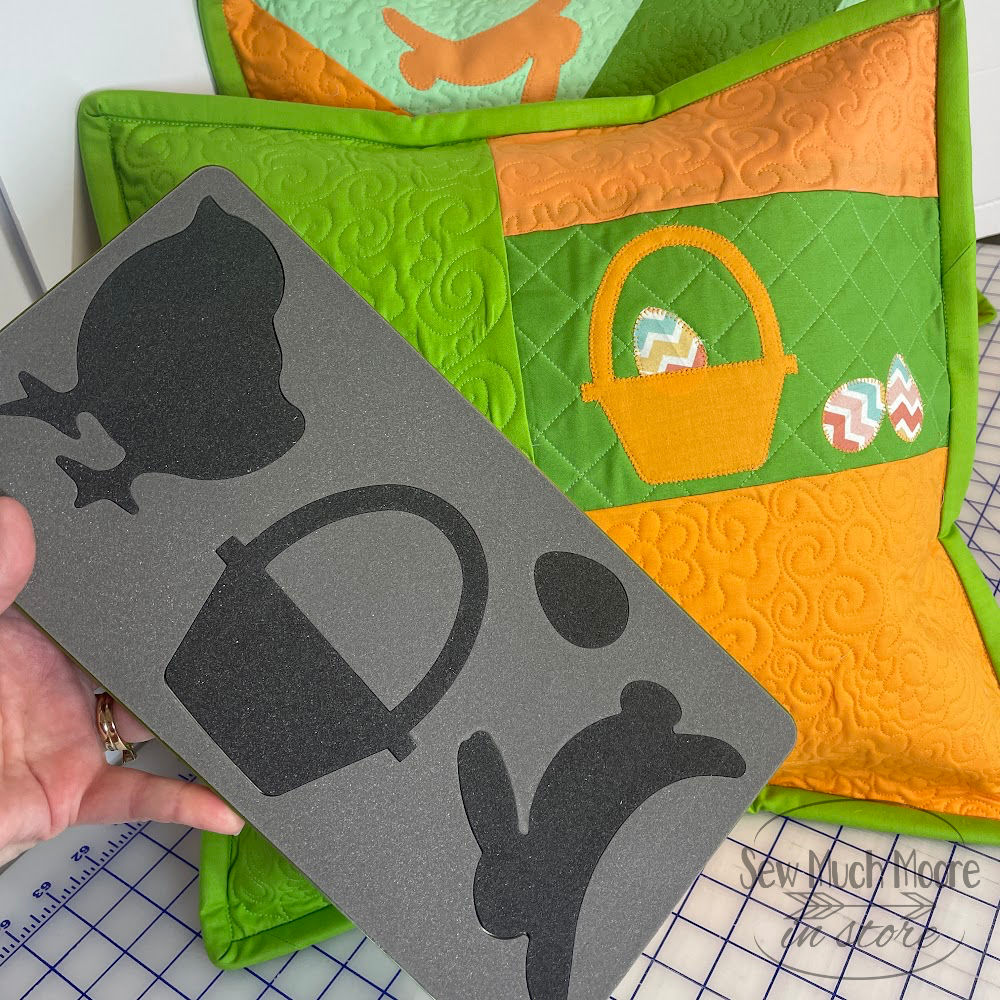
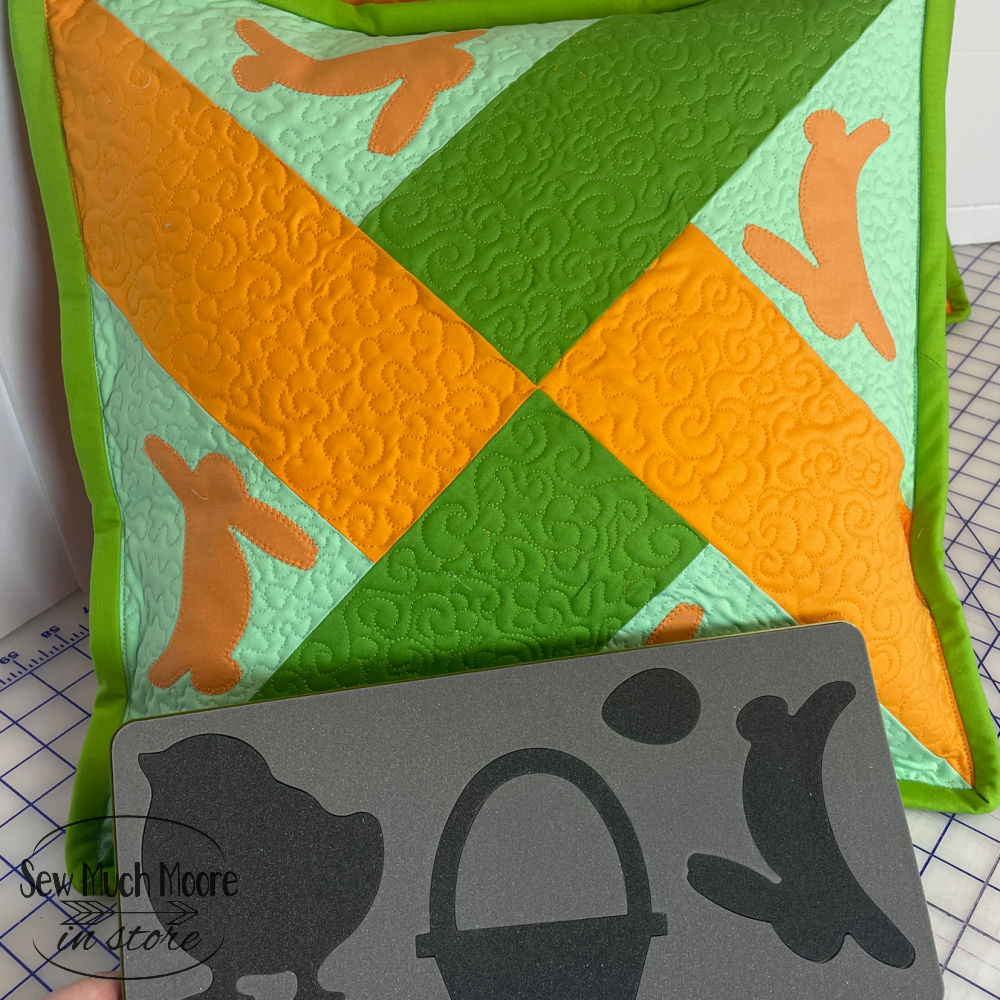
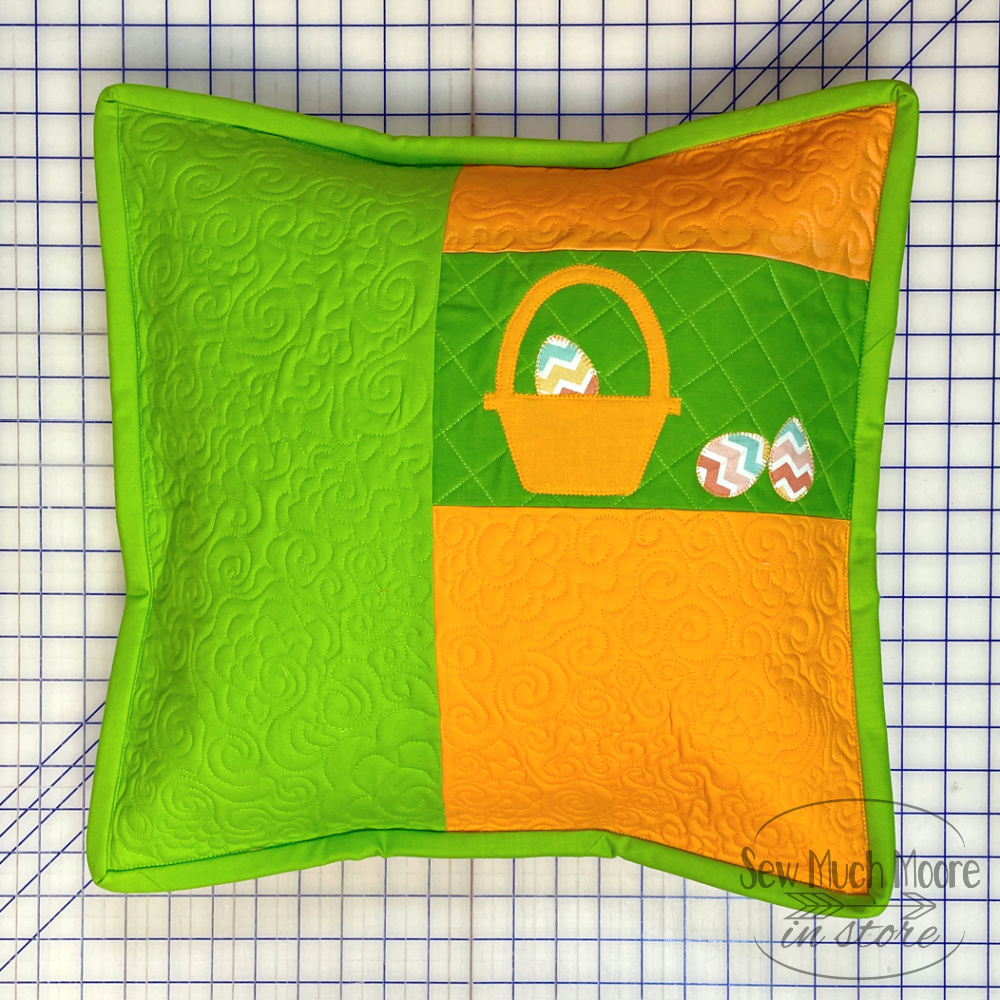
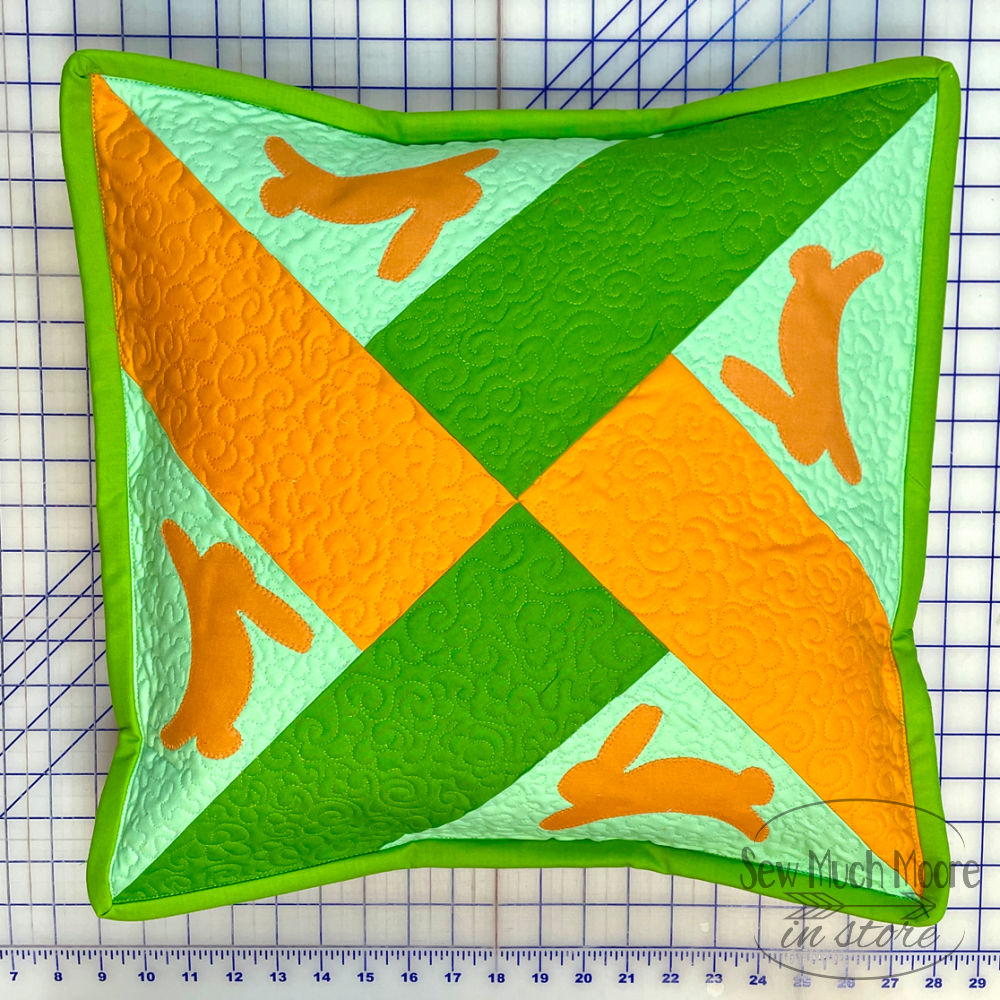
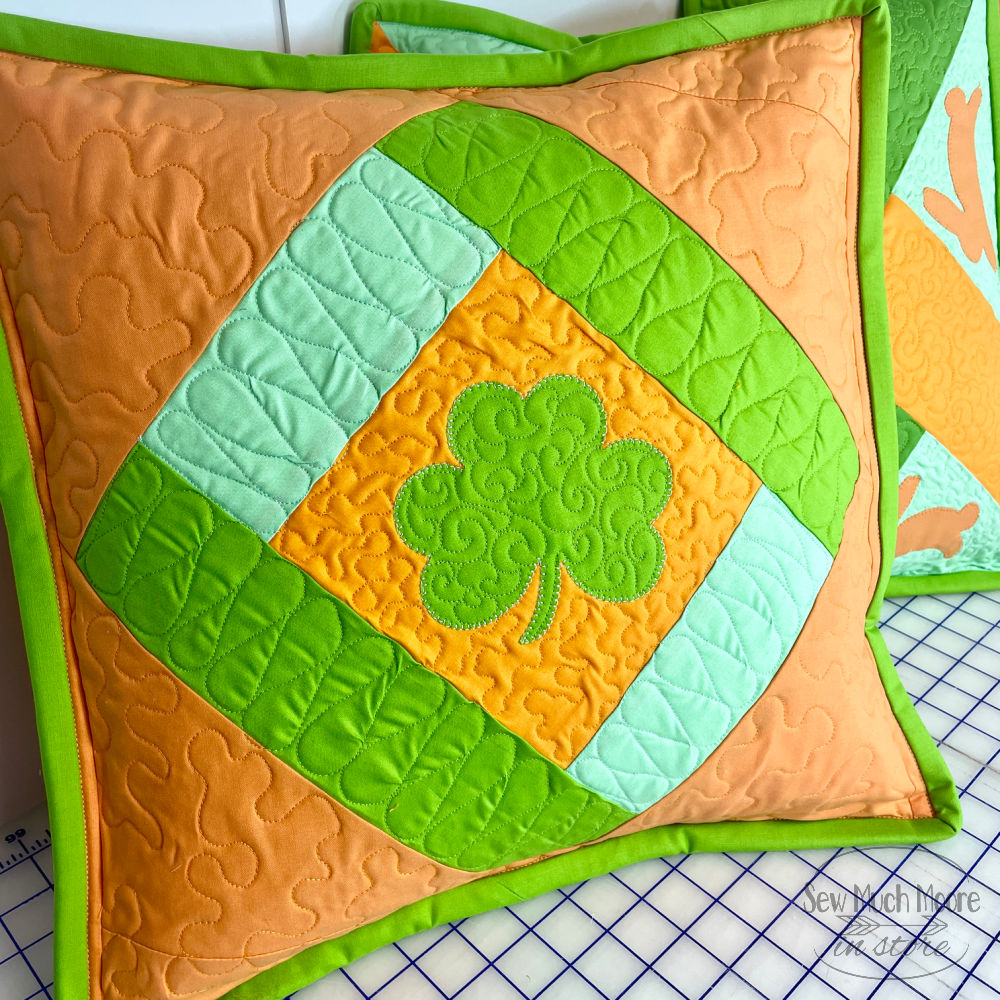
Appliqué Accents
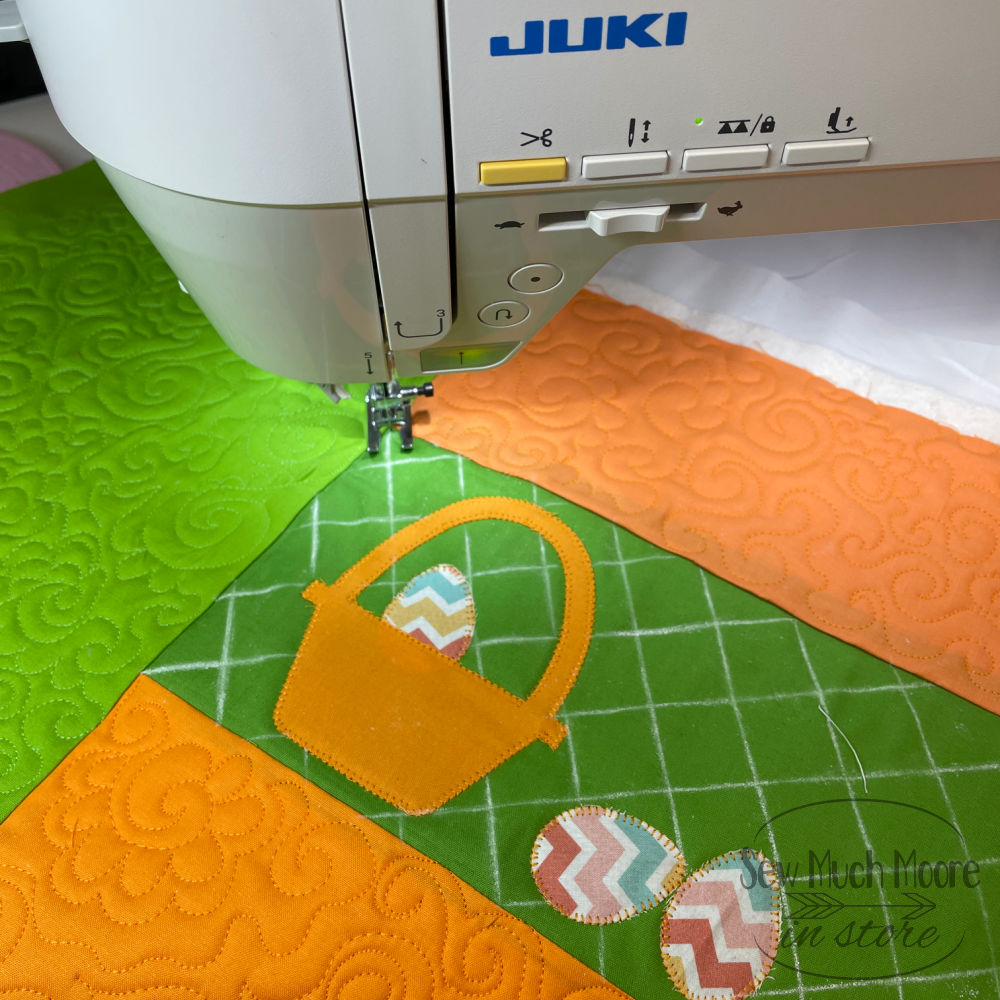
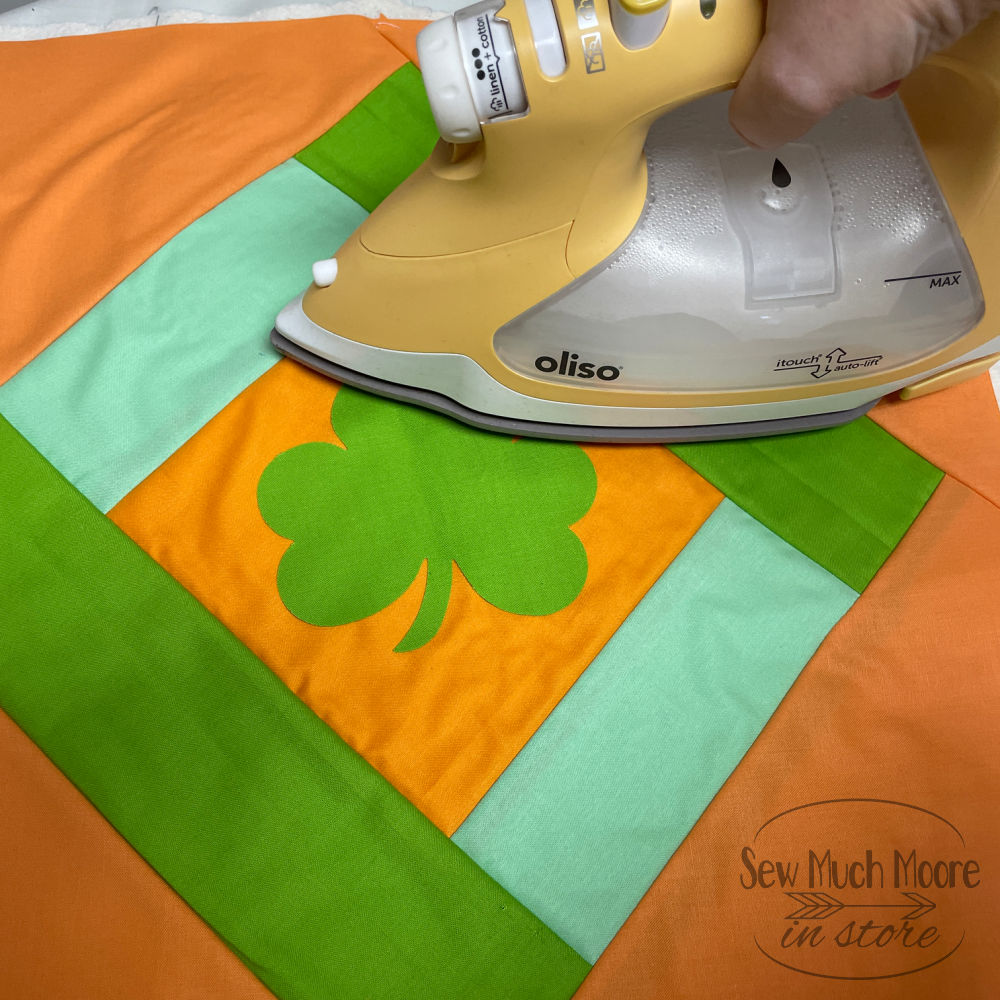
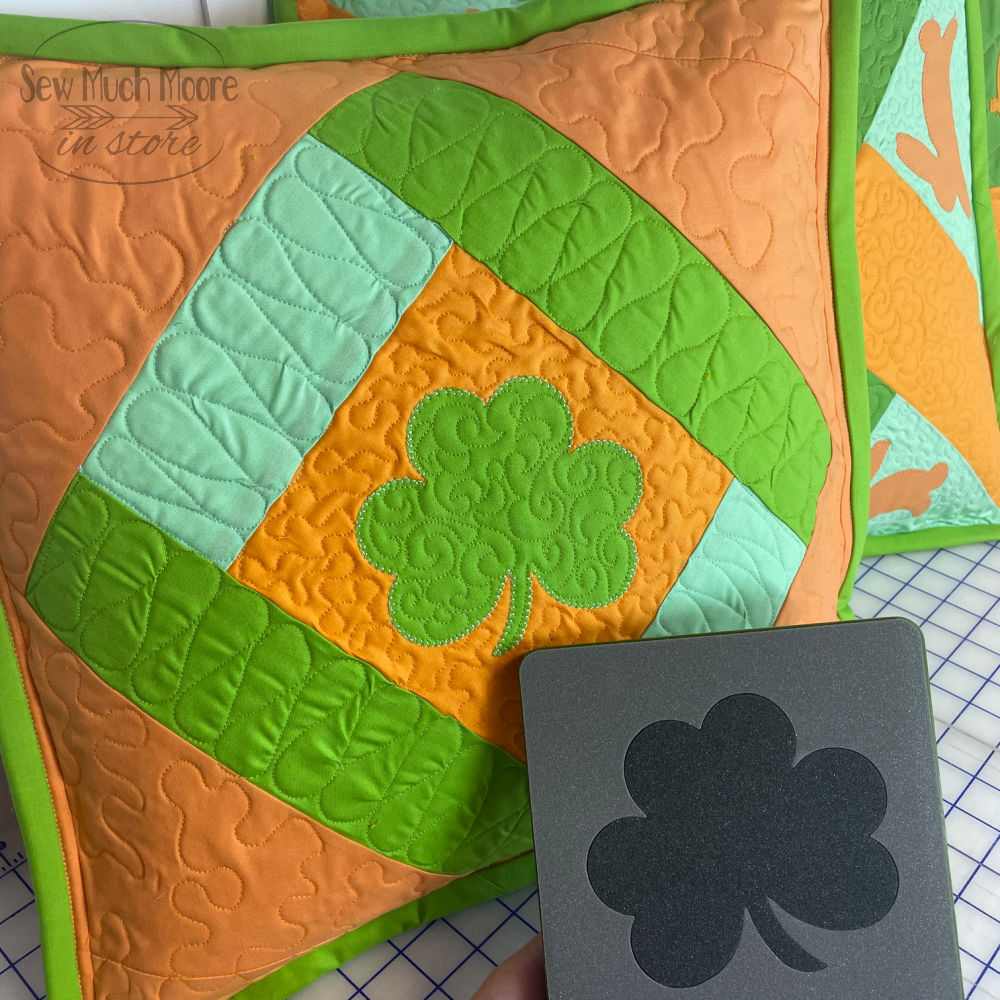
To add a unique touch to each pillow, consider incorporating appliqué accents. I used AccuQuilt dies, specifically the shamrock die (number 55594) and the spring medley die (number 55494), to create my appliqués. These pieces were easy to apply and, using the stitch options on my Juki DX-4000 QVP, attaching them was a breeze. This step is optional but highly recommended for adding personality to your pillowcases.
Quilting Finishes
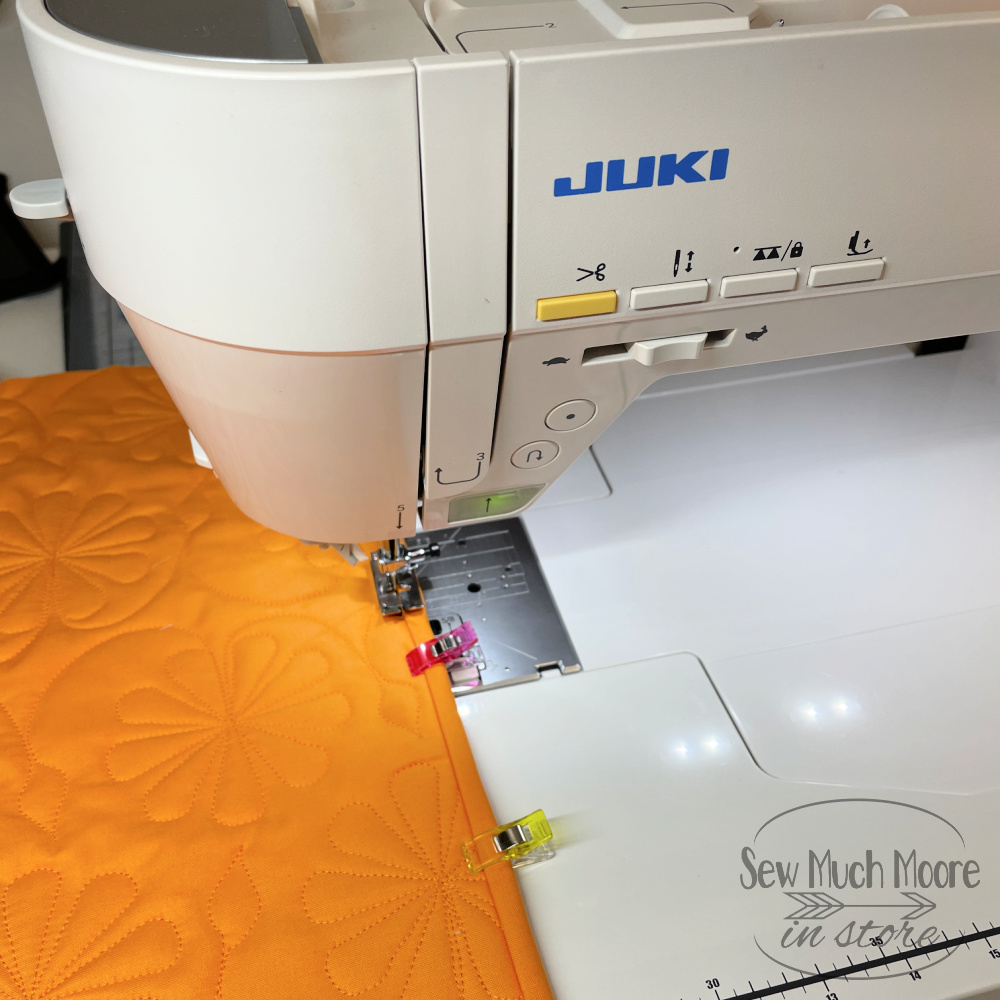
Quilting is where you can truly showcase your creativity. I quilted everything using a free-motion style with my Juki DX-4000 QVP, which boasts a 12-inch throat space, making maneuvering the fabric effortless, especially when using Juki Quilter’s Paddles. If you’re new to free-motion quilting, pillowcases are a great project to practice on due to their manageable size.

Inserting the Pillow
Once you’ve finished quilting, it’s time to insert the pillow forms. Instead of following the pattern instructions for the pillow back, I opted for quilting a length of fabric on my long arm and cutting it to size for an envelope closure. This method not only adds a custom touch but also simplifies the process of removing the pillow forms for washing.
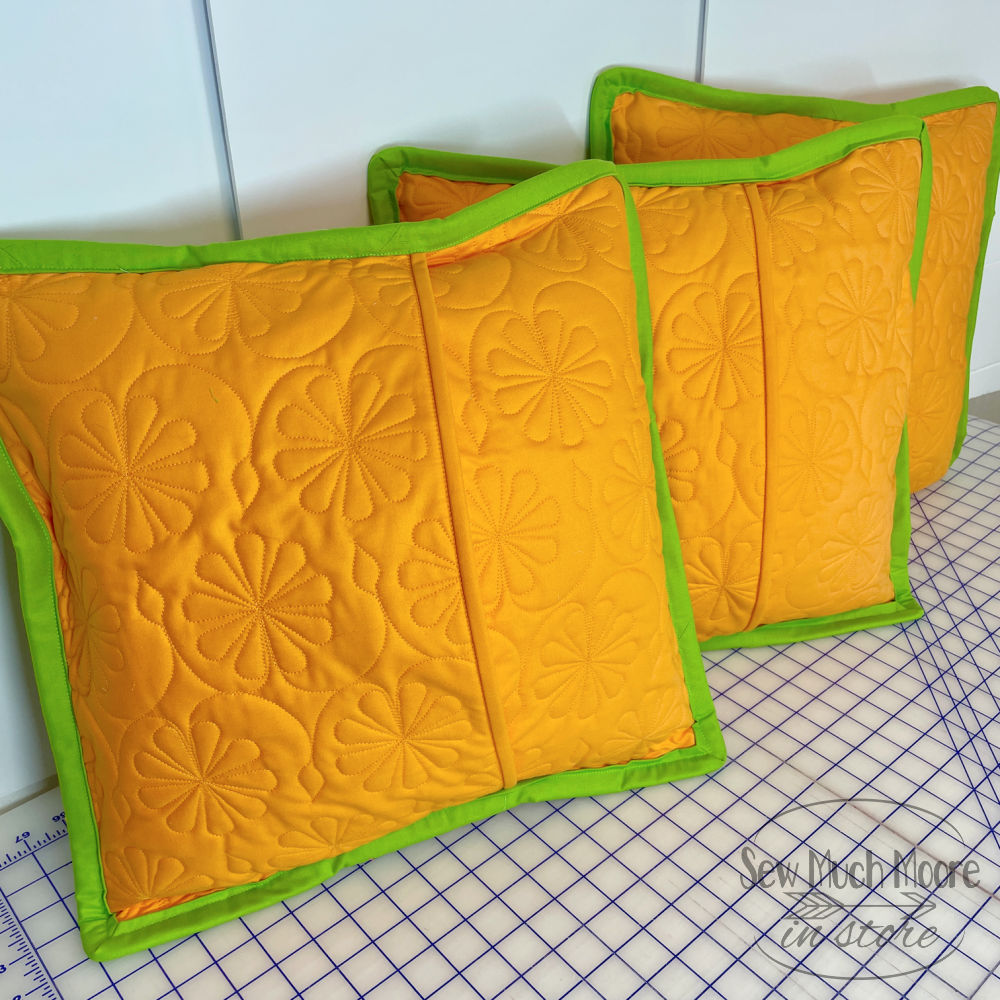
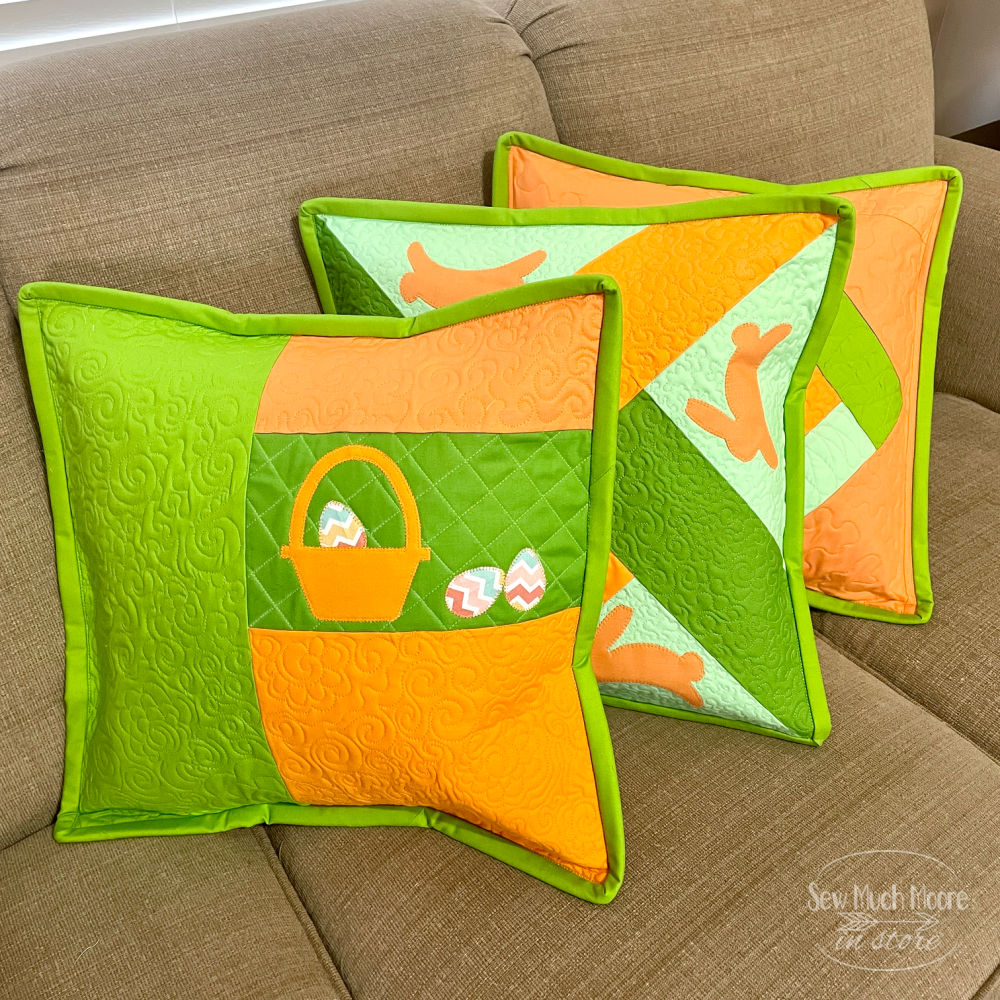
The Finished Product
The result is a set of beautifully crafted pillowcases that reflect your personal style and quilting skills. Whether you picked up your pillow inserts at a local store or ordered them online, these QAYG pillow casings are a quick, fun way to add a splash of color and comfort to your home.
This project showcases how traditional quilting techniques can be modernized and personalized. With the June Tailor QAYG Pillow Casing set, quilters of all levels can create something beautiful and functional, perfect for sprucing up any living space.
Whether you’re looking to decorate your home or make a thoughtful gift, these pillow casings offer a delightful blend of simplicity and creativity. Happy quilting!

Love this. What a fun project and your quilting is excellent!
You don’t show how you attached the binding. The rest is easy. Thnaks.
The binding is attached just like you were on a quilt. It’s just much wider.
I know you’ll show me the June Tailor kit for attaching the binding. I don’t want all that. Thank you. Beautiful pillows.