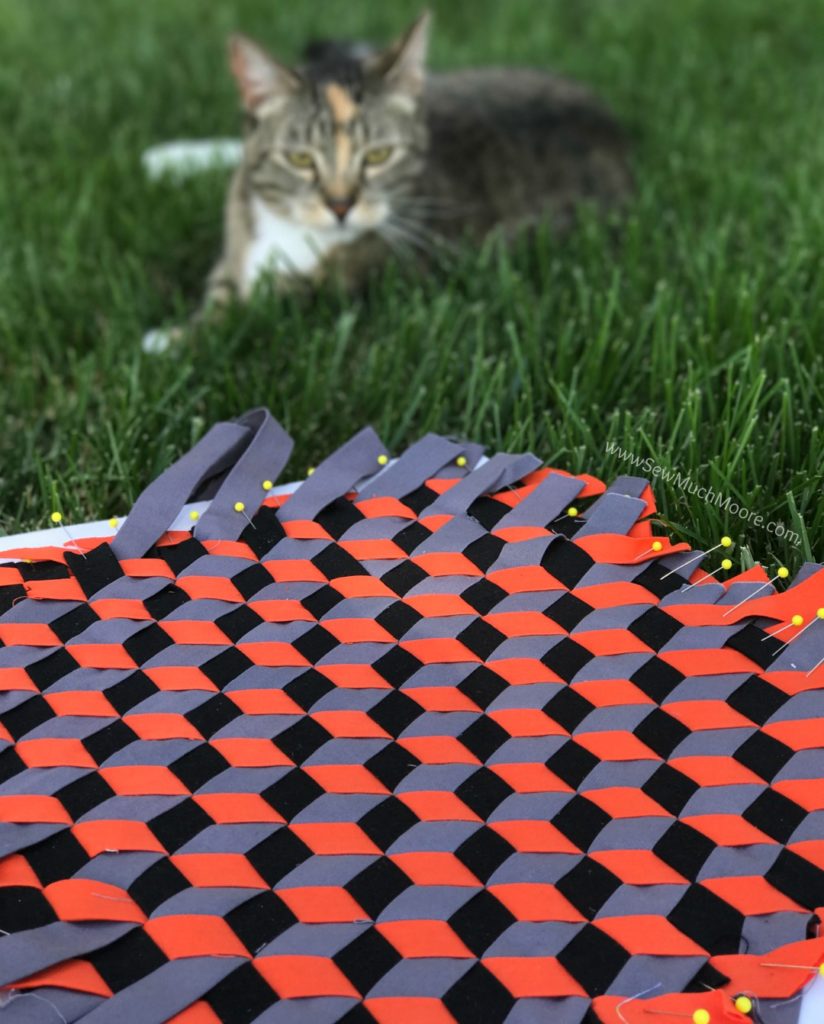
Mad Weave
Have you ever seen something and said, “WOW, how did they do that?” That is what I thought when I first saw Tara Curtis’ Instagram account (back in 2016). You see, Tara invented this awesome tool for weaving fabric strips so the weave would stay nice and tight. She began posting pictures of her fabric weaves and projects she made with her weave panels. I was amazed at the complexity and the overall statement these projects made. I started stalking the #madweave hashtag on Instagram and soon I knew that I had to try this for myself! Let me show you how to do the Mad Weave so you can start weaving fabric too!
This post contains affiliate links for your convenience. ? Read my full disclosure policy here.
The first thing I needed to understand was the materials that I needed to successfully create a Triaxal Weave (or Mad Weave). It turns out you only need a few things, and you may even have most of this already!
Materials List:
- 1/2 yard of base fabric (Ebony)
- 1/2 yard of 2nd layer fabric (Carrot)
- 1/2 yard of 3rd layer fabric (Pewter)
- 1″ bias tape maker
- large foam board (approx 18″ x 24″)
- lots and lots of sewing pins
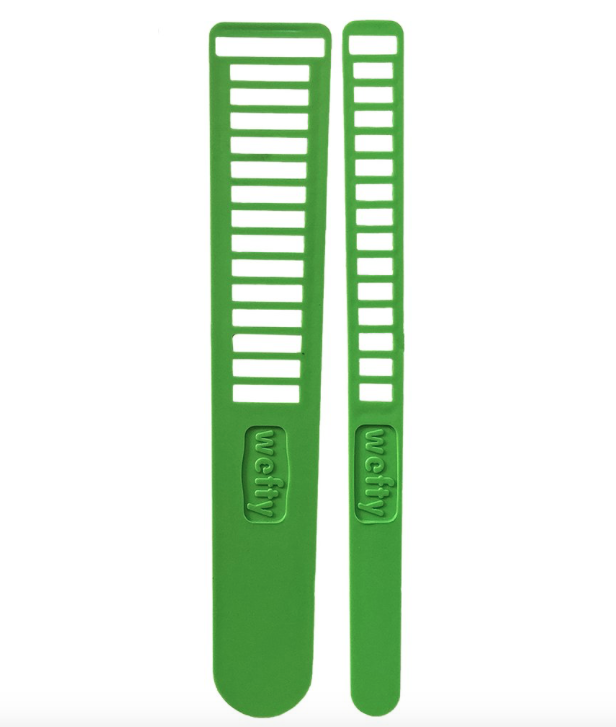
- 1″ Wefty Needle
- 1 yard of ShapeFlex 101
- Masking tape or blue painters tape
- Basic Sewing Supplies, including a long acrylic ruler with a 30 degrees mark
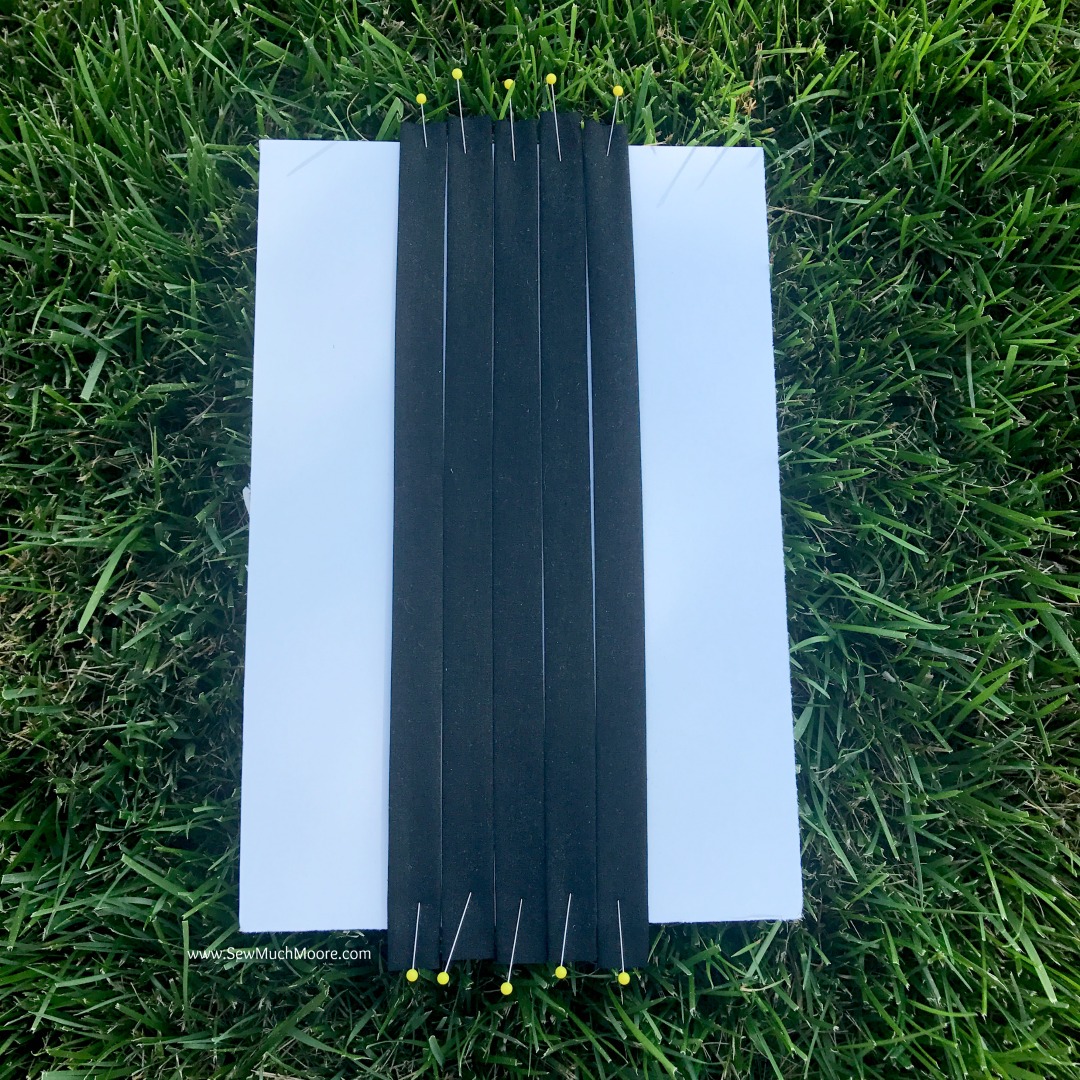
Making the fabric strips
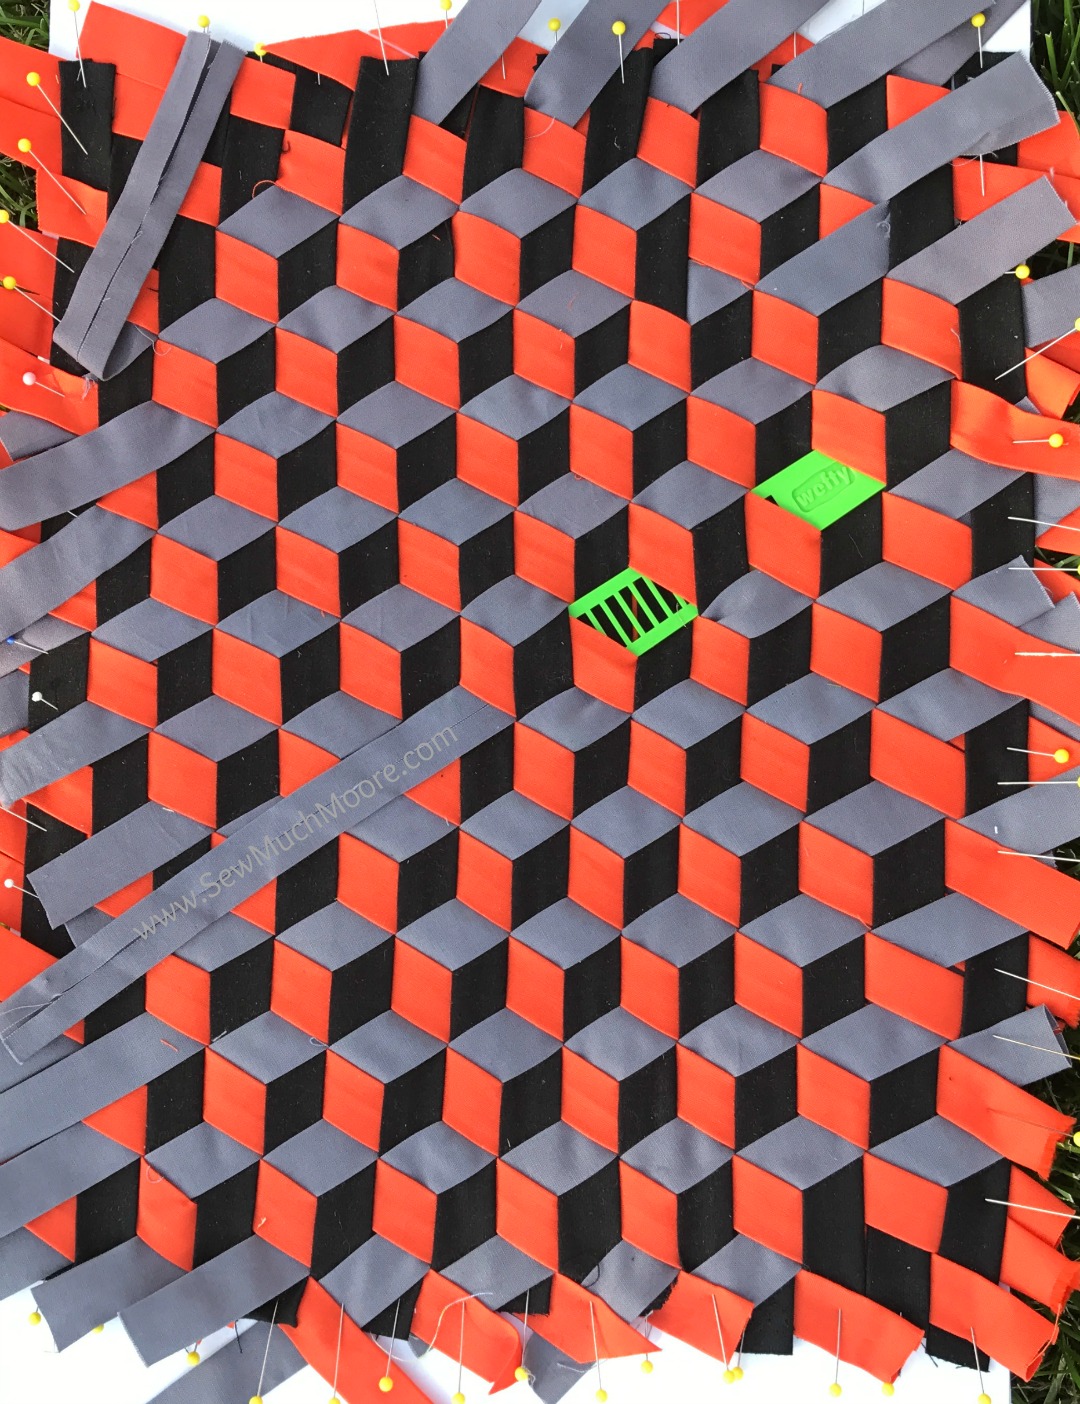
Begin by cutting all your fabric into 2″ strips of fabric. There is no need to cut these on the bias since this weave does not contain curves. Simply cut this along the grain. For your typical 1/2 yard of fabric, you should get about (20) 2″ x 18″ fabric strips. Once you cut all your fabric, you should have a total of 60 fabric strips.
Next, you will pull each fabric strip through the bias tape maker. This is essentially fold each strip into a 1″ x 18″ size.
I would also recommend using a nice fabric starch, which will help the fabric stay nice and flat during the weaving
process. My favorite starch is Best Press. I love the Lavendar scent the best!
Starting the Weave
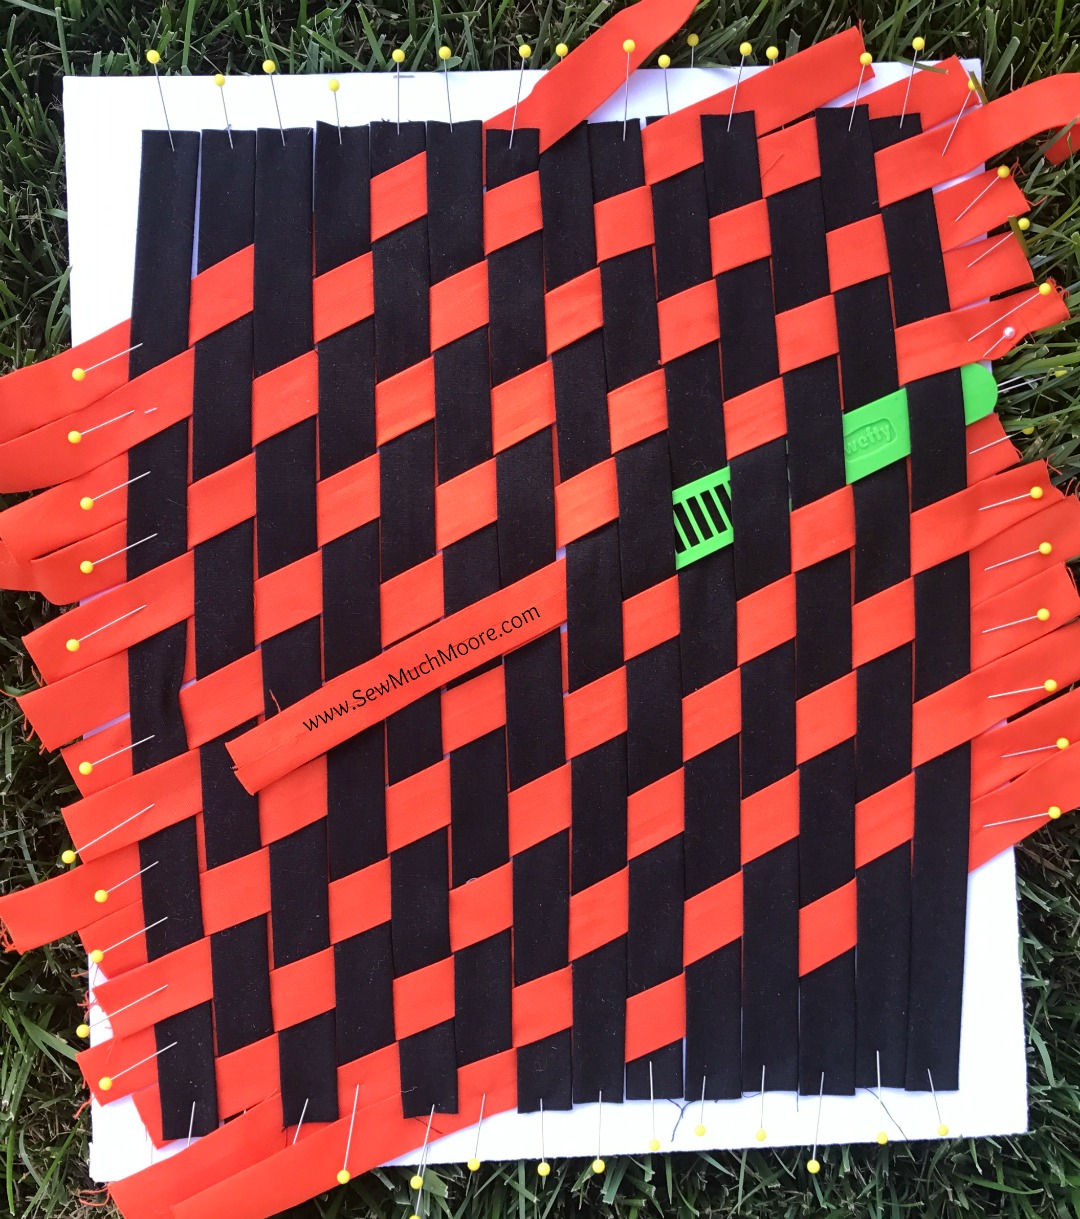
Once you have all your fabric strips folded and ironed, you will pin down your first layer. Before you start lining out your bottom layer, you will need to lay down some ShapeFlex onto the foam board. Make sure you face the fusible side up so the back of your fabric strips will be in direct contact with the waiting glue. Line up, side by side, all your 1st layer of fabric strips and pin both the top and the bottom of each strip. You will need to ensure that there are hardly any gaps or spacing.
Second Weave layer
Before you add your second layer, you will need to identify your 30 degree angle. Take your acrylic ruler and identify the 30 degree mark on your ruler. Place either masking or painters tape onto your ruler to help you see the degree line better.
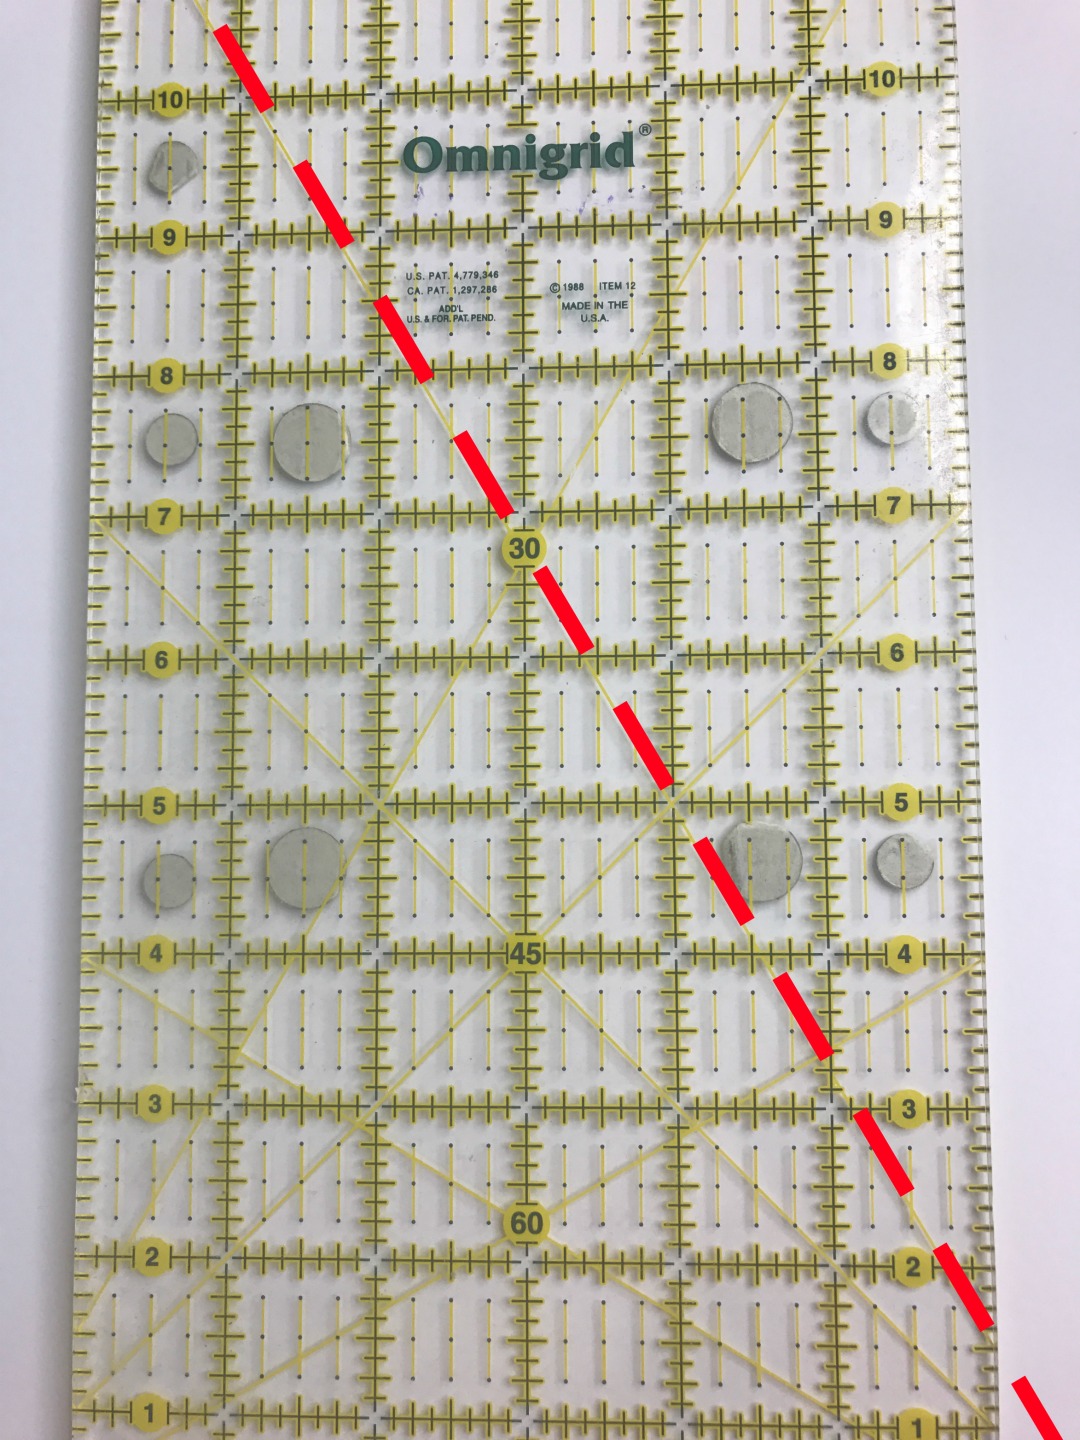
Hold the marked ruler flush with the bottom edge of your foam board. Using your Wefty needle, begin to integrate your second fabric layer into the panel. The repetition is simple: Over one, under two. You will stair step each fabric strip after the other. For example; if you begin your 2nd layer with OVER ONE, UNDER TWO…. your next fabric strip will be UNDER TWO, OVER ONE. UNDER TWO – OVER ONE, UNDER TWO – OVER ONE… your third fabric strip will be UNDER ONE, OVER ONE, UNDER TWO, OVER ONE, UNDER TWO. See image below is this is tricky to understand in writing (watching the video really makes sense of what I am writing). Continue this until the entire panel is filled with the 2nd layer.
The final weave layer
The third layer is probably the trickiest, but definitely the layer that has the most impact. The third layer gets added at a 30 degree angle as well, but you will go UNDER ONE – OVER TWO. Identify what may appear as a “BIRD” shape in the two layer weave. Using your Wefty needle, you will travel under the wings and the body, over two strips and then under first wing of the next bird. Continuing in this fashion thru the rest of the line and panel.
Finishing your Fabric Weave
Once you have the final layer in place you will carefully iron the panel so that the fusible interfacing becomes active to adhere to the back of the fabric strips. Be sure you don’t overdo the ironing (as the foam board shouldn’t want to get too hot)!
Take your fabric panel and sew around the perimeter of the panel (about a quarter inch from each edge). This will help to secure your fabric weave. Once you have secured your weave panel, you can incorporate this into many different projects!
Join the fun! Get your Wefty Needle and start weaving!
Weaving projects
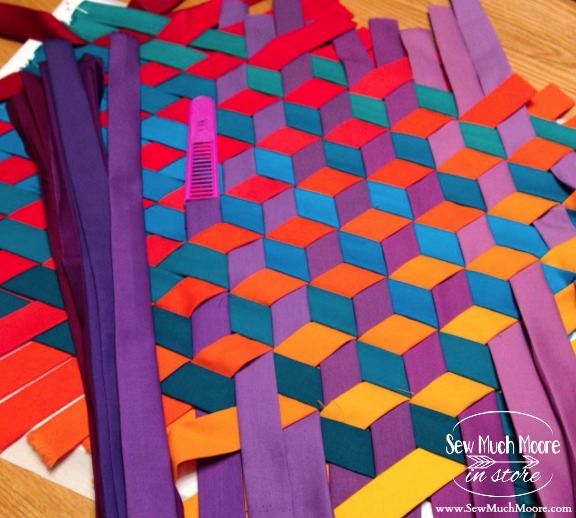
I’ve taken this weave process and made another weave panel into a Tote bag! Instead of using only 3 colors, I used a wide variety of Solid Fabric from my online shop. I was very intentional about the color gradation and created this ombre effect. After I completed my weave panel, I used the weave panel and made a Tote Bag. This Tote bag pattern is by Elizabeth Hartman and is called the Perfect Quilted Tote. I love how it turned out!
![]()
If you would benefit from watching a video of the process I described above, simply watch the video below!
click here to watch the tutorial
Until the next project, check out some other fun things below!
Happy Sewing!
~Nicole~
This looks so neat and excited about leArning how.
Making these fabric panels is a lot of fun! Have you tried this yet?
This is awesome! Thank you so much for sharing this!
Your welcome! I’m ‘sew’ glad you enjoyed it!
I made a woven fleeve fabric blanket a couple years ago- (never knew there was a tool for weaving fabric- I fashioned something similar from a piece of 8 ply matboard- worked well) but it was not on the bias and didn’t have the dimensional effect. I really like the cotton fabric and how this one is done. What is the finished size of the panel?
Hi Kim, I have several different sizes of panels. For the Ombre panel, I used a foam board that measured approximately 28″ x 22″. It worked out well for the tote bag. Get yourself a Wefty needle and give it a try! I hope you love fabric weaving as much as I do!
~Nicole
Why make bias tape vs just strips?
Hi Audrey! I like to make the fabric strips because it keeps the raw edges towards the back of the project. You could most certainly use strips, but your fabric has a better chance of fraying. If you don’t want to mess with all the ironing (to make the bias strips), then I would recommend using ribbon. Just use the correct size Wefty for the ribbon. Easy Peasy!
This is amazing, I’m so going to try this, thanks for sharing 🙂
It’s nearly impossible to find knowledgeable folks about this topic, but the truth is sound like do you know what you’re dealing with! Thanks
Wow! Thanks for the video! I need to get one of those wefty needles!
Where do you purchase the wefty?
Hello Emilie, You can purchase the Wefty Needle set in my shop. Here is the link: https://www.sewmuchmoore.com/product/wefty-needle-set/ Happy weaving! ~Nicole
I have tried to sign up for! your newsletter to get instructions for mad weaving 5 times ! Still waiting for the confirmation email
Hello Barbara and thanks for your comment! My Newsletter software suggests that you were sent a Confirmation Message on 08/17/18 at 11:14am. Many times, your email server may think that messages from me might be considered spam. Please check your “junk” or “spam” folder for my message. Once you find the message, you only need to confirm your subscription to my Newsletter and you will also receive the free info you requested. Thanks again and please don’t hesitate to contact me if you have any problems or questions. Happy Weaving!
Wow that was tricky, tried several times with just the written instructions but I only really got it with the video, thank you! Bit of a work out for my brain on a quiet afternoon
Great! I’m glad you found the video helpful!