The Hashtag Quilt
In the past, I used to create commissioned quilts, although it has become less frequent nowadays due to the high costs involved for customers. However, a memorable request came my way when a customer approached me to craft a quilt for her son’s upcoming high school graduation. As we explored various quilt block patterns together, one design caught her attention in particular—the Hashtag Quilt Block that I had previously crafted. Given her son’s keen interest in hashtags, she enthusiastically chose to have me bring the Hashtag Quilt to life. Now, let me take you on a captivating journey as I unravel the story behind this extraordinary creation.
This post contains affiliate links for your convenience. ? Read my full disclosure policy here.
The Hashtag Quilt – MATERIALS LIST
- I was inspired by my Hashtag Quilt Block Pattern (I just made them smaller, made lots of these and then set them with sashing)
- Hoping to make a Quilt Pattern someday!
- I used black yardage (I cut these into a million strips!)
- I used several yards of White Fabric (this is for the background and the border)
- I used the same black/Ebony Fabric for the binding (I just cut the strips a little wider)
- Fabric for backing
- Cotton batting
The Hashtag Quilt – SUPPLY LIST
- Sewing Machine – checkout my domestic sewing machine recommendations
- Cotton Thread (I recommend Aurifil 50 wt)
- Rotary Cutter
- Acrylic Ruler – I recommend the Stripology Ruler.
- Cutting Mat
- Iron & Ironing Board
- Sewing Pins or Wonder Clips
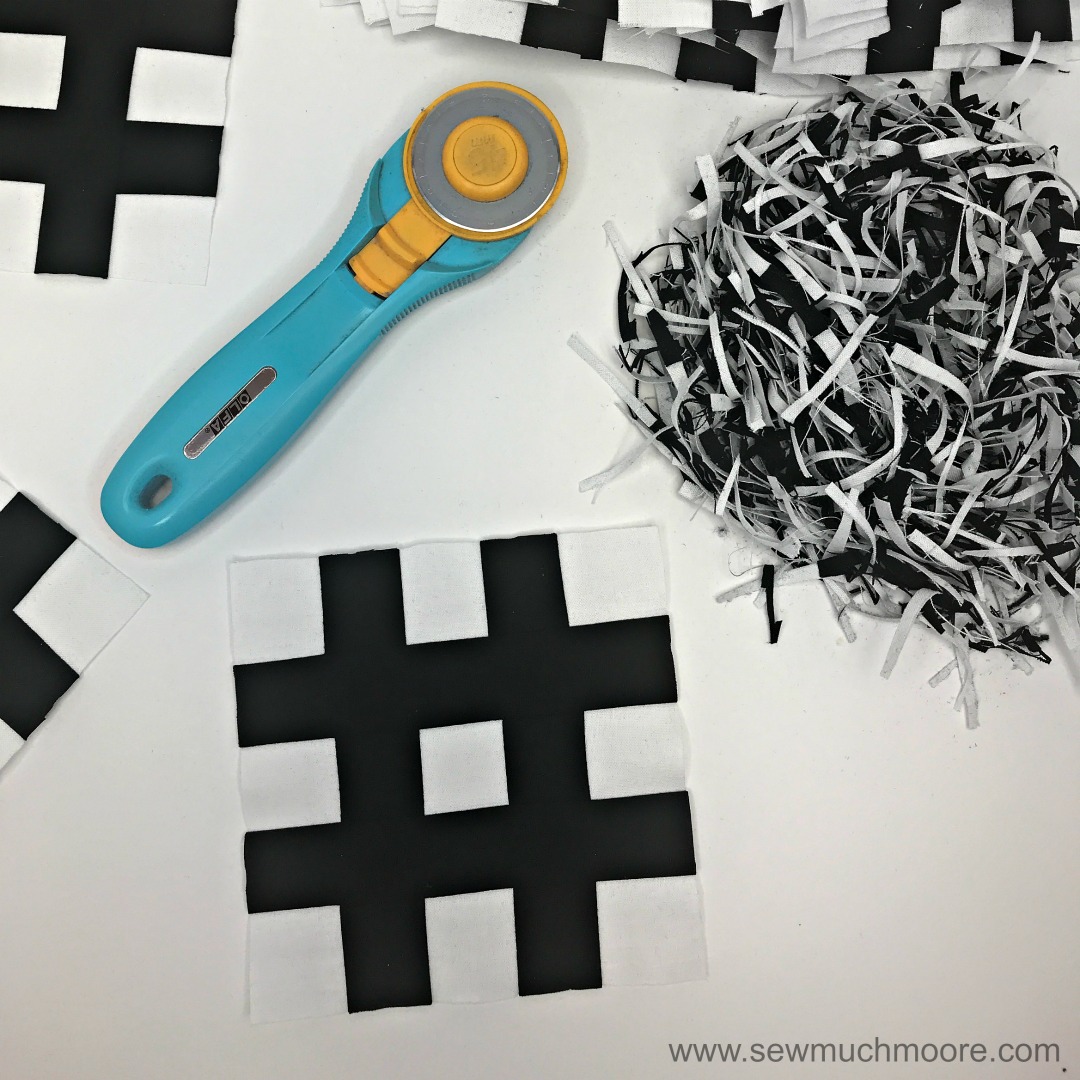
The Hashtag Quilt – assembly
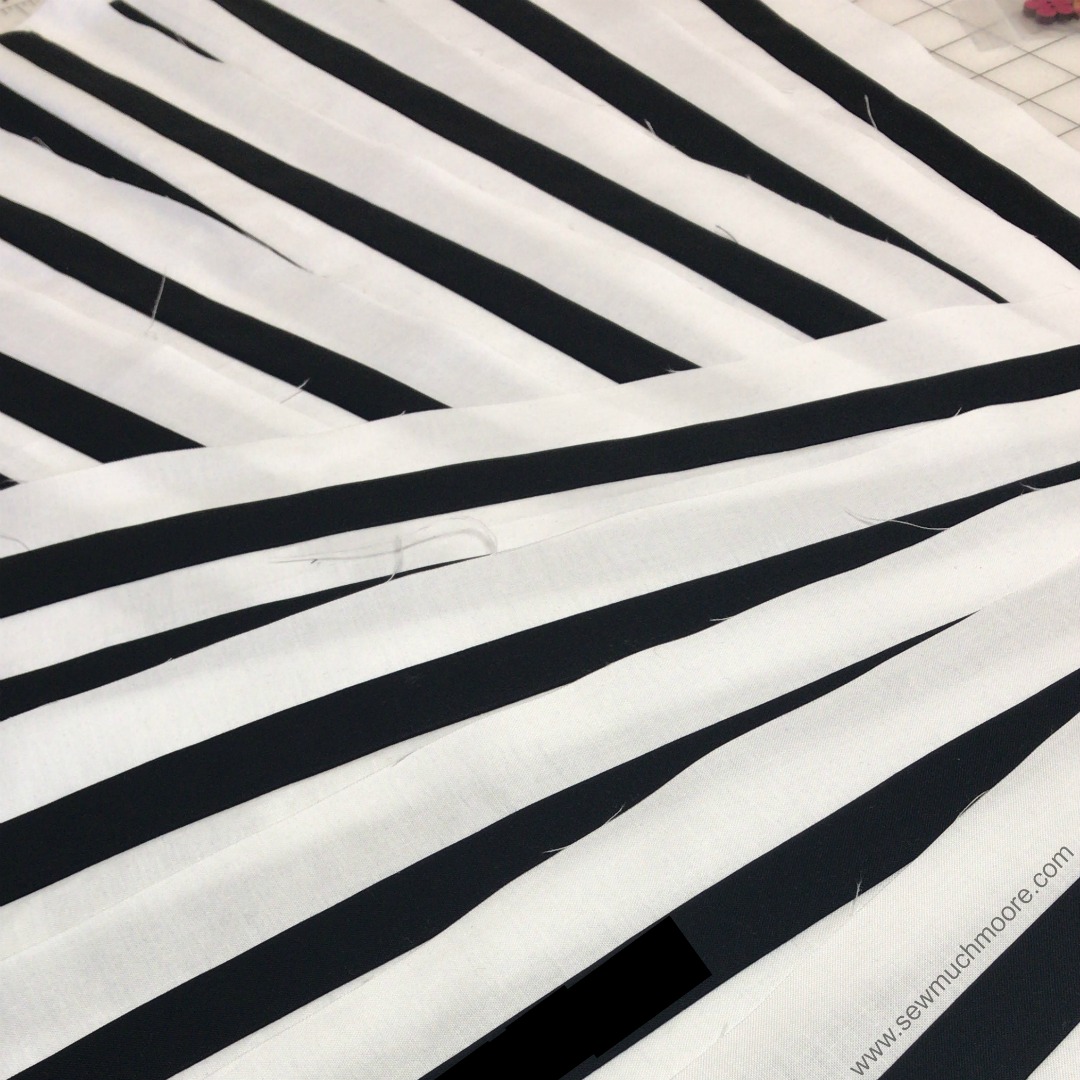
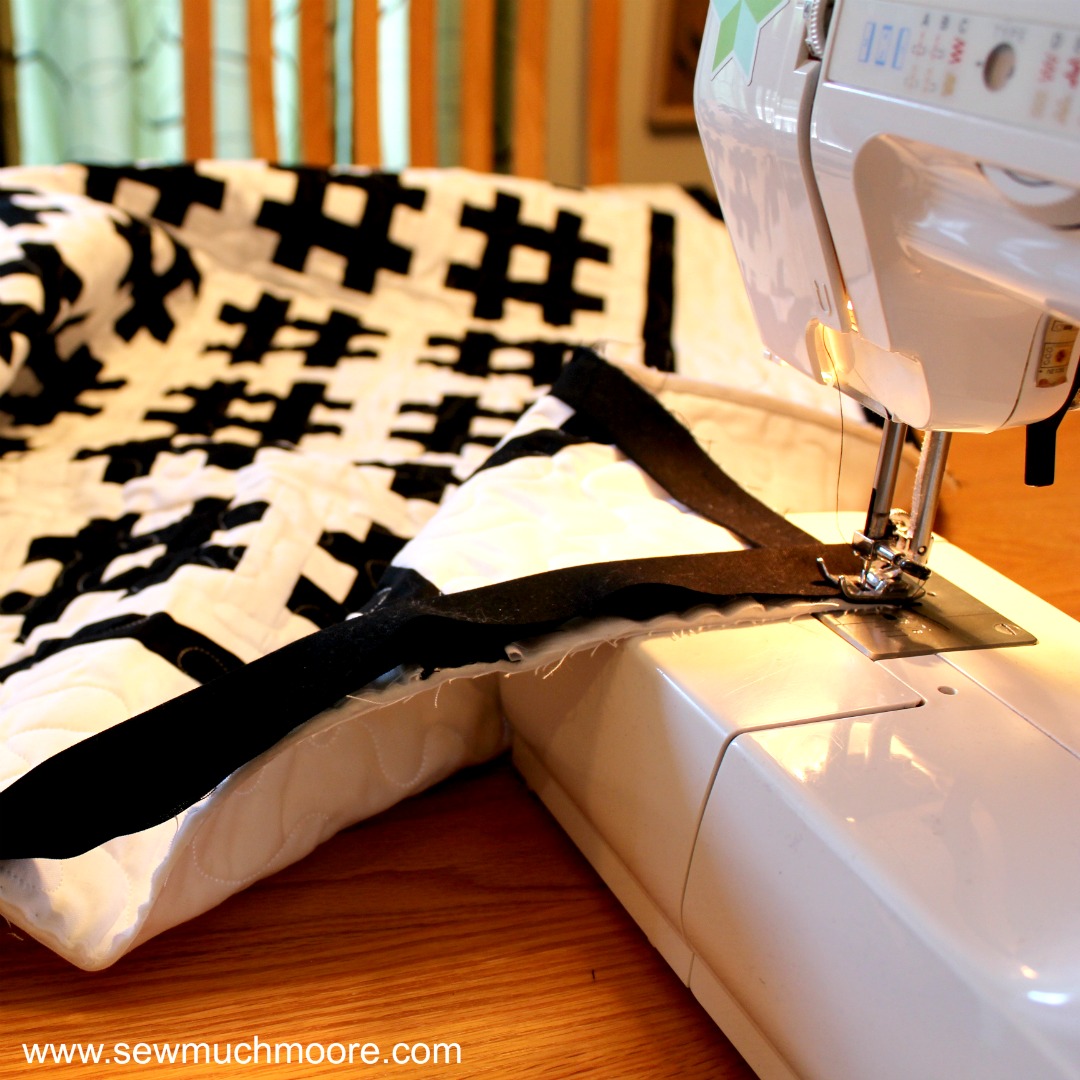
I definitely found the Stripology ruler to be a MAJOR time saver for this quilt! So many cuts of the same size! I also highly recommend that you use a 1/4″ quilting foot (be sure you get the right one – tons of choices for different machine shafts). There is tons and tons of chain piecing, so be sure to wind lots of bobbins too – or you can cheat and get the pre-loaded bobbins. I won’t tell – hehe!
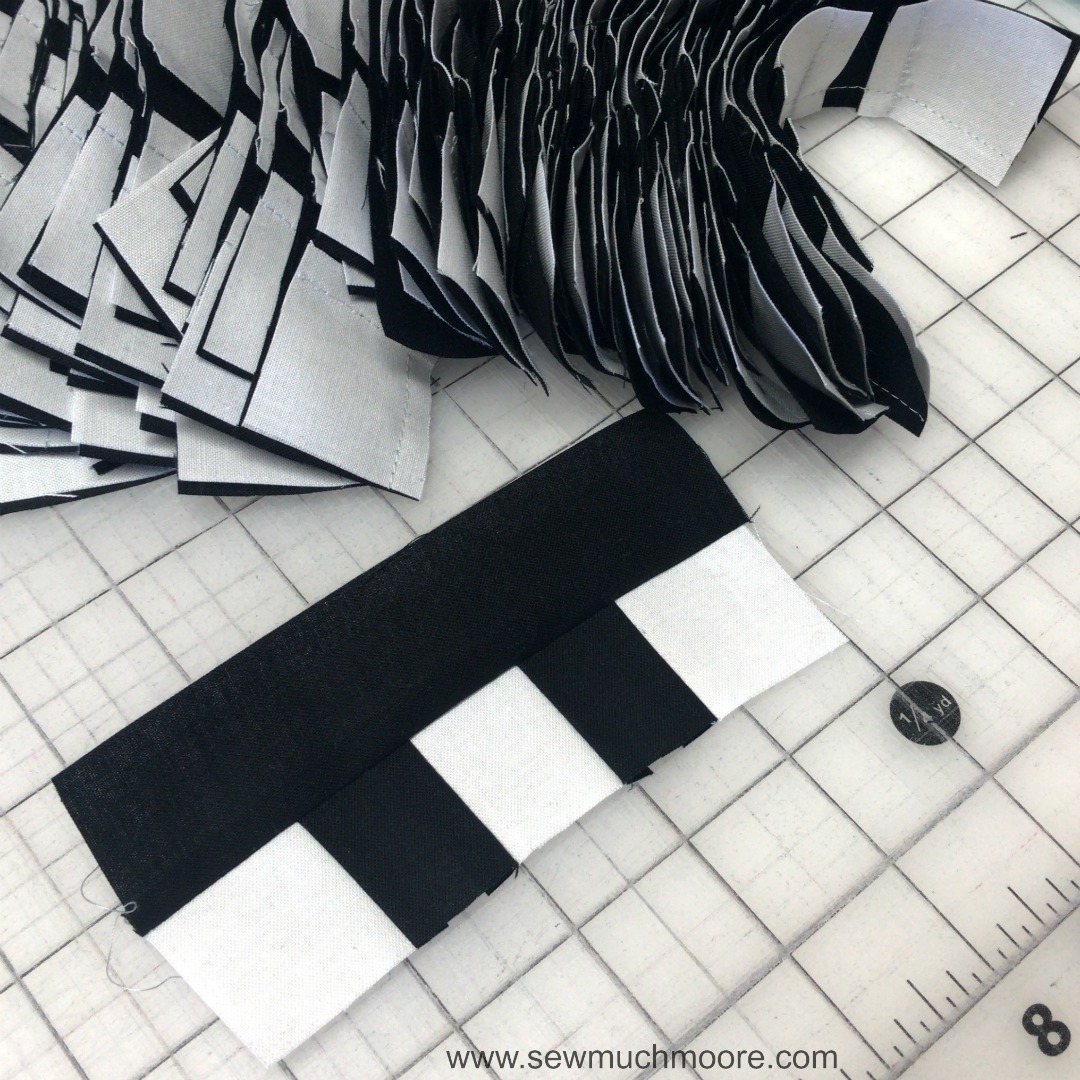
I created 2 kinds of strip units. The first strip set was white/black/white and the second set was black/white. I sewed these together and then cut them to size. I sewed black strips perpendicular to create the hashtag.
The Hashtag Quilt – almost finished!
Back in the day (before I had my own Juki J-350 Miyabi Quilting machine), I used to rent time on my friends machine. Once you use a long arm quilting machine – it’s difficult to go back to quilting on your domestic (just sayin’). I know everyone doesn’t have a long arm option, so you can always use free motion quilting on your domestic. It’s simple! Be sure you have a Darning Foot! There are different kinds, based upon the shaft of your specific machine.
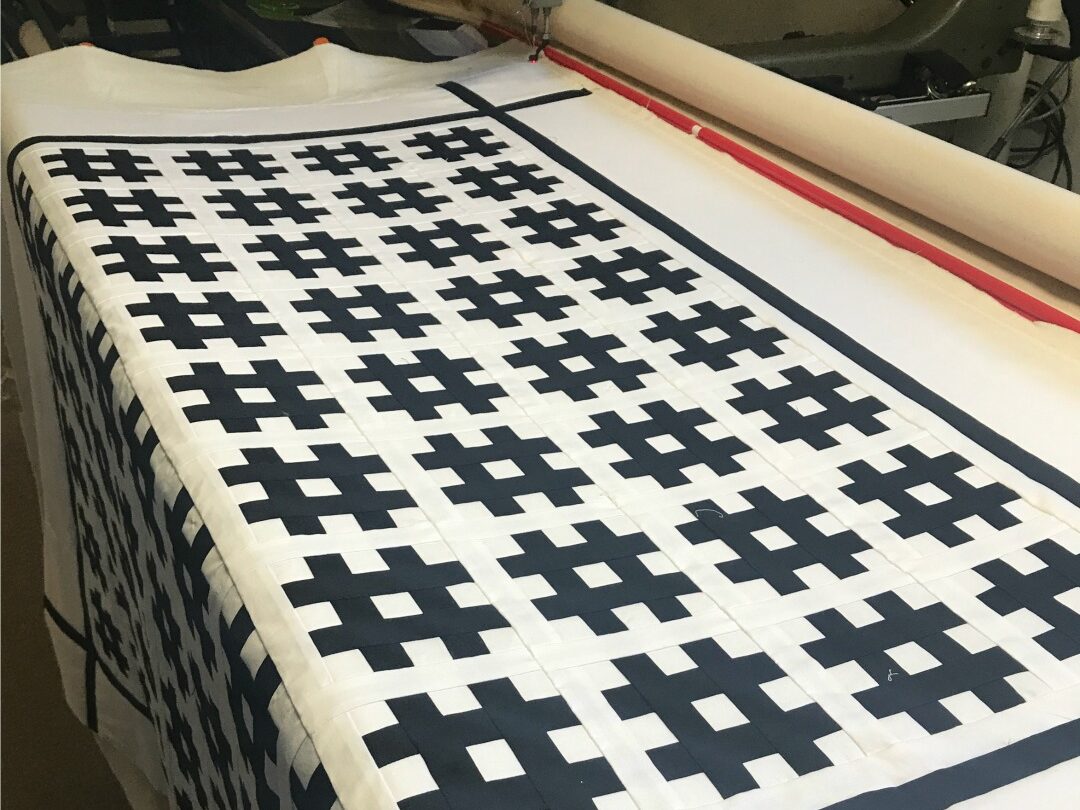
I was very fortunate to have a friend with a LongArm!! If you don’t know my friend, Tia Curtis with Tia Curtis Quilts – you should check here out right HERE. When my Longarm was installed – I was as happy as a clam! Since the first of January 2022, I have been finishing my own quilts and loving every minute of it! To learn more about my quilting journey, you can visit my YouTube Channel right HERE.
Once I sewed on the binding, I could not wait to take some pictures of this amazing quilt! I convinced my husband to help me take some pictures of the finished quilt. I liked this picture the best! What do you think?
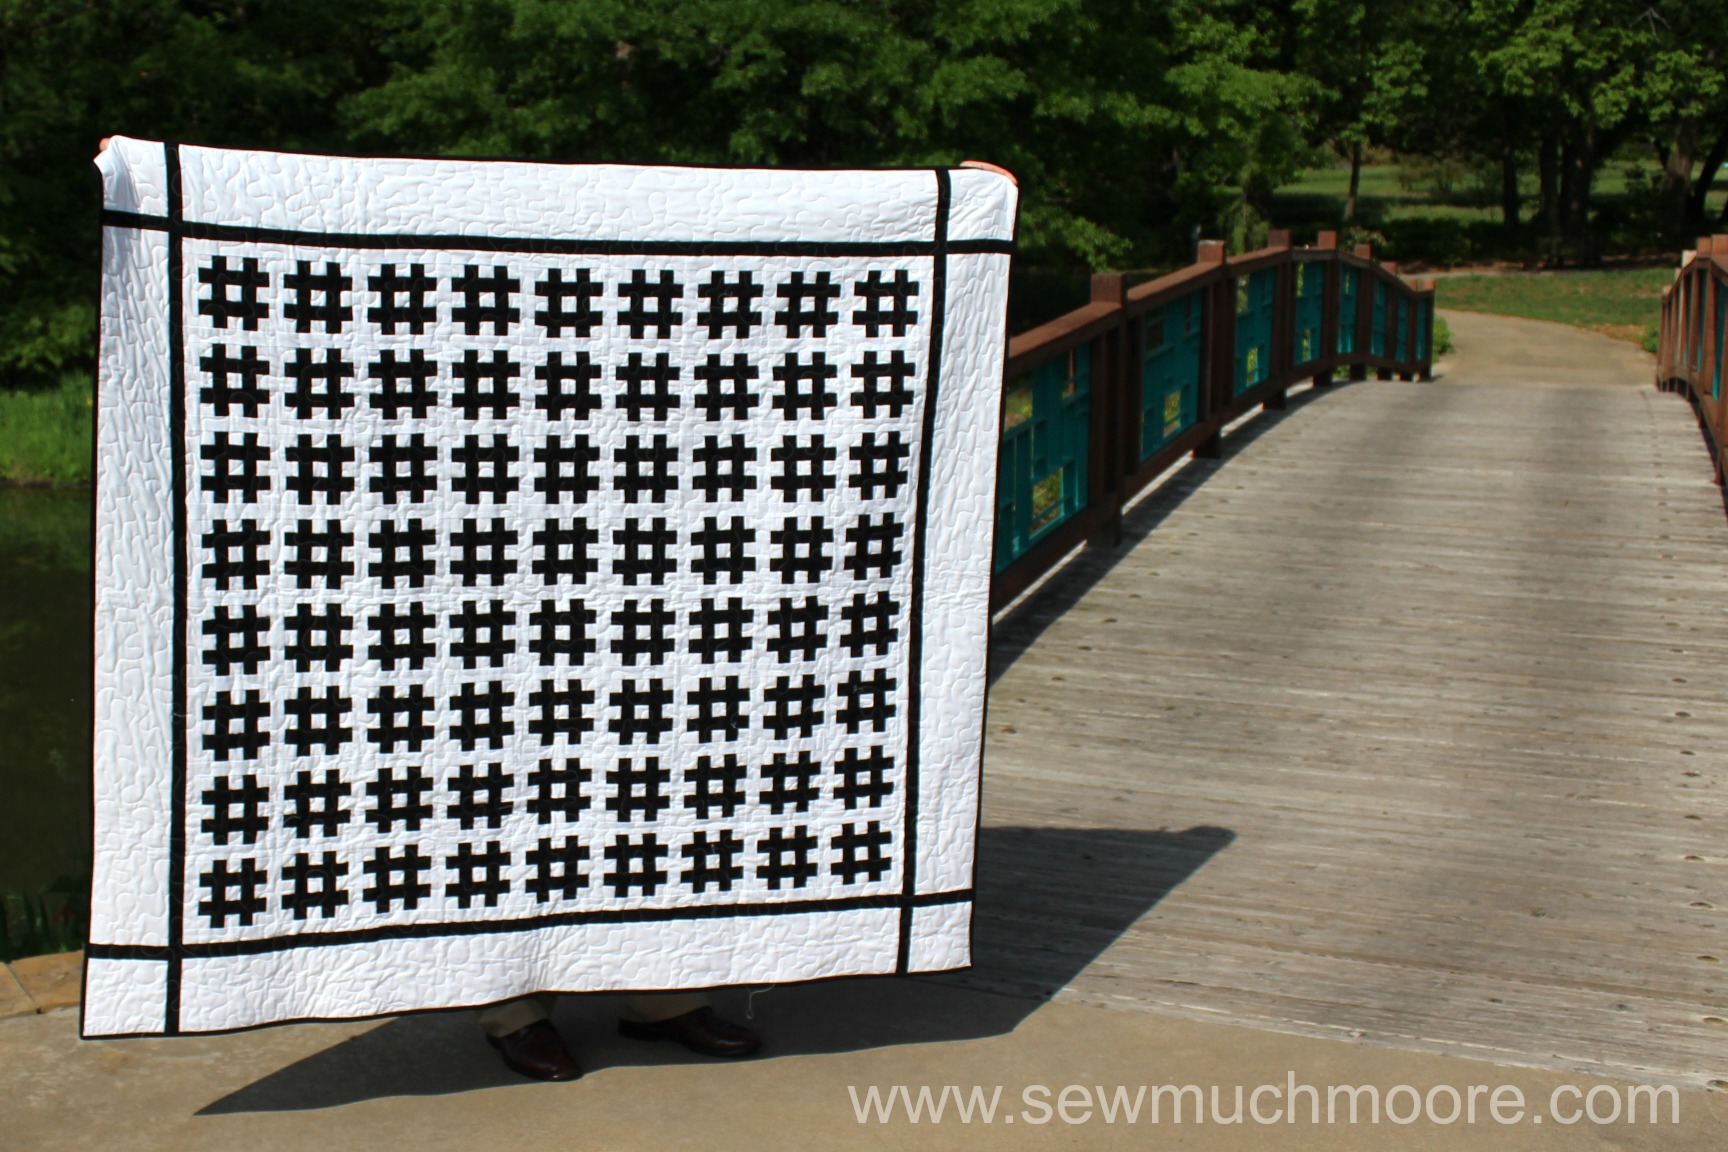
Making this Hashtag Quilt was fun! There were times when I had to give my eyes a rest (all that black and white can make you dizzy). But in the end, I just loved it and so did my customer! Yay!
I’m thinking about making a quilt pattern for this design. Maybe mix it up a bit – we shall see!
Happy Quilting!

Such a cool quilt! Lucky person the receive this! Wow!
Wouldn’t this also be really cool with a color gradient? I’m going to give it a try. I think I will get a Kona gradient jelly roll (to make things easier). Thanks for the fun Quilty idea!
Love this hash tag block. My mind is racing with all kinds of possibilities. I might have to move this closer to the top of my to do list. Thanks for sharing