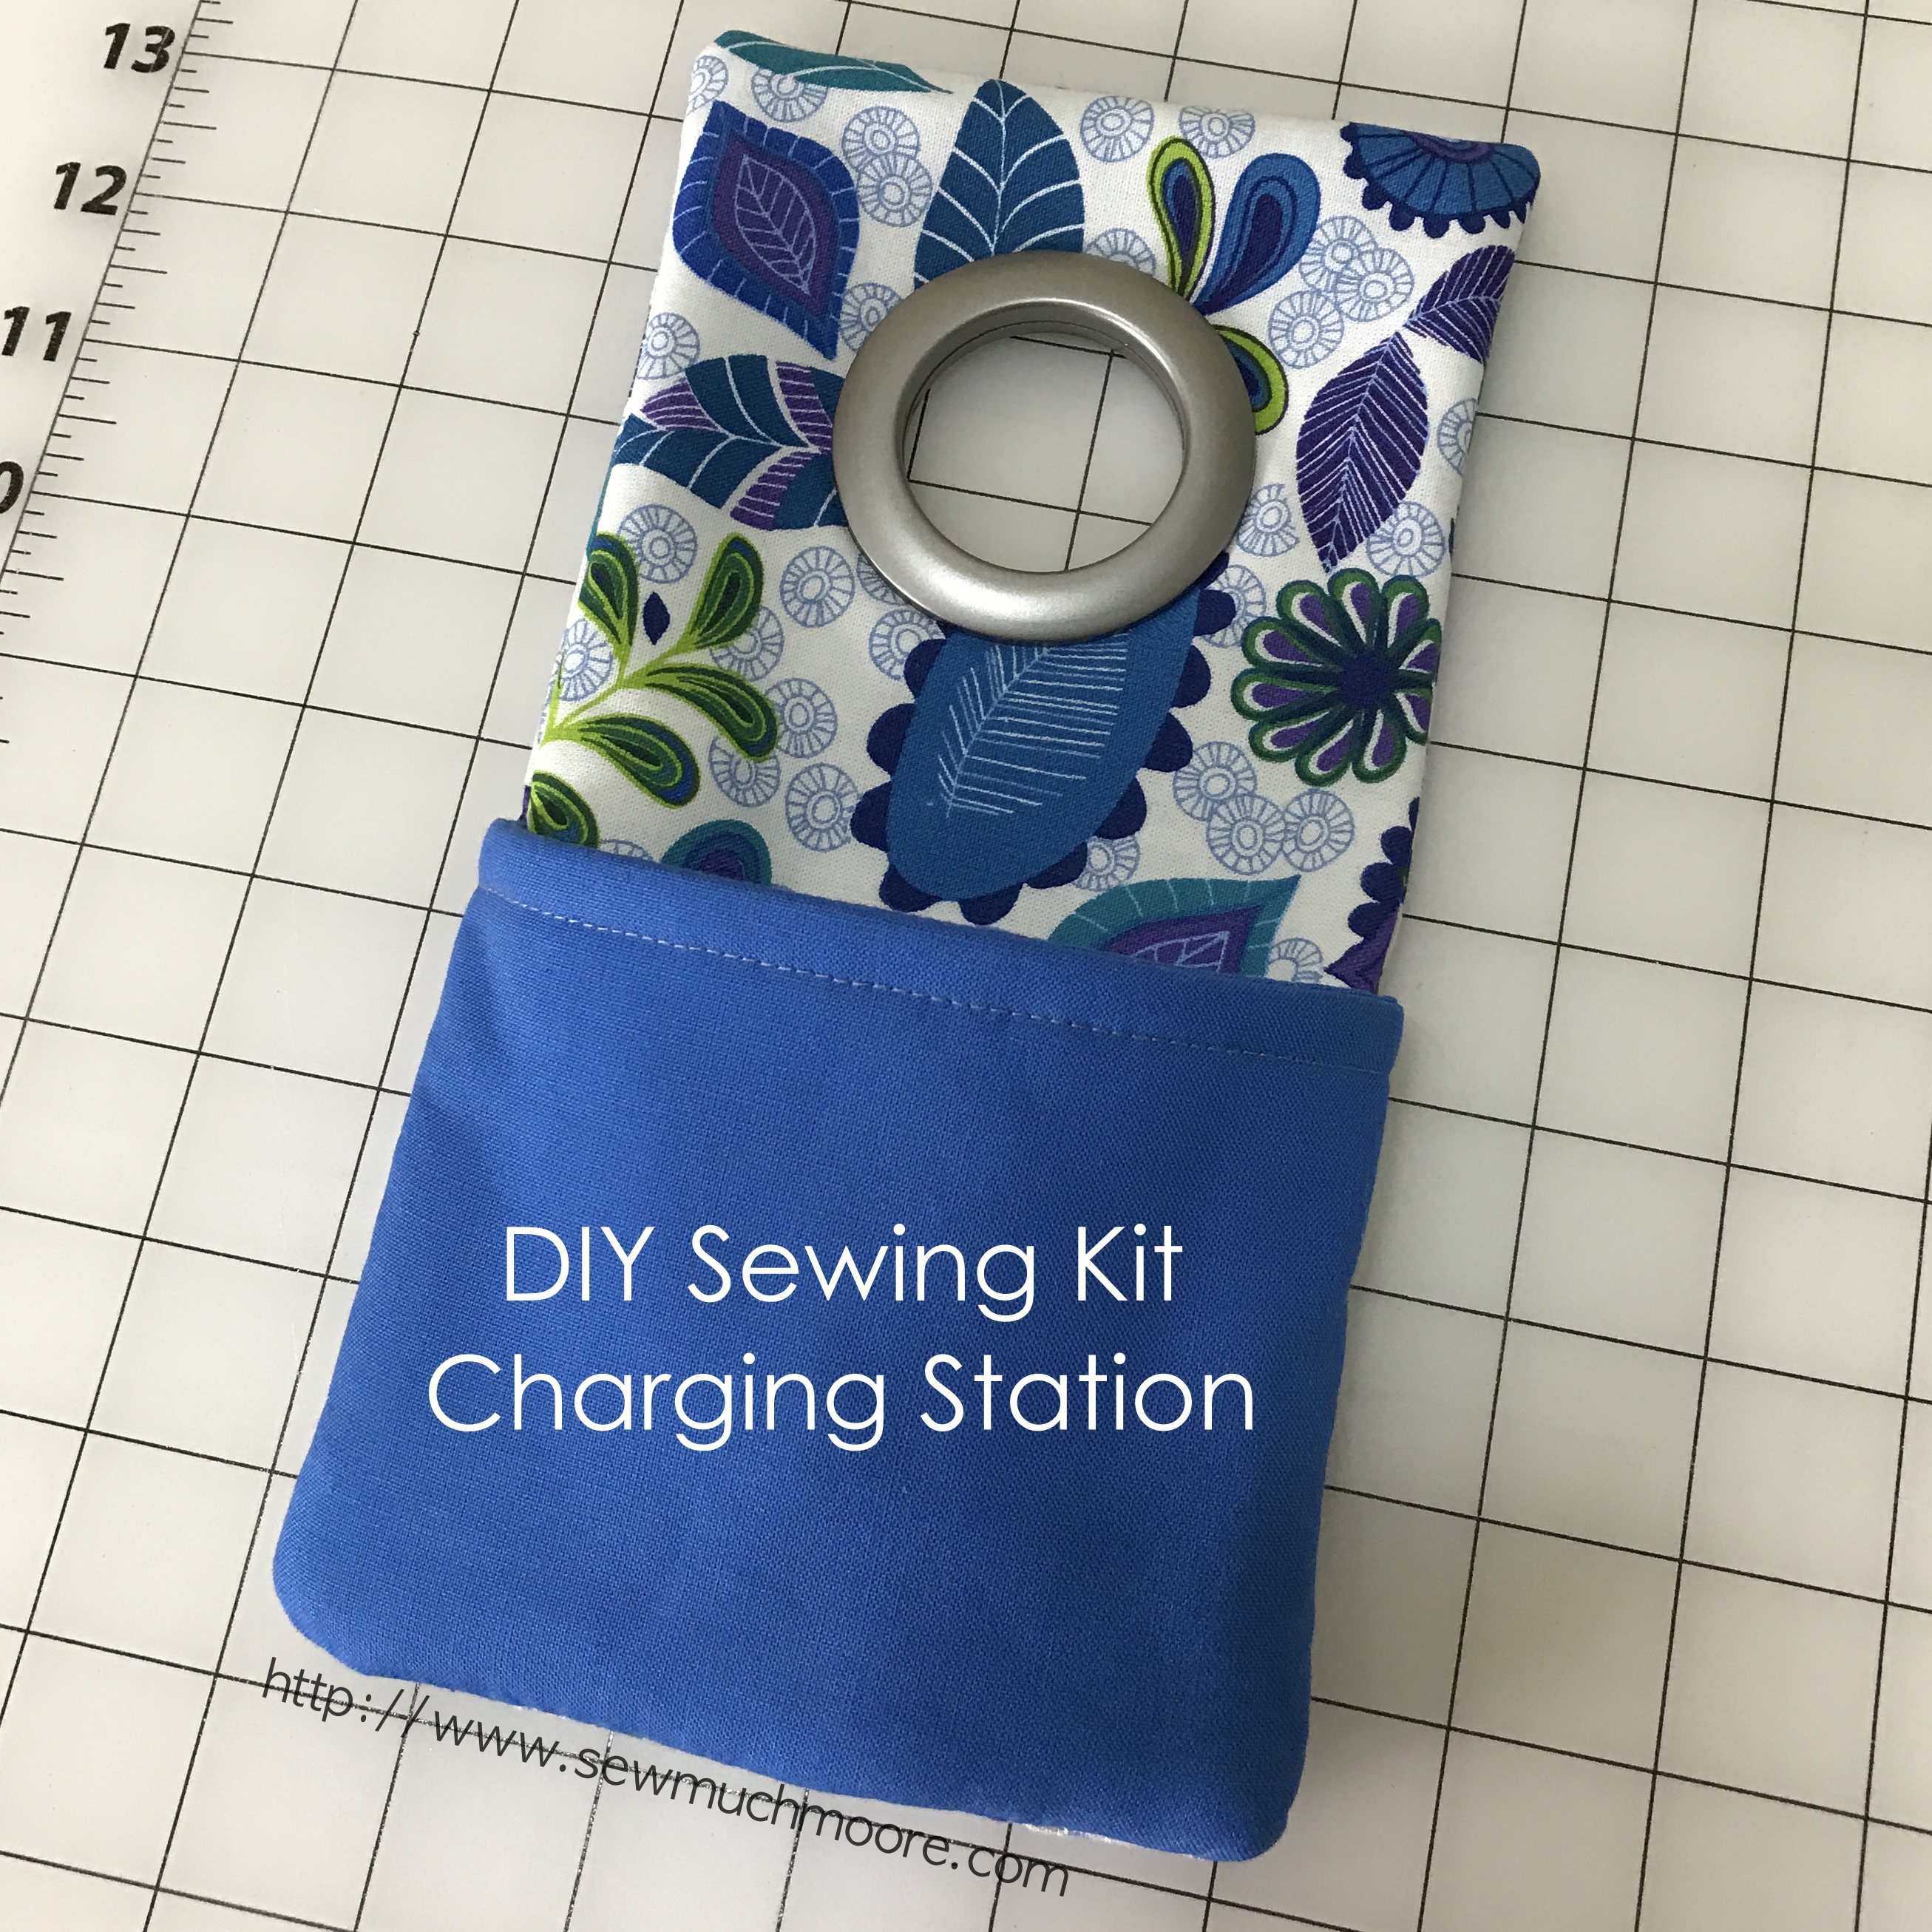
DIY Cell Phone Charging Station
Welcome to our latest sewing project: the DIY Cell Phone Charging Station. This guide is designed to walk you through creating a practical and stylish charging station, perfect for keeping your phone powered up in style. For those ready to start this project, I’ll send you the PDF Download of the sewing pattern, which includes all the essential cutting measurements. Whether you’re a seasoned sewist or just beginning, this pattern is tailored to help you easily achieve a great result. Let’s begin this creative journey together, and transform your sewing skills into a functional piece of art for your home.
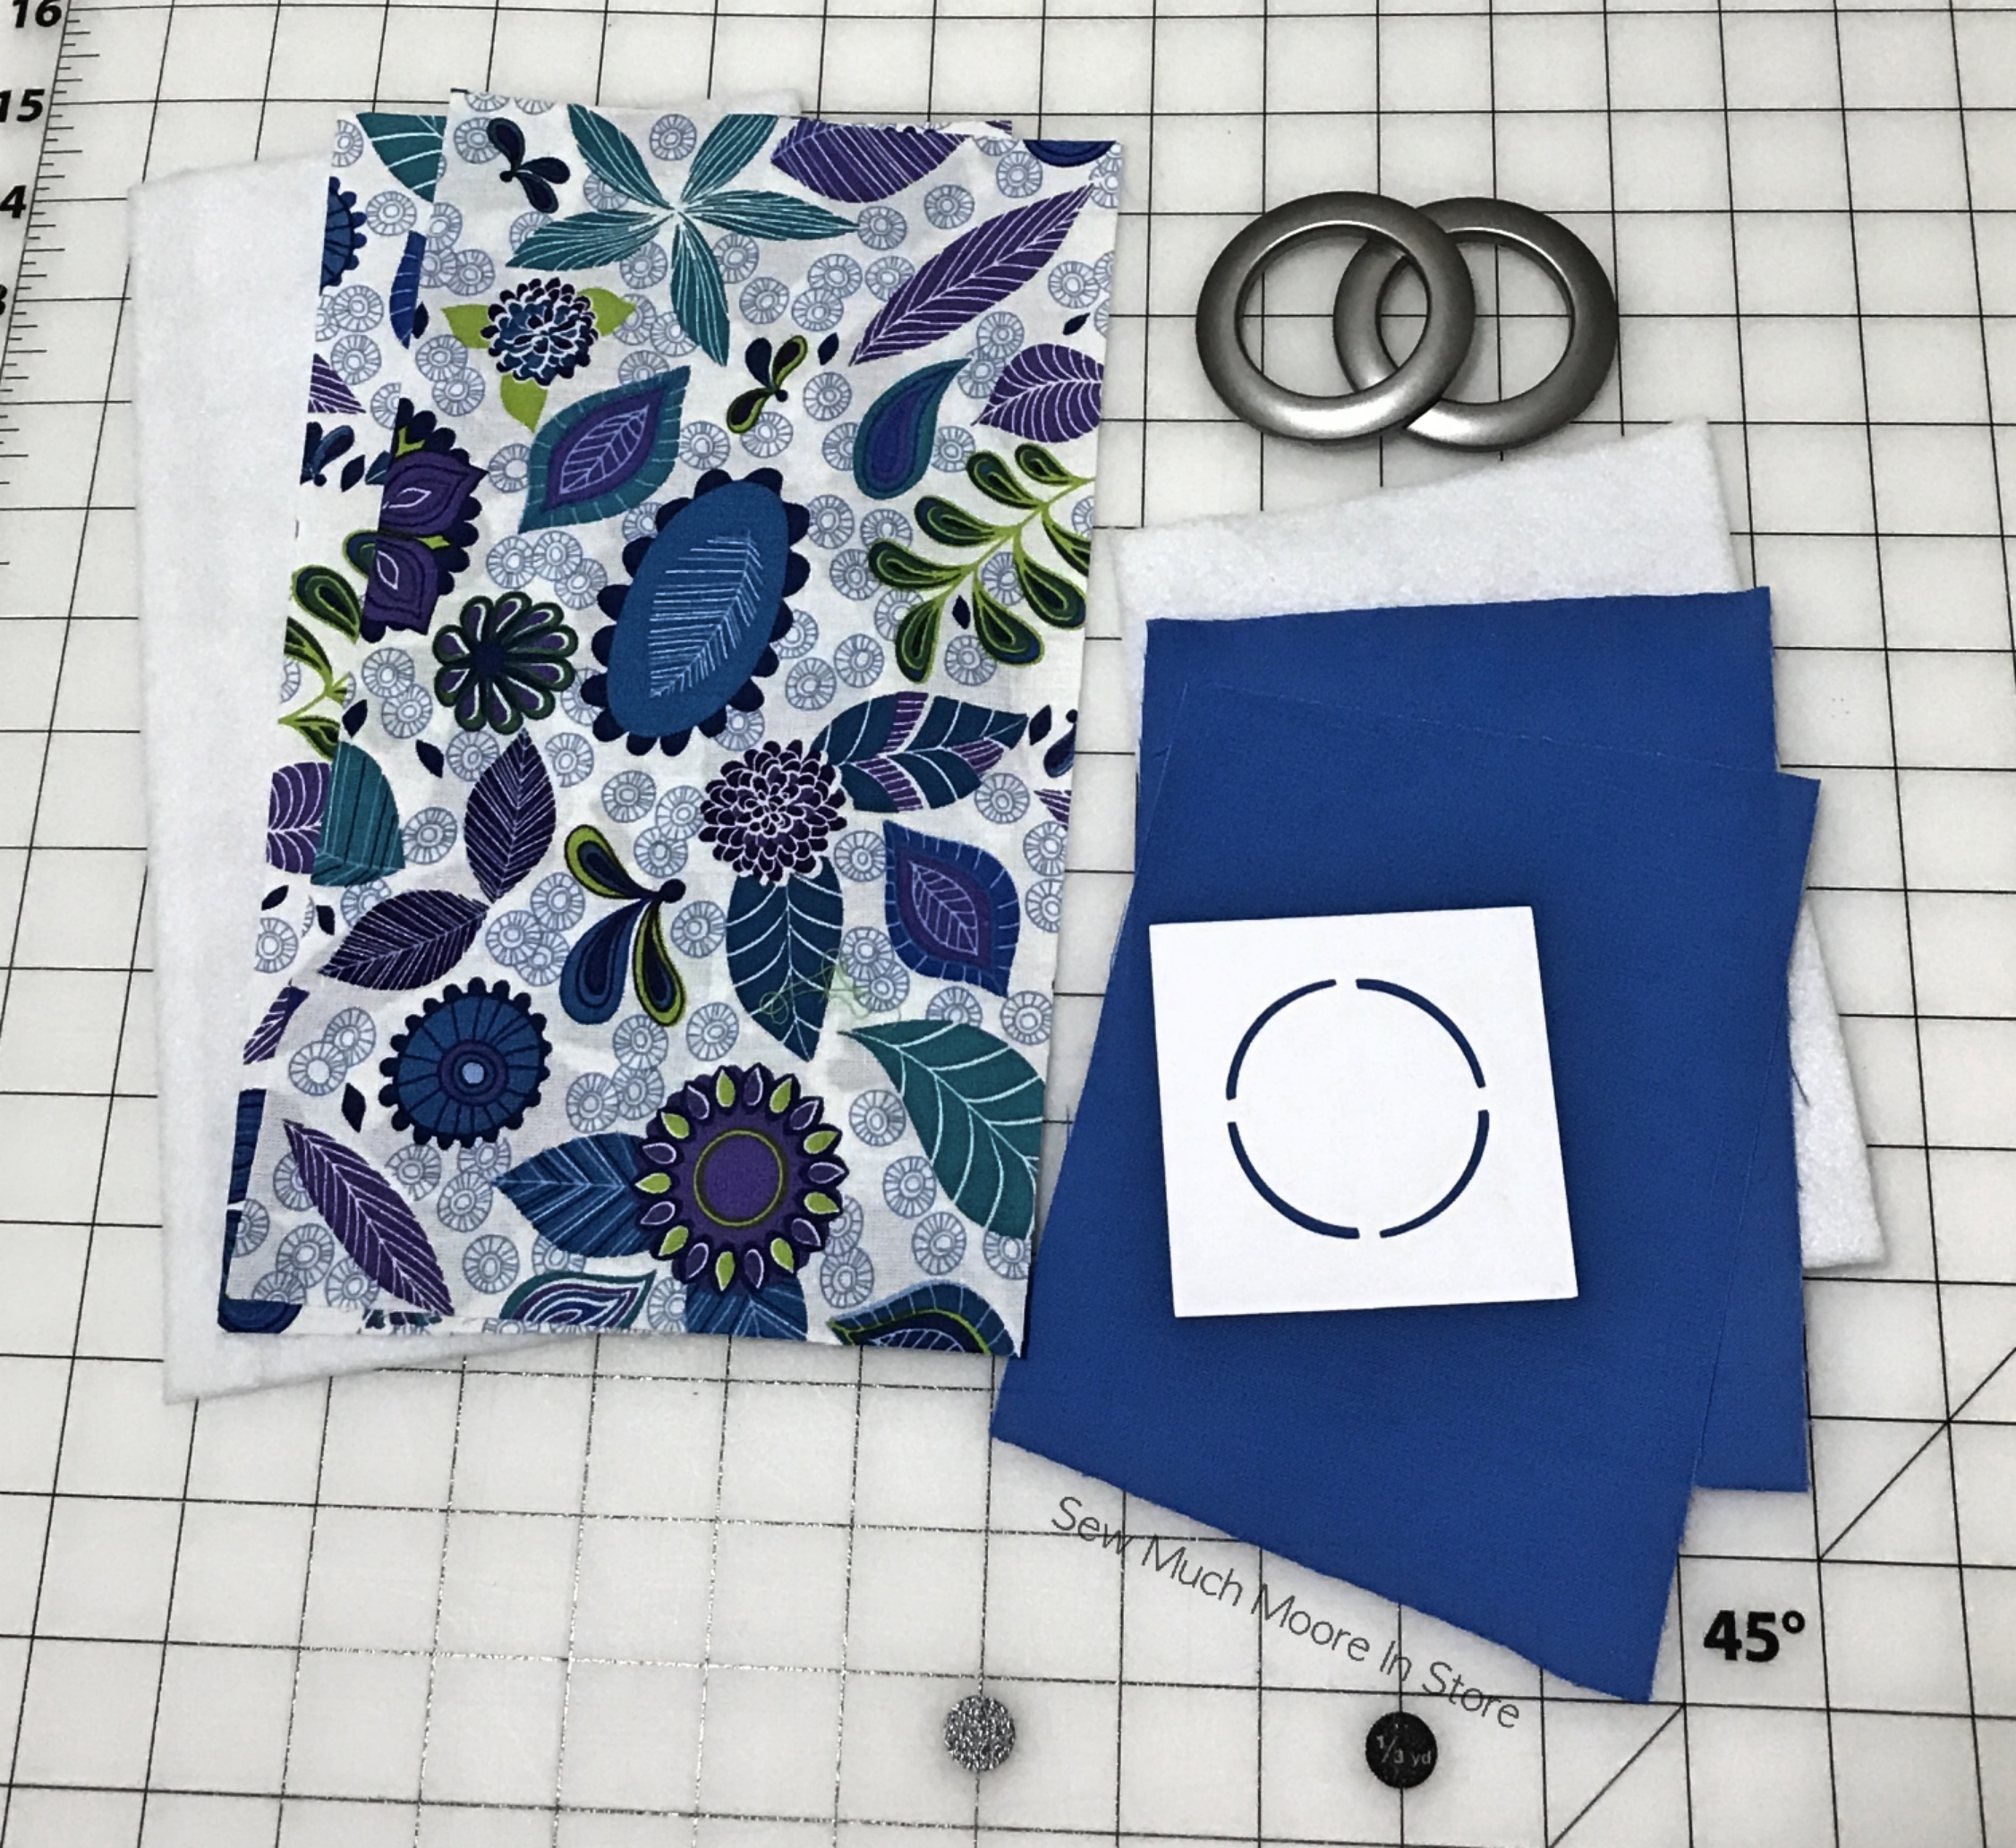
DIY Cell Phone Charging Station Materials List
To start making your DIY Cell Phone Charging Station, you’ll need your fabric, fusible fleece, and a curtain grommet. Be sure to download your DIY Cell Phone Charging Station Pattern for your cutting measurements as well as the grommet suggested size.
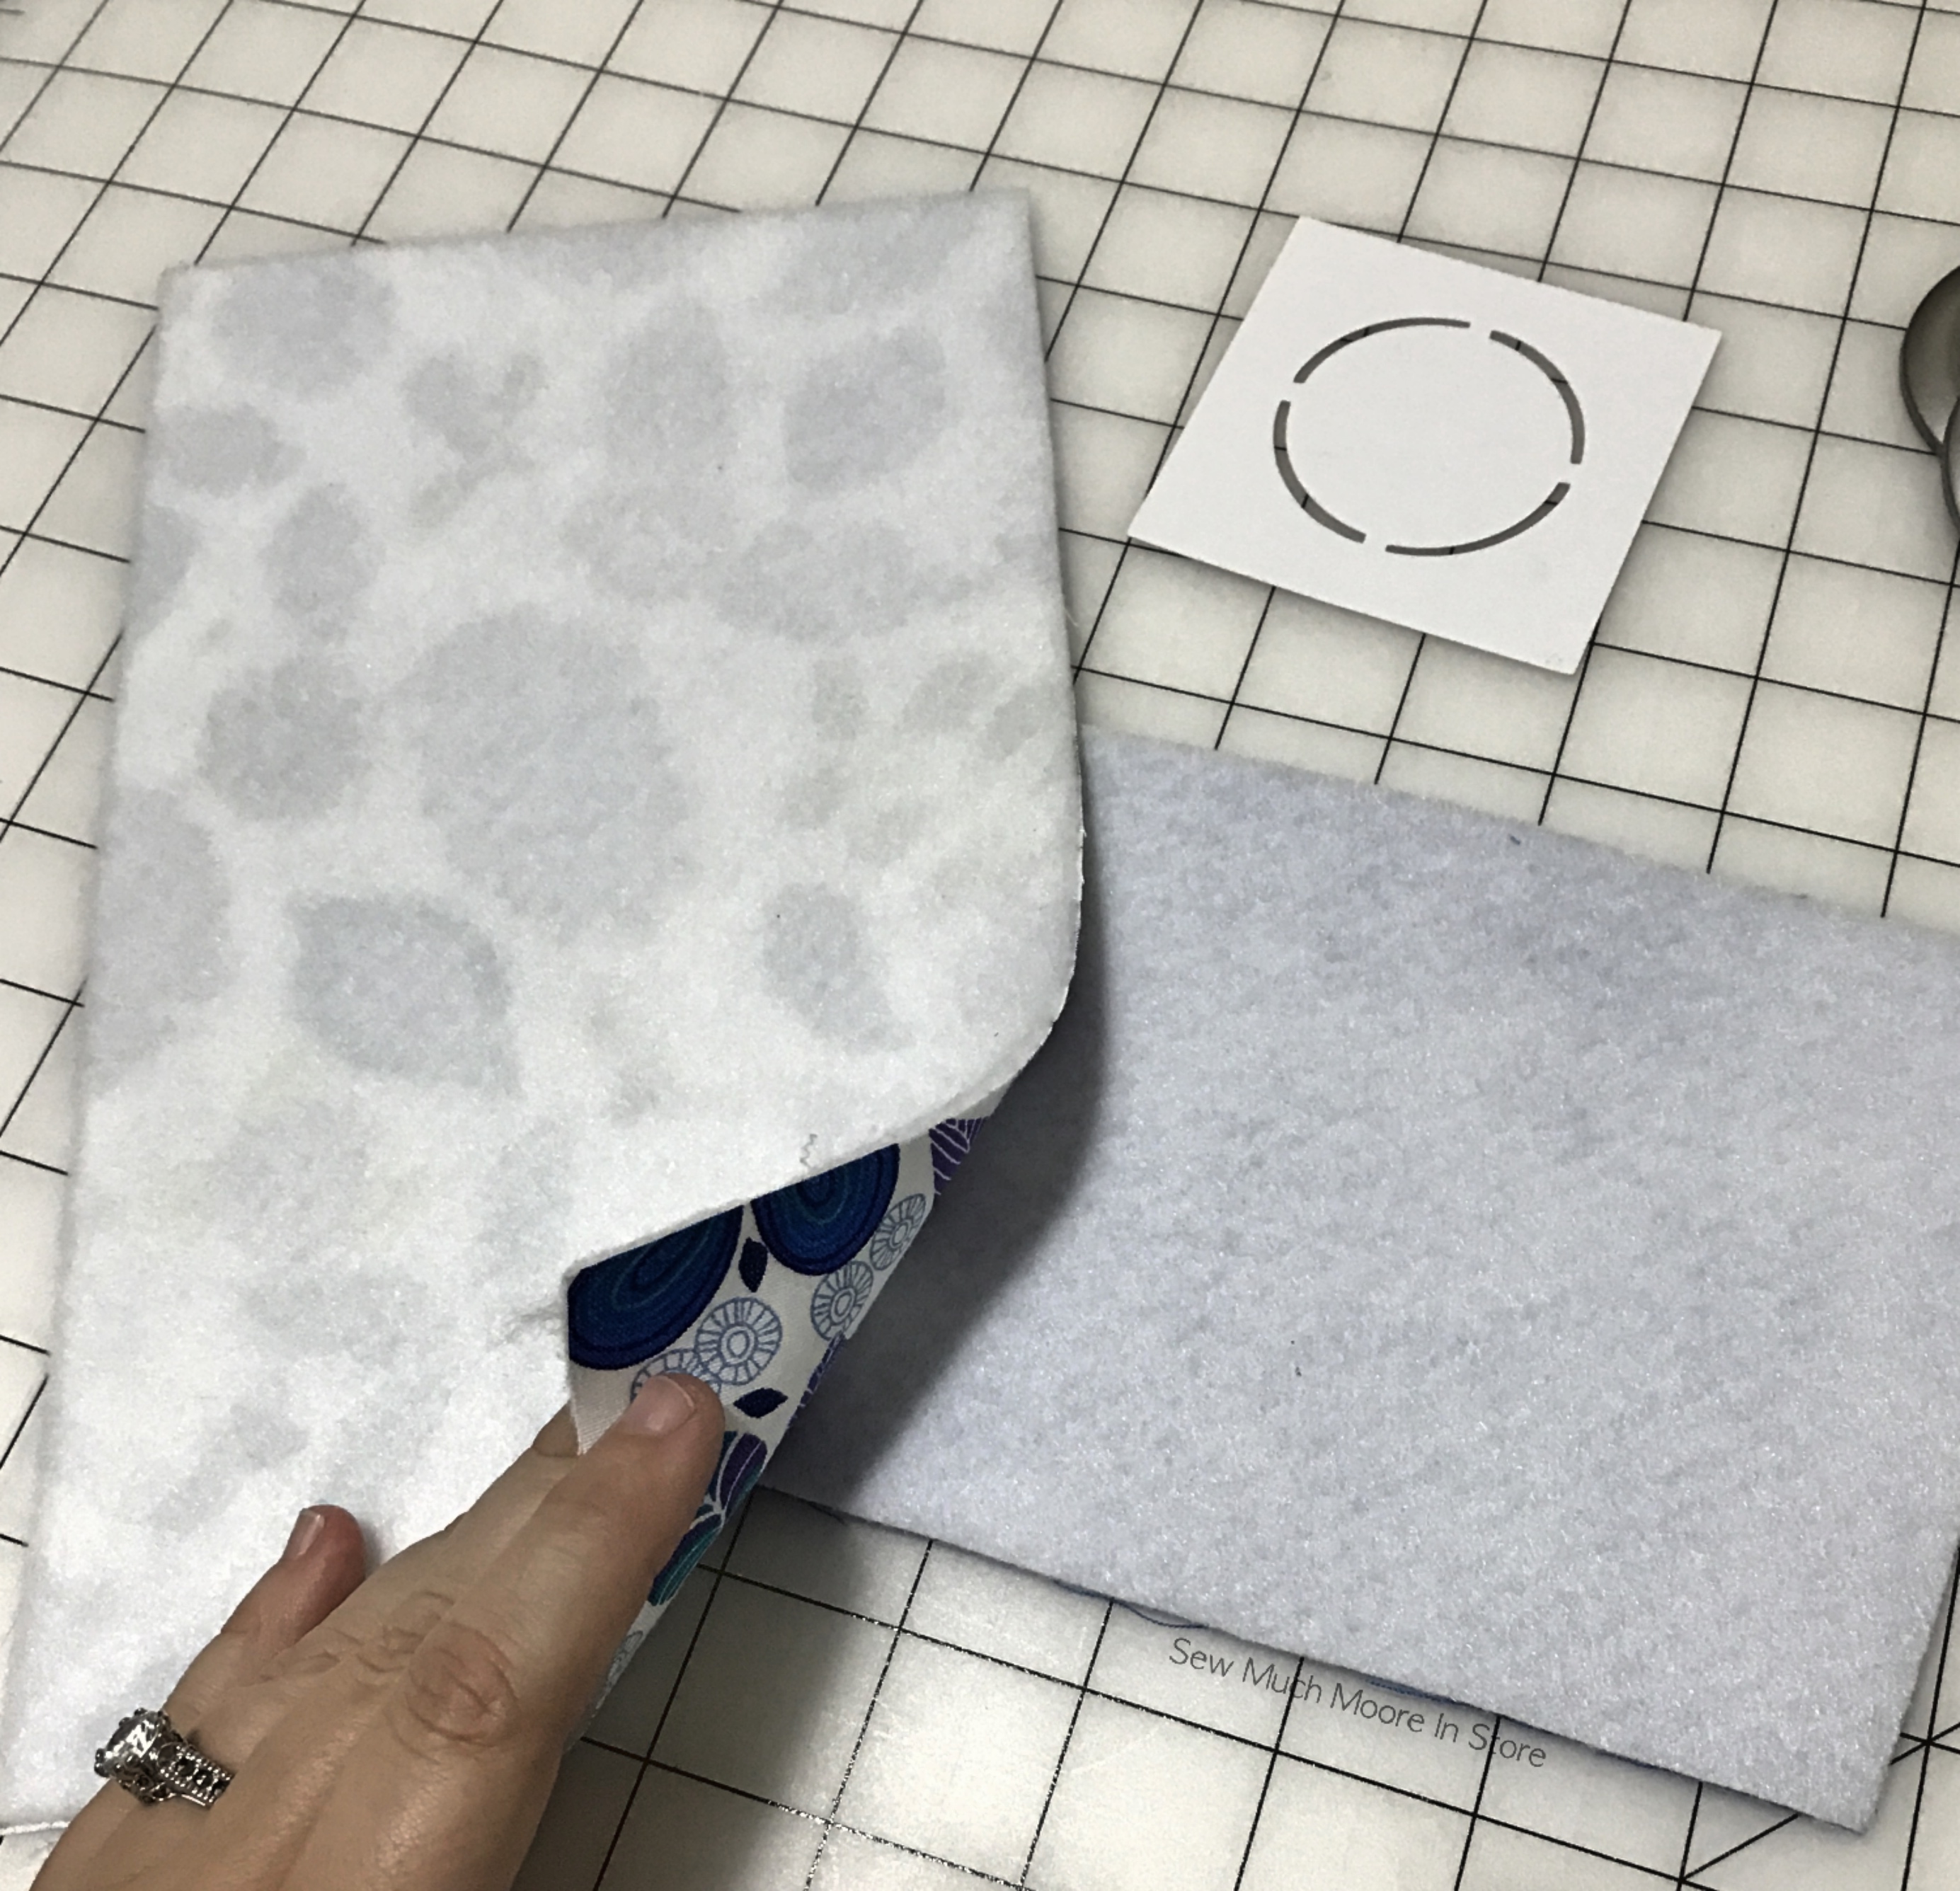
First, iron the fusible fleece to the back side of one of the pocket pieces and one of the main pieces. I recommend fusing it to the pieces that will be the front to keep everything neat. Trim away any excess fleece.
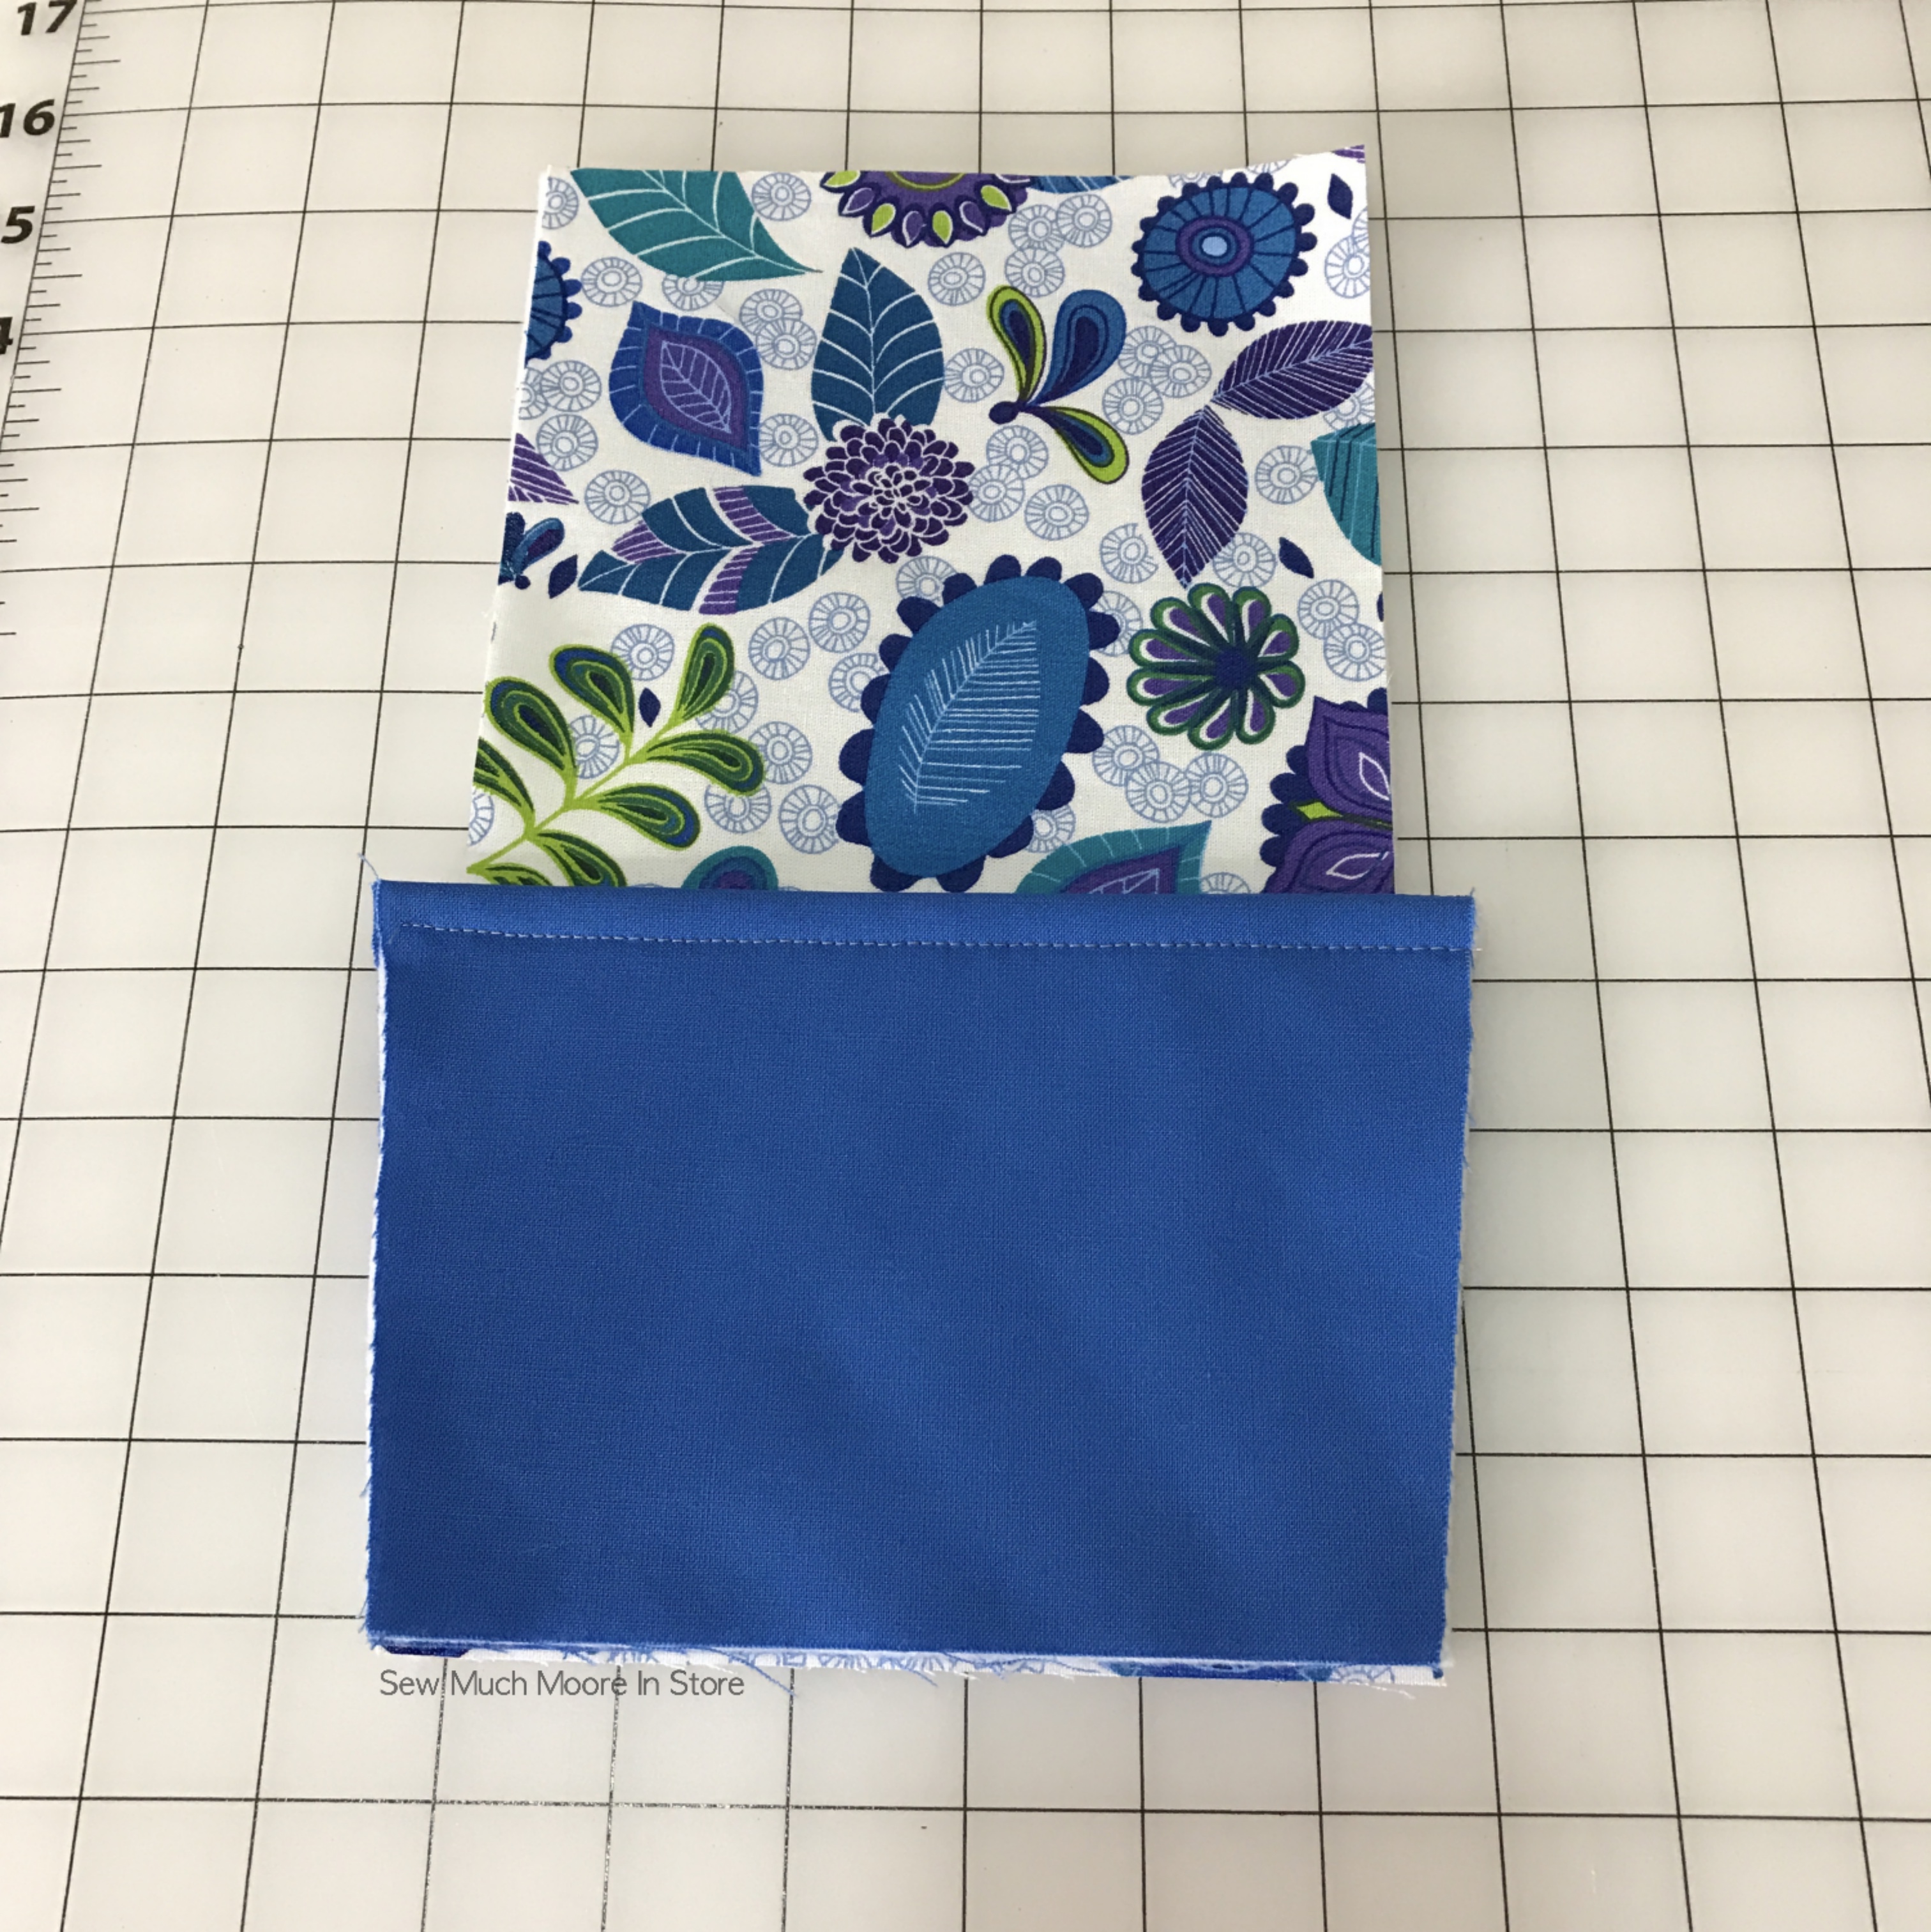
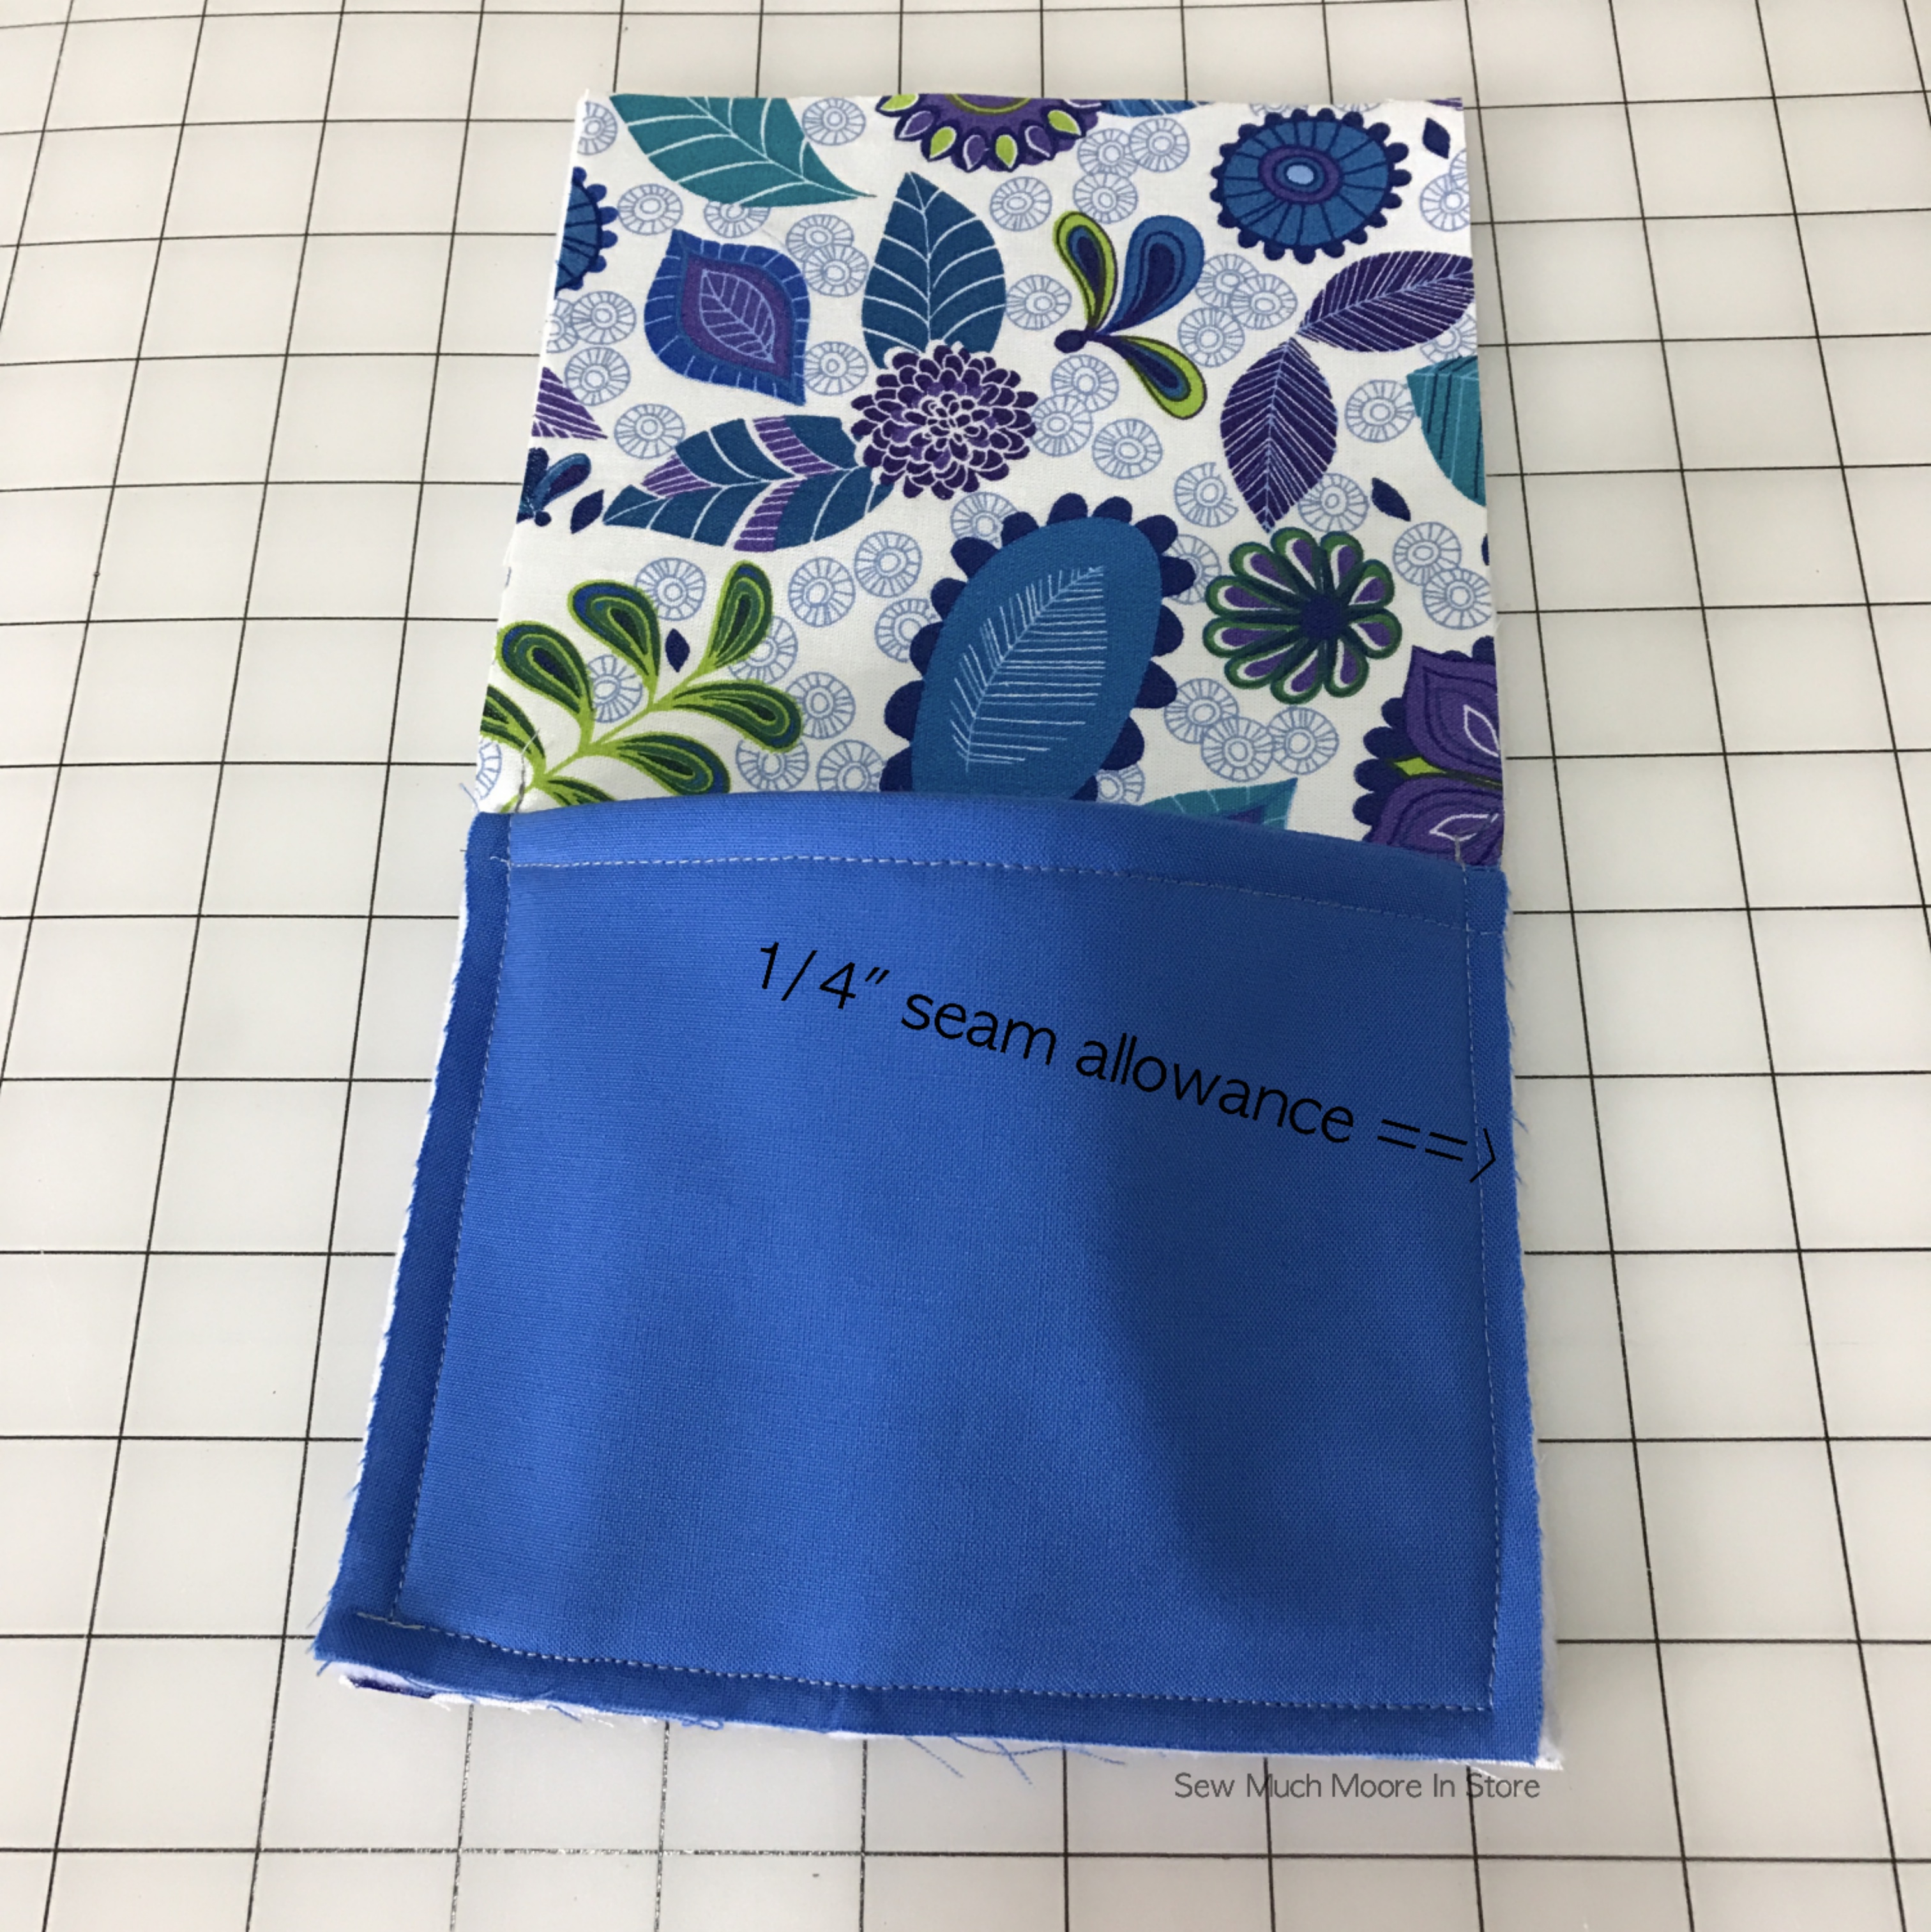
Place the front pocket on the front main piece (the one with the fusible fleece on the back) and line up the bottom edge and sides. Sew the sides and bottom with a 1/4″ seam allowance. The pocket will protrude slightly from the main piece due to the top of the pocket being wider.
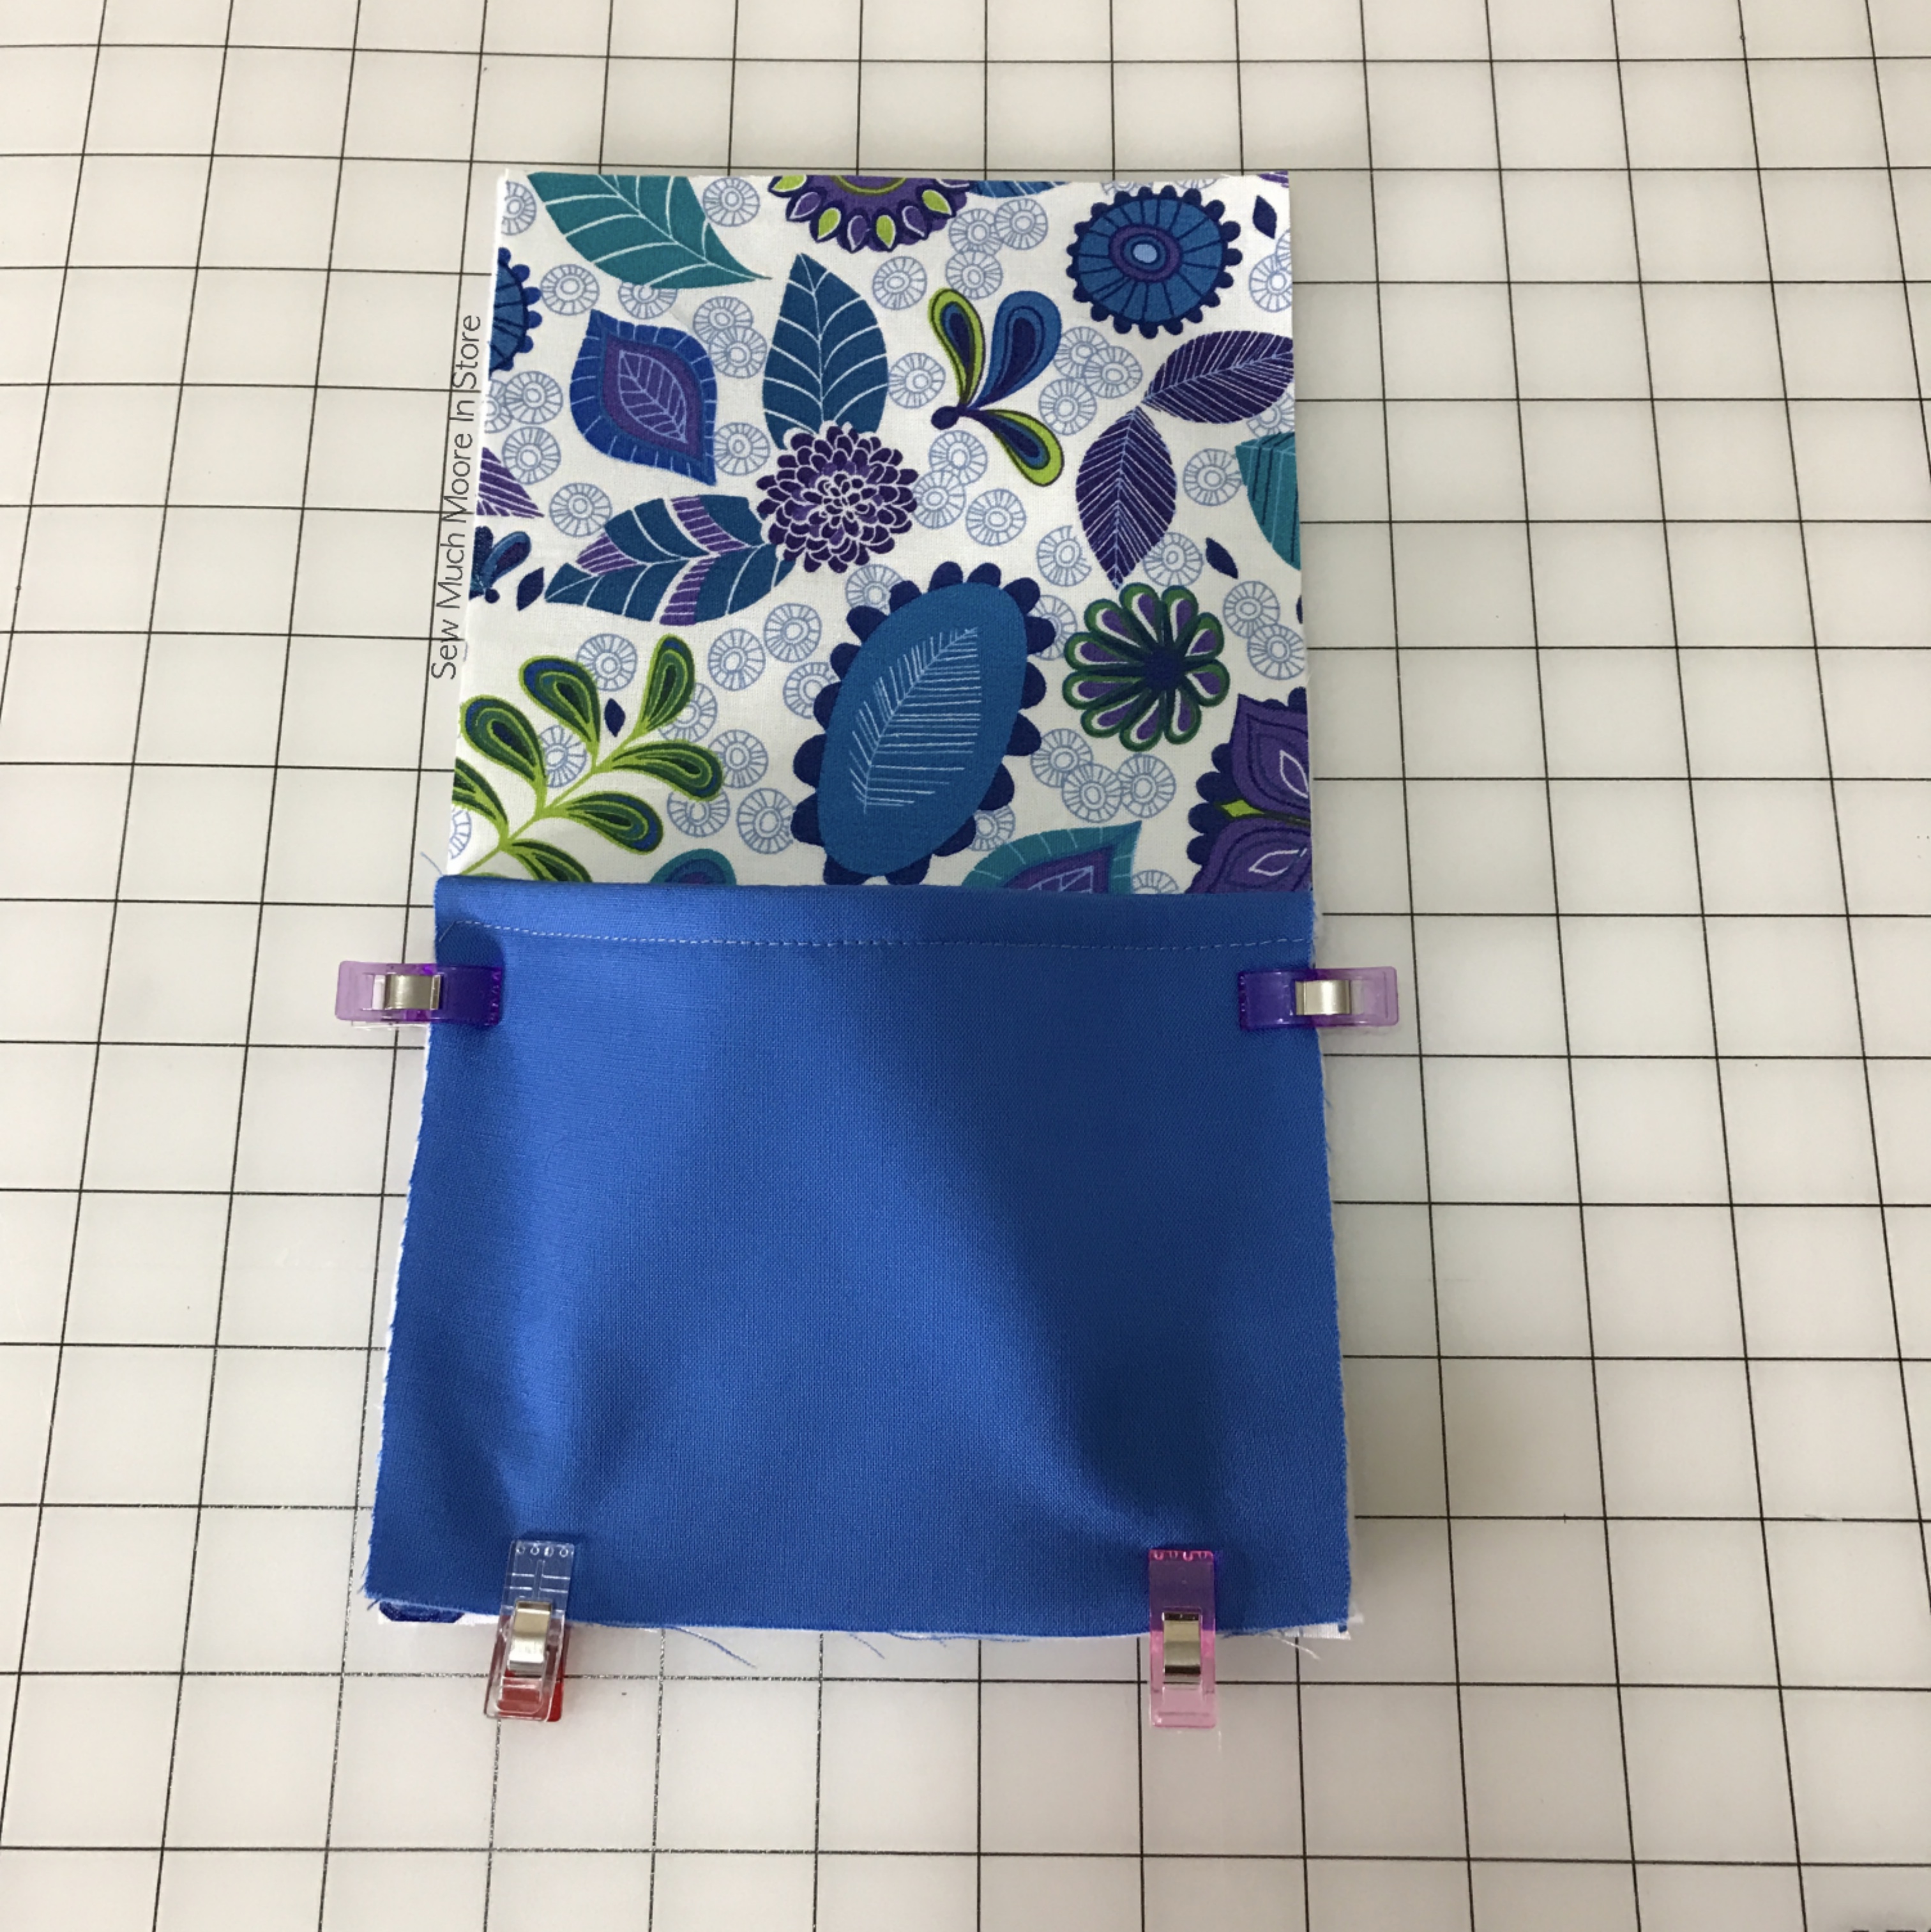
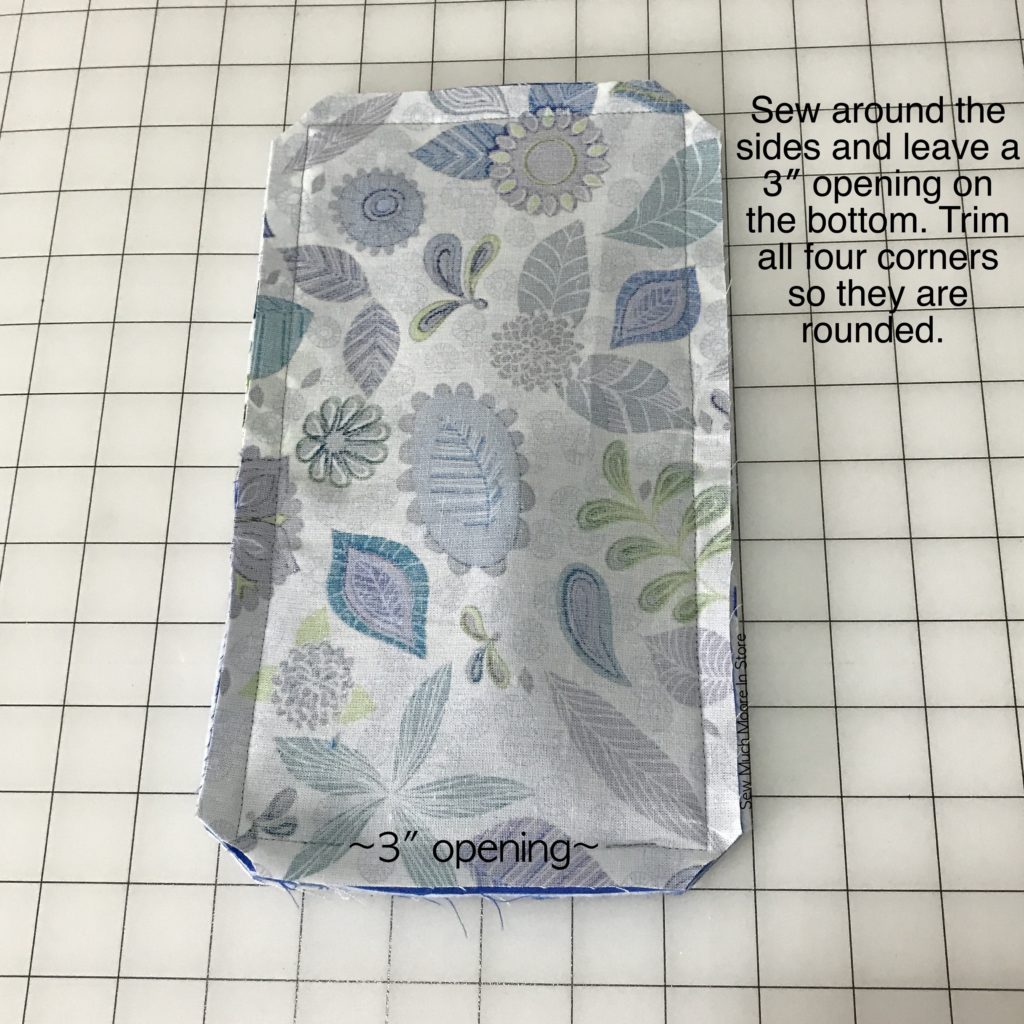
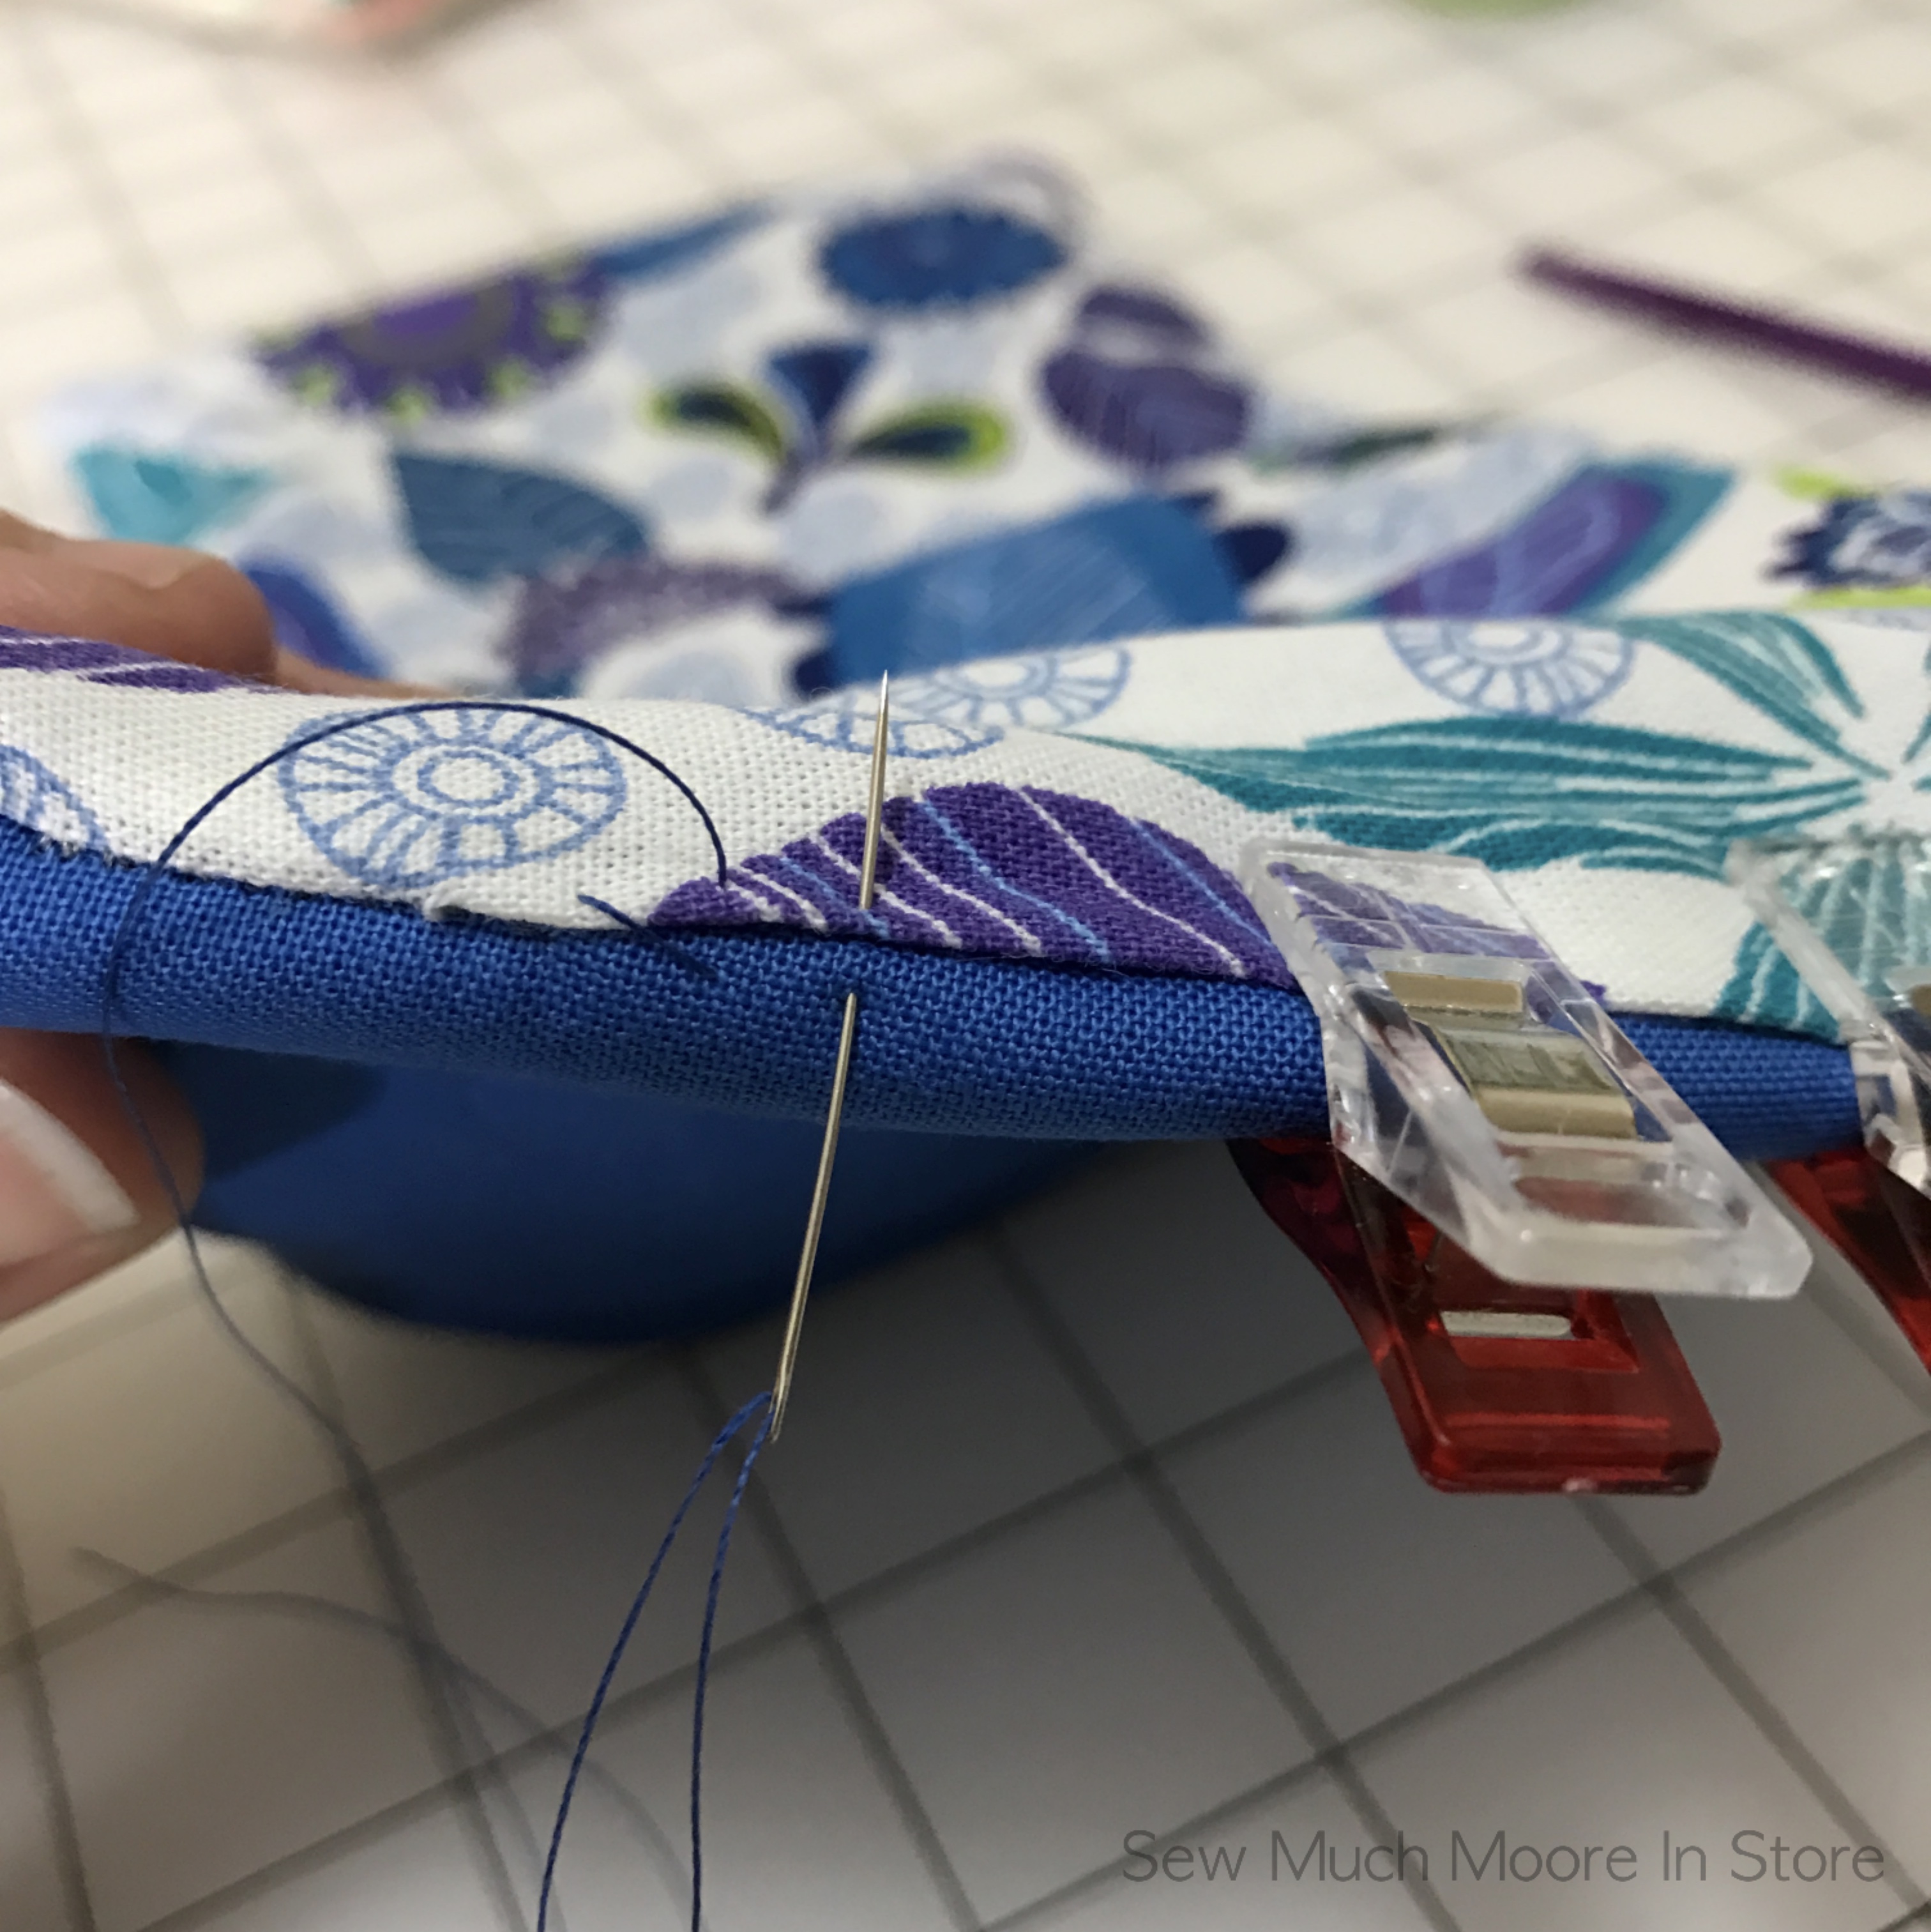
Now, pin the back main piece to the front main piece, right sides together, and sew around the sides, leaving a 3″ opening at the bottom. Round off all four corners. Turn the holder right side out through the opening, press it, and then hand sew the opening closed.
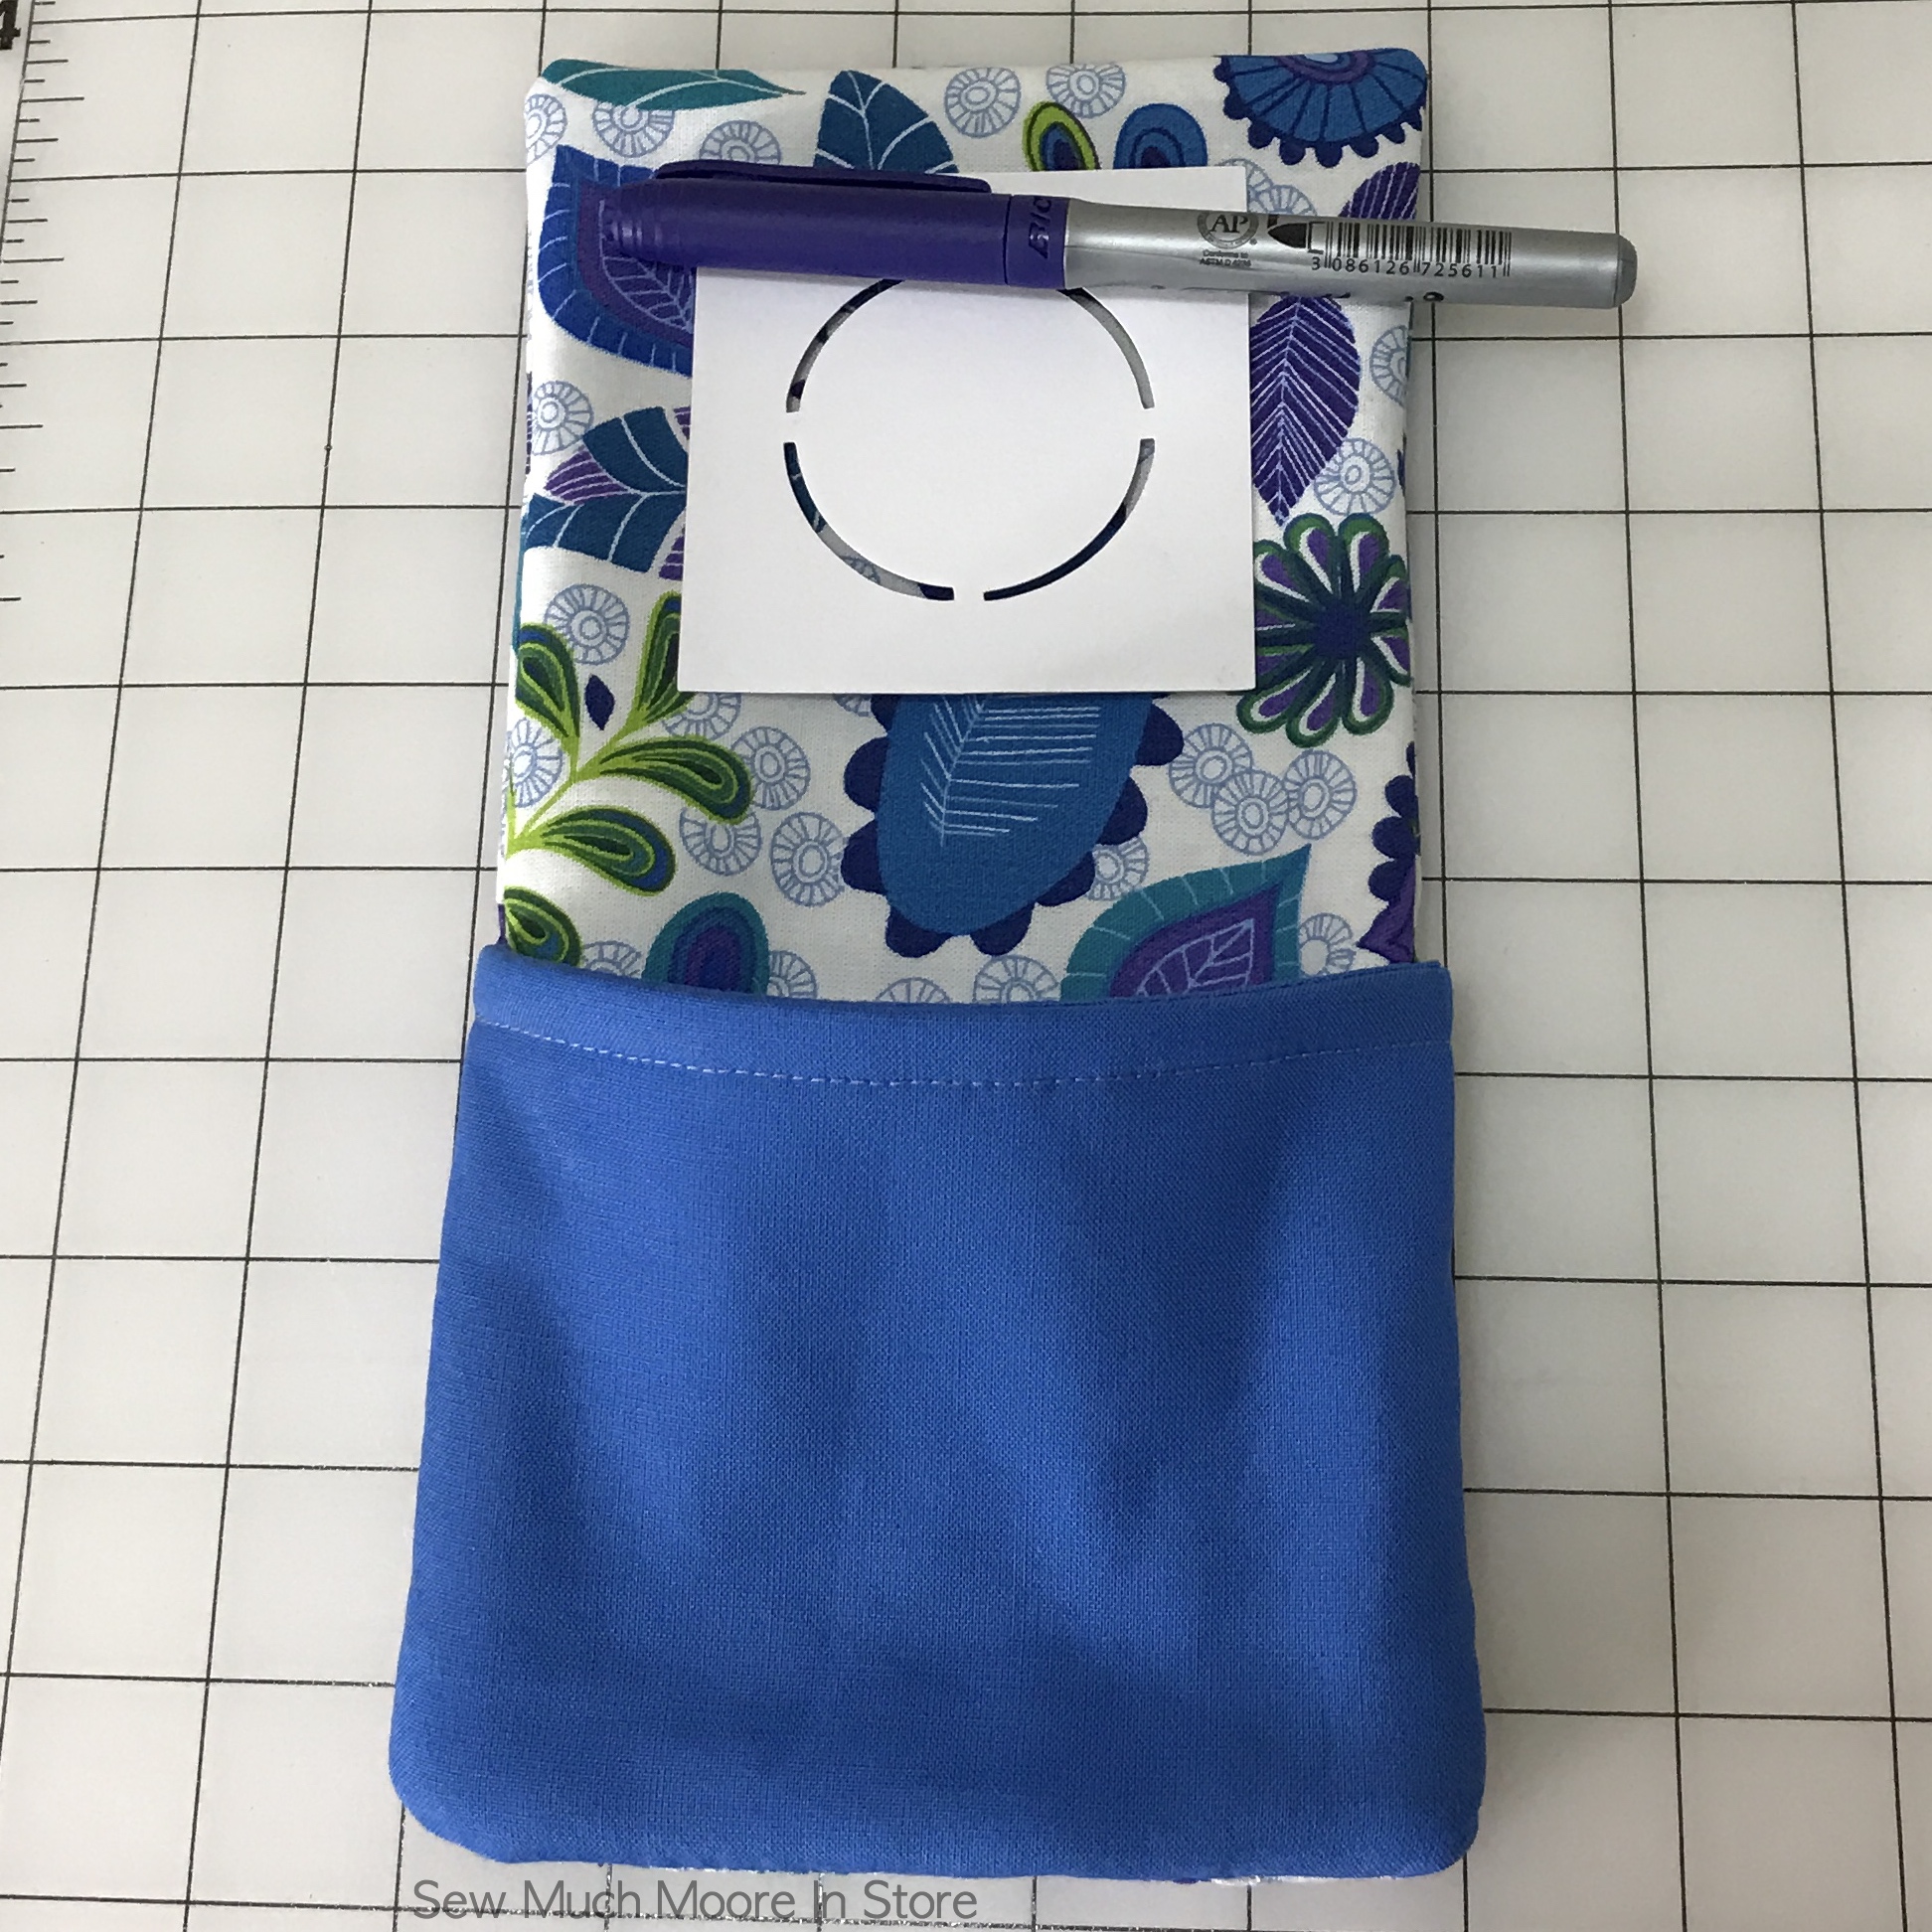
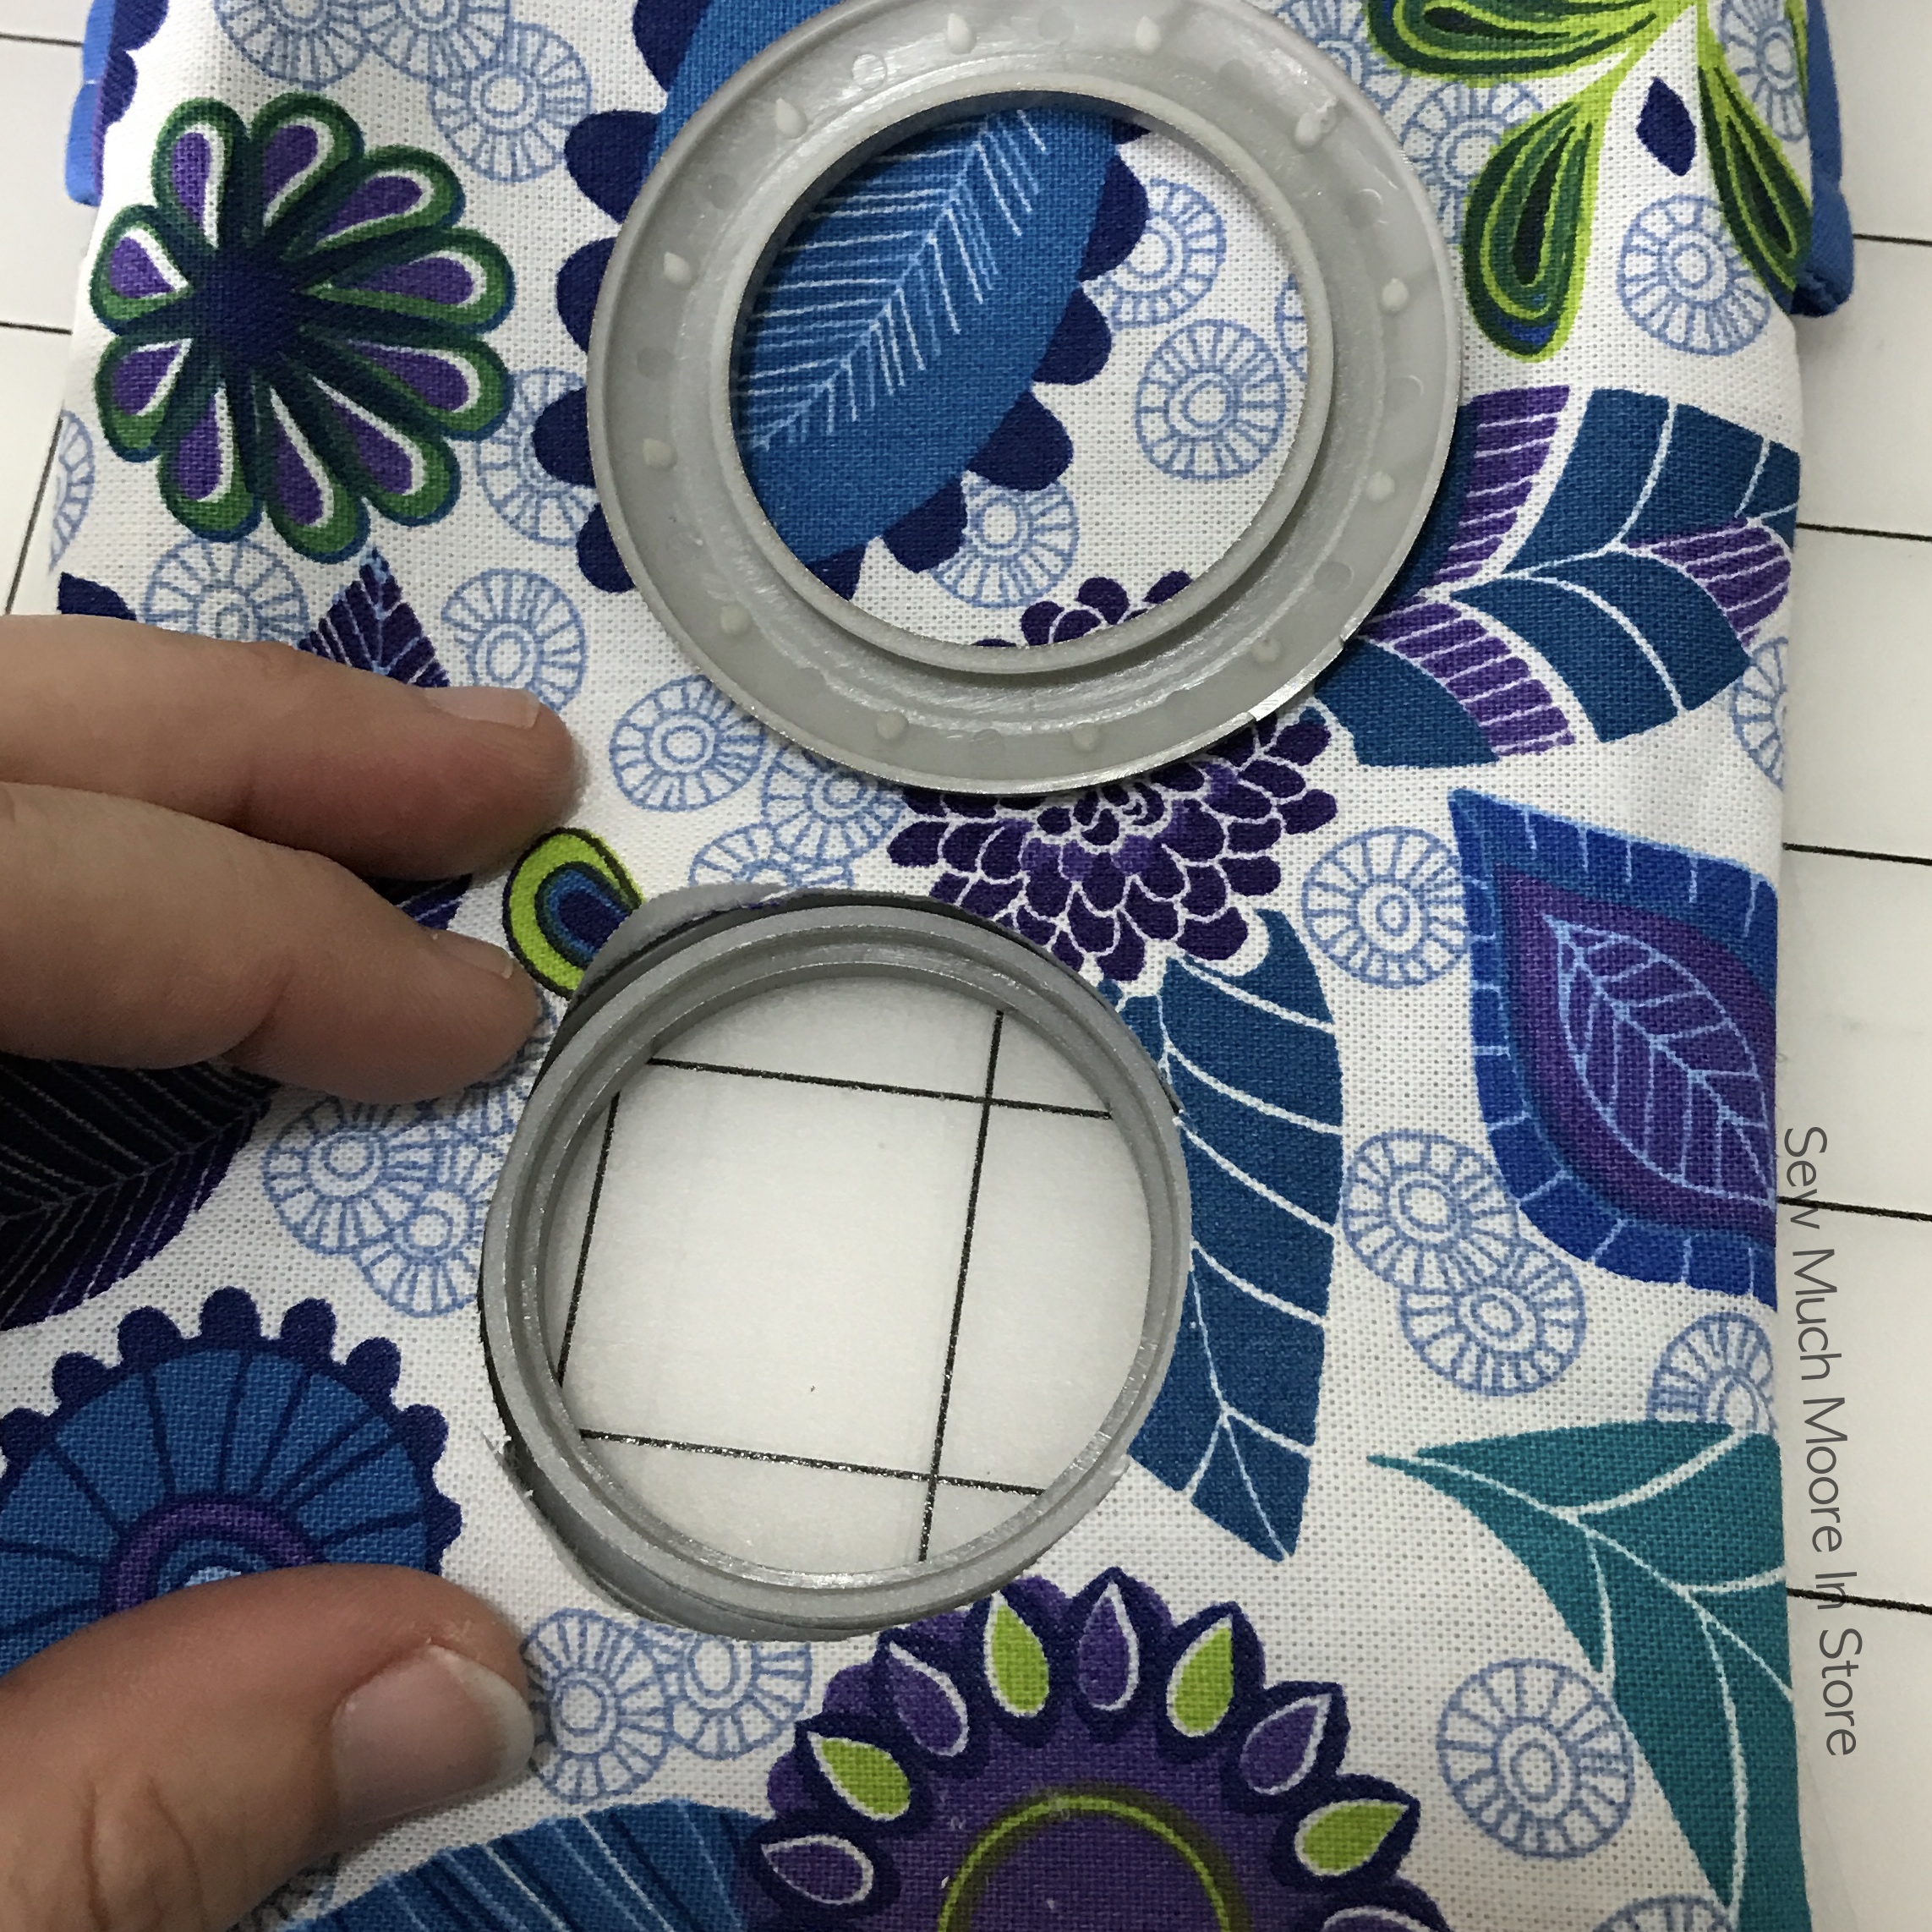
For the final touch, position the plastic curtain grommet template and trace the slots to cut out the hole. Place the grommet in the hole, with the raised center facing the back. On the back side, position the prong side of the grommet and press down to secure it.

Finishing your DIY Cell Phone Charging Station
Congratulations! You’ve just created your very own Charging Station. Feel free to use this pattern to make as many as you’d like – they make excellent gifts!
General Directions for Fusible Fleece:
- Place the fusible fleece on an ironing surface, fusible side up.
- Place the fabric on top of the fleece, right side up.
- To fuse, press firmly in place for about 10 seconds. Repeat, lifting and slightly overlapping the iron until all interfacing is fused.
- Let the fabric cool and then check the bond.
this kit is perfect, the instructions are so easy to understand….
Great gift card holder , that will be used again and again!
I recieved my kit today,love it so easy ,but my cell charger does not fit , i have a square charger, was going to make for my grands but there chargers are all the same ,going to modify if i can
I’m so glad you liked your kit and enjoyed putting your Charging Station together! I would recommend using a command hook to hold your Charging Station. These can be placed in near proximity to your outlet and still offer all the benefits of your new Charging Station. ? Here is a link for the command hook I am referring to: https://www.amazon.com/gp/aw/d/B002PQEBQ6/ref=mp_s_a_1_3?ie=UTF8&qid=1504773626&sr=8-3&pi=AC_SX236_SY340_QL65&keywords=command%2Bhook&dpPl=1&dpID=516hFhT3n6L&ref=plSrch&th=1&psc=1
Thanks for a great pattern and wonderful instructions! I made one for myself, but my daughter loved it so much that she just had to have it. Since then, I made ANOTHER one for myself. These will make great gifts for sure!!!
These are great! You made a really nice tutorial. Thanks for that – I used it to make one of these for my niece. I’m sure she will love it!
I was wondering where you get the Plastic Curtain Grommet???? I have a JoAnn’s store here, but not many Crafty stores. Thanks for the Free Pattern, I think this will make great gifts for anyone with something to charge.
Hello and thanks for your question. I have found these at Walmart and at JoAnn’s (in the curtain section). You can also find these on Amazon!